Hi, if you need harware control to use OSMC on the go with Raspberry Pi Zero then this should be useful.
Note: This should work with all Raspberry with the lastest kernel since this overlay is there for all version.
First, the electronic part. If you are able to solder, you can do like me and recycle boards from old radio or this can be done on a little breadboard as well. Use what you have.
For the switches normally open tact switch (wich are very common) are all we need.
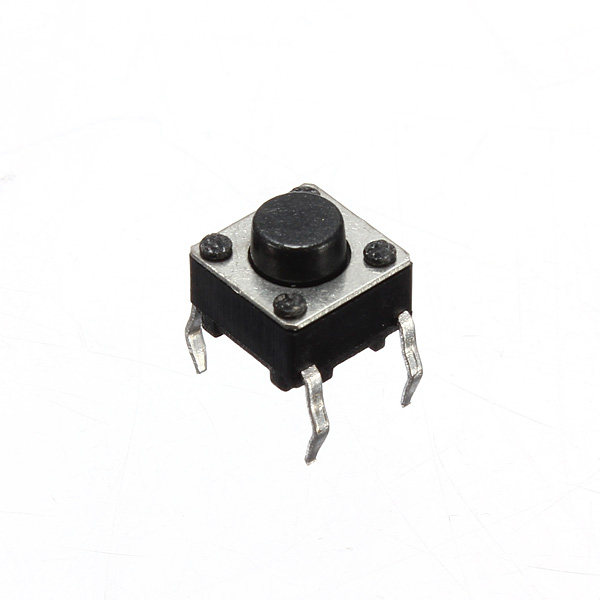
Some are two legs other four but they do the same thing.
You can either make these buttons active high (when you press the switch it connects 3.3V to gpio)
or
active low (when you press the switch it connects ground to gpio) .
I decided to go with active high so here is the schematic for 8 switches:
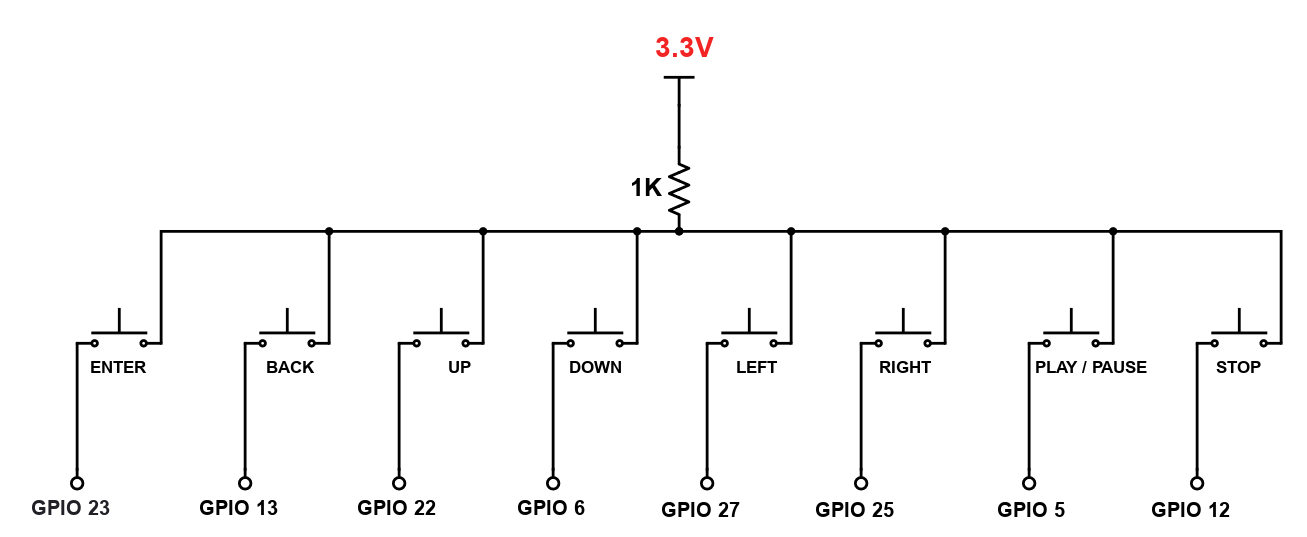
3.3 volts is from raspberry gpio ( pin 1 or pin 17) I added a 1k resistor as current limiting.
GPIO pins are the one I had free on my board (I have a DAC connected to I2C that uses some pins)
You need one GPIO pin for each switch so I used 8 pins + 1 for the 3.3V
I suggest you use Only GPIO pins for this so the other options will remain available (SPI, I2C, etc)
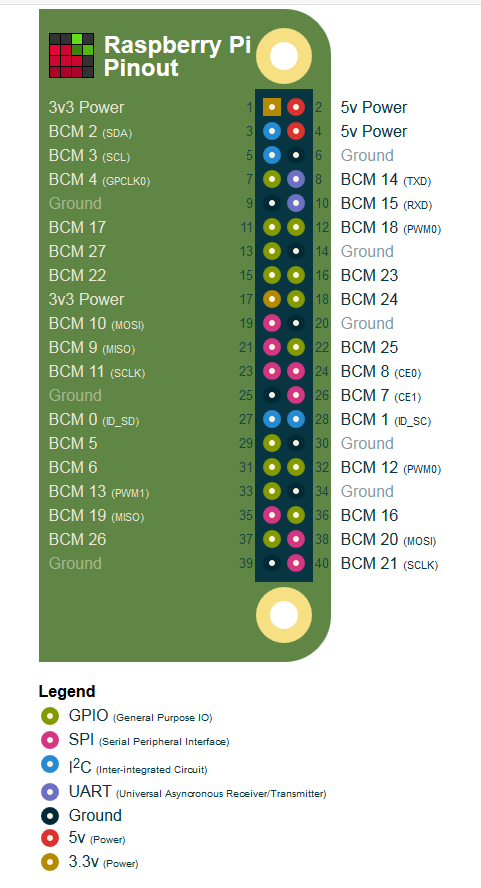
Here is a good pinout image from the DAC site, the GPIO-only pins are in green.
You should use a mulimeter to check your connections before using your pcb or breadboard (it’s not dangerous for the gpios since the source is the gpio 3.3v but checking the harware is working as expected is always a good idea)
What I did is that I connected the 3.3v line but not the GPIO yet, I connected a volmeter to the output of the switch and checked if I had 3.3v when pressed, then repeated for all the switches)
When the hardware is ok you can wire it to the GPIOs. The hardest part is done.
Now, you just have to set an overlay line for each switch in your config.txt
You can do this by ssh but the easiest way is to plug your sd card directly to another computer, the config.txt will be there.
I use notepad++ to edit the file.
I did not know how to set it at first but the Overlay Readme is pretty clear. Here is the description of gpio-key overlay
Name: gpio-key
Info: This is a generic overlay for activating GPIO keypresses using
the gpio-keys library and this dtoverlay. Multiple keys can be
set up using multiple calls to the overlay for configuring
additional buttons or joysticks.
Load: dtoverlay=gpio-key,param=val
Params:
gpio GPIO pin to trigger on (default 3)
active_low When this is 1 (active low), a falling edge generates a key down event and a
rising edge generates a key up event. When this is 0 (active high), this is reversed. The default is 1 (active low)
gpio_pull Desired pull-up/down state (off, down, up) Default is “up”. Note that the default pin
(GPIO3) has an external pullup
label Set a label for the key
keycode Set the key code for the button
We got all we need,
First you call the overlay dtoverlay=gpio-key
Next specify the gpio pin you are using for that button gpio=23
If like me you use active high button, set the parameter active_low=0 otherwise you don’t have to set it since the default is active low. (active_low=1)
Same goes for the pull state, if you use active high button set pull_state=down (to ensure that the gpio input is not floating and is really zero when no button is pressed) otherwise you don’t have to use this parameter since the default is pull up (if you use active low button)
Nest you set a label for the key label=enter
Note: a long label seems to product unexpected results, at first I used playpause and it was too long, I replaced it by playII and the button was now working.
The last parameter is the linux event code. you can find these codes here
And kodi keyboard function here
https://kodi.wiki/view/Keyboard_controls
Here are my overlay lines
dtoverlay=gpio-key,gpio=23,active_low=0,gpio_pull=down,label=enter,keycode=28
dtoverlay=gpio-key,gpio=13,active_low=0,gpio_pull=down,label=back,keycode=14
dtoverlay=gpio-key,gpio=22,active_low=0,gpio_pull=down,label=up,keycode=103
dtoverlay=gpio-key,gpio=6,active_low=0,gpio_pull=down,label=down,keycode=108
dtoverlay=gpio-key,gpio=27,active_low=0,gpio_pull=down,label=left,keycode=105
dtoverlay=gpio-key,gpio=25,active_low=0,gpio_pull=down,label=right,keycode=106
dtoverlay=gpio-key,gpio=5,active_low=0,gpio_pull=down,label=playii,keycode=57
dtoverlay=gpio-key,gpio=12,active_low=0,gpio_pull=down,label=stop,keycode=45
One line per button and all parameters are separated by commas (I added a space between each dtoverlay line so it’s more readable here but in my config.txt there are no spaces between each lines)
With the enter, back, up, down keys you can navigate in osmc to your video.
Once you are playing it, enter activate a menu where you can turn on subtitles, adjust video zoom, etc) you can view how much time is left on your movie.
To remove the progress bar and this menu, press the back button.
play/pause and stop do what their labels say
right and left to skip a little bit backward or forward
up and down to skip more at a time