If you’re like me, you have a lacking space SDCard in your RPi running OSMC as all you ever do is stream content, but now you want to play some ROMs. If you try to install full RetroPie, you will run out of space and OSMC will panic and die with no space left.
So I decided to do a few quick & easy edits, to make it install to a USB Drive, plugged in to a connected powered USB hub.
(I thought this was going to be a lot harder to figure out, but was pretty straight forward after looking through all the source files. Would be nice if they just added an install location option in the menu system, maybe they will someday.)
Plug in your USB Drive to the RPi, Format it EXT4.
Note: If emulationstation for you is not starting, try to run it through ssh and you will see errors. (Example: emulationstation “Line 12” permission denied.) You probably didn’t format your USB Drive EXT4 and it is probably FAT32 which you cannot launch programs from, as you can’t properly use execute, without some workarounds.
Make sure the SSH Server is running in OSMC, Find it under services in the OSMC Settings (Not in KODI’s main settings).
SSH into your OSMC installation.
ssh osmc@10.13.37.100 [Your OSMC IP]
Note: You will lose all your data on your USB Drive if you continue with this!!!
Find your USB Drive with:
lsblk
MMCBLK0 is normally your SDCard (Do not kill this one).
My USB Drive was SDA (8GB).
umount /dev/sda
fdisk /dev/sda
Delete all partitions with:
d
Press partition numbers until all removed.
1,2,3,4,etc
Write partition table.
w
Then quit
q
Format our usb drive with EXT4 (Linux File System).
mkfs.ext4 /dev/sda -L RETROPIE
Rename our drive label RETROPIE (If you forget to label your drive in the last step properly.)
e2label /dev/sda RETROPIE
Remove the USB Drive from the port and reinsert it. It should now be remounted under /media/RETROPIE/
Download the installation script to your OSMC home directory:
cd /home/osmc
wget https://raw.githubusercontent.com/mcobit/retrosmc/master/install-retrosmc.sh
Make it executable:
chmod +x install-retrosmc.sh
Then run it:
/home/osmc/install-retrosmc.sh
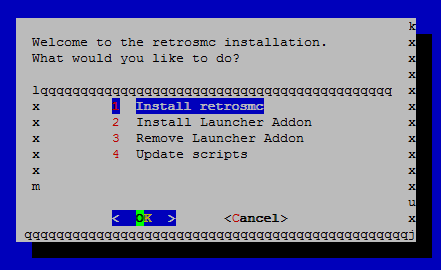
Click Install retrosmc
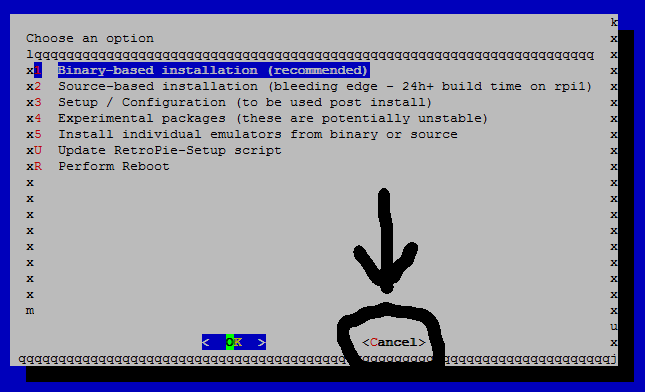
After it is finished downloading the setup scripts (ie you see the [Choose an option] menu) CLICK CANCEL!!! until you are back to the CLI (Command Line). Don’t worry it downloaded all the files we need to modify, from clicking the first menu option. We will come back here after a few more preliminary steps.
Edit this file below to change the install location to our USB Drive that we formatted above.
cd /home/osmc/RetroPie-Setup
nano retropie_packages.sh
Find this:
#main retropie install location
rootdir="/opt/retropie"
Modify this line to:
rootdir="/media/RETROPIE/retropie"
Save:
Press ctrl x
Press y
Press [Enter]
Note: You will need a few 100MB’s free on your SDCard for all the extra Linux Arm packages it requires to do what it does, but all the frontend (emulationstation), emulators and ROMs will go to the USB Drive, cross your fingers you have enough space for the packages and continue! ![]()
This will show you, your free space on the SDCard while logged in via SSH look at the largest capacity Use% column:
df -h

/home/osmc/install-retrosmc.sh
Click Install retrosmc again.
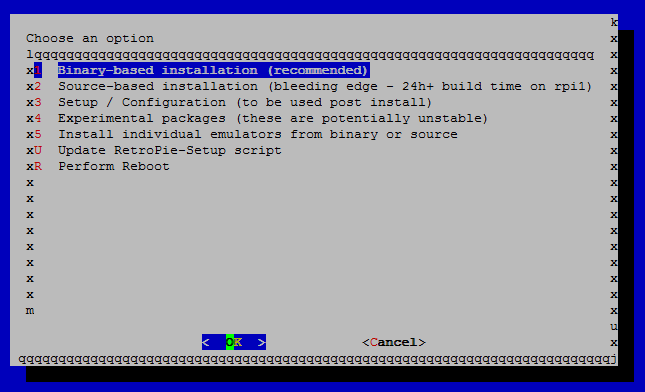
Once you get to the second menu of the Retrosmc [Choose an option], select “Binary-based installation (recommended)” and press enter.
After the RetroPie-Setup script is finished the installation, press Enter for all windows, mentioning DATA and BIOS files for the emulators. When back at the main RetroPie menu, choose “Cancel”!
Install the Retrosmc Launcher Add-on, you will find your shortcut under Program Add-ons in KODI after a restart.
You can exit the menu by choosing Cancel at the bottom after every task.
nano /home/osmc/RetroPie/scripts/retropie.sh
Change:
es_bin="/opt/retropie/supplementary/emulationstation/emulationstation"
To:
es_bin="/media/RETROPIE/retropie/supplementary/emulationstation/emulationstation"
Save:
Press ctrl x
Press y
Press [Enter]
Let’s move the roms folder to the Flash Drive as well now and make a soft system link to it.
Rename the current roms folder so it won’t stop our soft system link from linking.
cd /home/osmc/RetroPie
mv roms roms2
Make the directory RetroPie on your USB Drive, Note linux file system is case sensitive so you can have a two folders named RetroPie and retropie.
mkdir /media/RETROPIE/RetroPie
Make a new roms directory on the USB Drive or network share.
mkdir /media/RETROPIE/RetroPie/roms
Install rsync to copy the old roms folder to the USB Drive because it has all the folder structures you need for Retrosmc.
sudo apt-get install rsync
Copy the old roms2 folder to the new roms flash drive folder.
rsync /home/osmc/RetroPie/roms2 /media/RETROPIE/roms
Soft system link our USB Drive folder back to its prior location.
ln -s /media/RETROPIE/RetroPie/roms /home/osmc/RetroPie/roms
Copy your ROMs via an SFTP client depending on your OS, I just use rsync/scp or WinSCP is good for windows if you still use that.
Note: I’m not sure how all this will effect if you try to update the RetroPie scripts so proceed with caution you might have to do all this again.
Move the setup files to the USB drive.
mv /home/osmc/RetroPie-Setup /media/RETROPIE/
Move the rest of the folders to our RetroPie folder on the USB Drive note the capitals as said before…
mv /home/osmc/RetroPie/scripts /media/RETROPIE/RetroPie/
mv /home/osmc/RetroPie/BIOS /media/RETROPIE/RetroPie/
mv /home/osmc/RetroPie/retropiemenu /media/RETROPIE/RetroPie/
Soft system link the rest of the folders as well now.
ln -s /media/RETROPIE/RetroPie/BIOS /home/osmc/RetroPie/BIOS
ln -s /media/RETROPIE/RetroPie/scripts /home/osmc/RetroPie/scripts
ln -s /media/RETROPIE/RetroPie/retropiemenu /home/osmc/RetroPie/retropiemenu
Reboot your RPi via SSH:
sudo reboot
Hopefully that’s it, start it up from the OSMC Programs RetroPie launcher.
Original thread here for further help with other issues: [HowTo] RetroPie and OSMC: Retrosmc - Retrogaming on OSMC