Hi I am trying to get my LCD HD 44780 work with OSMC in my raspberry Pi 2. I am not getting any luck.
I followed the guide below step by step but nothing happend. All I see is white blocks only. Any suggestion why I can’t get it to work? To fit my LCD, I changed the gpio pin connectors to my own in the LCDd.conf, will that be the problem?
You should definately try with the pins specified in the tutorial first. If that works, start changing them one by one.
Hi That did not work. I tried the pin in the tutorial and the one that the seller provided. Both of the are not working.
This is the lcd that I bought.
http://www.ebay.com/itm/LCD-16-x-2-Alphanumeric-Display-Push-Buttons-for-Raspberry-Pi-/231854889817?var=&hash=item35fba0db59:m:m4MzBX_rjaxd1EG7h7_OBKA
Are you sure this is a hd44780 lcd? It isn’t mentioned in the description…
This is what the seller sent to me
https://drive.google.com/file/d/0B4gCF1KUvqwnQU40QnB0RVJ3RUk/view?usp=sharing
Should theoretically work then if you follow the tutorial and if you have the right hd44780.so file.
Be sure to deactivate the lirc pin if it conflicts with your lcd pin config.
Actually I am not sure do I have the correct hd44780.so file Is it possible to sent me ?
how to deactivqte the lirc pin?
So did you get the filw from the link in your linked tutorial post? Thatvshould be the right one.
Also, if you used the pins specified there, you shouldn’t need to change anything.
And you are sure you have a pi2, right?
i havent read the guide you posted but in case it help you here is another guide.
this does work on rpi2 i am using it on almost 20 rpi2.
on post 24 or something you will find the guide for rpi2 and on last post scematics. Please remember i have forgot to use a rotary potentiometer at pin 3 of lcd for the contrast. The potentiometer has 3 legs. one leg goes to lcd pin one, one leg to lcd pin 2 and middle leg to lcd pin 3. on the picture i have it wrongly connected pin 3 to 1 with no potentiometer.
On the
Tell me if you need something. i think above you will find everything you need. follow the 1st post then read the second and make the changes it say and connect according to 3rd. on that same thread there is another connection diagram as a link somewhere but i could not see it.
Good luck
Yes I am sure I had a raspberry pi 2. Actually the link in the tutorial is broken. I use another hd44780.so I found on the internet. Therefore I am not sure is it the correct one.
I followed the link that you provided but still not working. The lcd is just still have blocks
Use this one:
http://sourceforge.net/p/lcdproc/patches/_discuss/thread/4c659fe3/b8f3/attachment/hd44780.so
That’s right ,this .so file for Pi2.B. modell, size 82 728 Kbytes
(directly wired to the GPIOs method)
Hi Sorry for the late reply. I am gone to holiday just back today. I tried the hd44780.so you gave me and I also disabled the lirc pin in raspbi-config but the lcd still have white blocks… I am sure that I have an pi 2 please help me!
White pins can also mean that it has power but no data is coming in. Are you sure you wired everything correctly? Could you please take a photo of the wired up lcd and post a datasheet for your specific model?
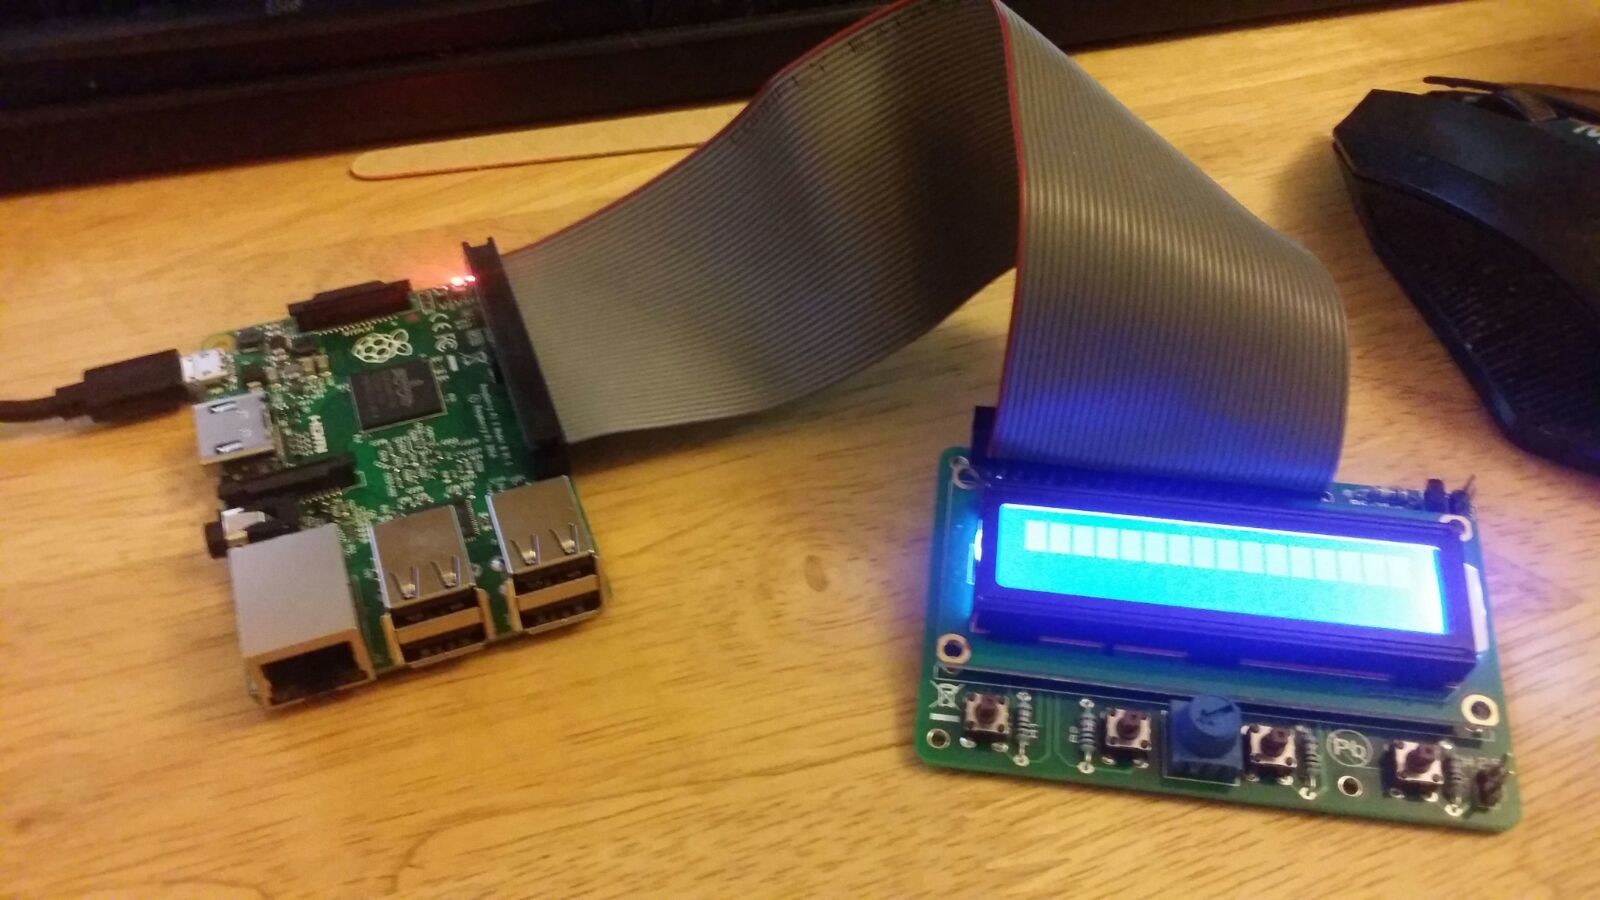
Here is the image

and this is the data sheet
https://drive.google.com/file/d/0B4gCF1KUvqwnQU40QnB0RVJ3RUk/view?usp=sharing
Thanks so much for your help!
Are you sure you don’t have the board 180 degrees off? I would think that the 2 boards would “stack” on top of eachother.
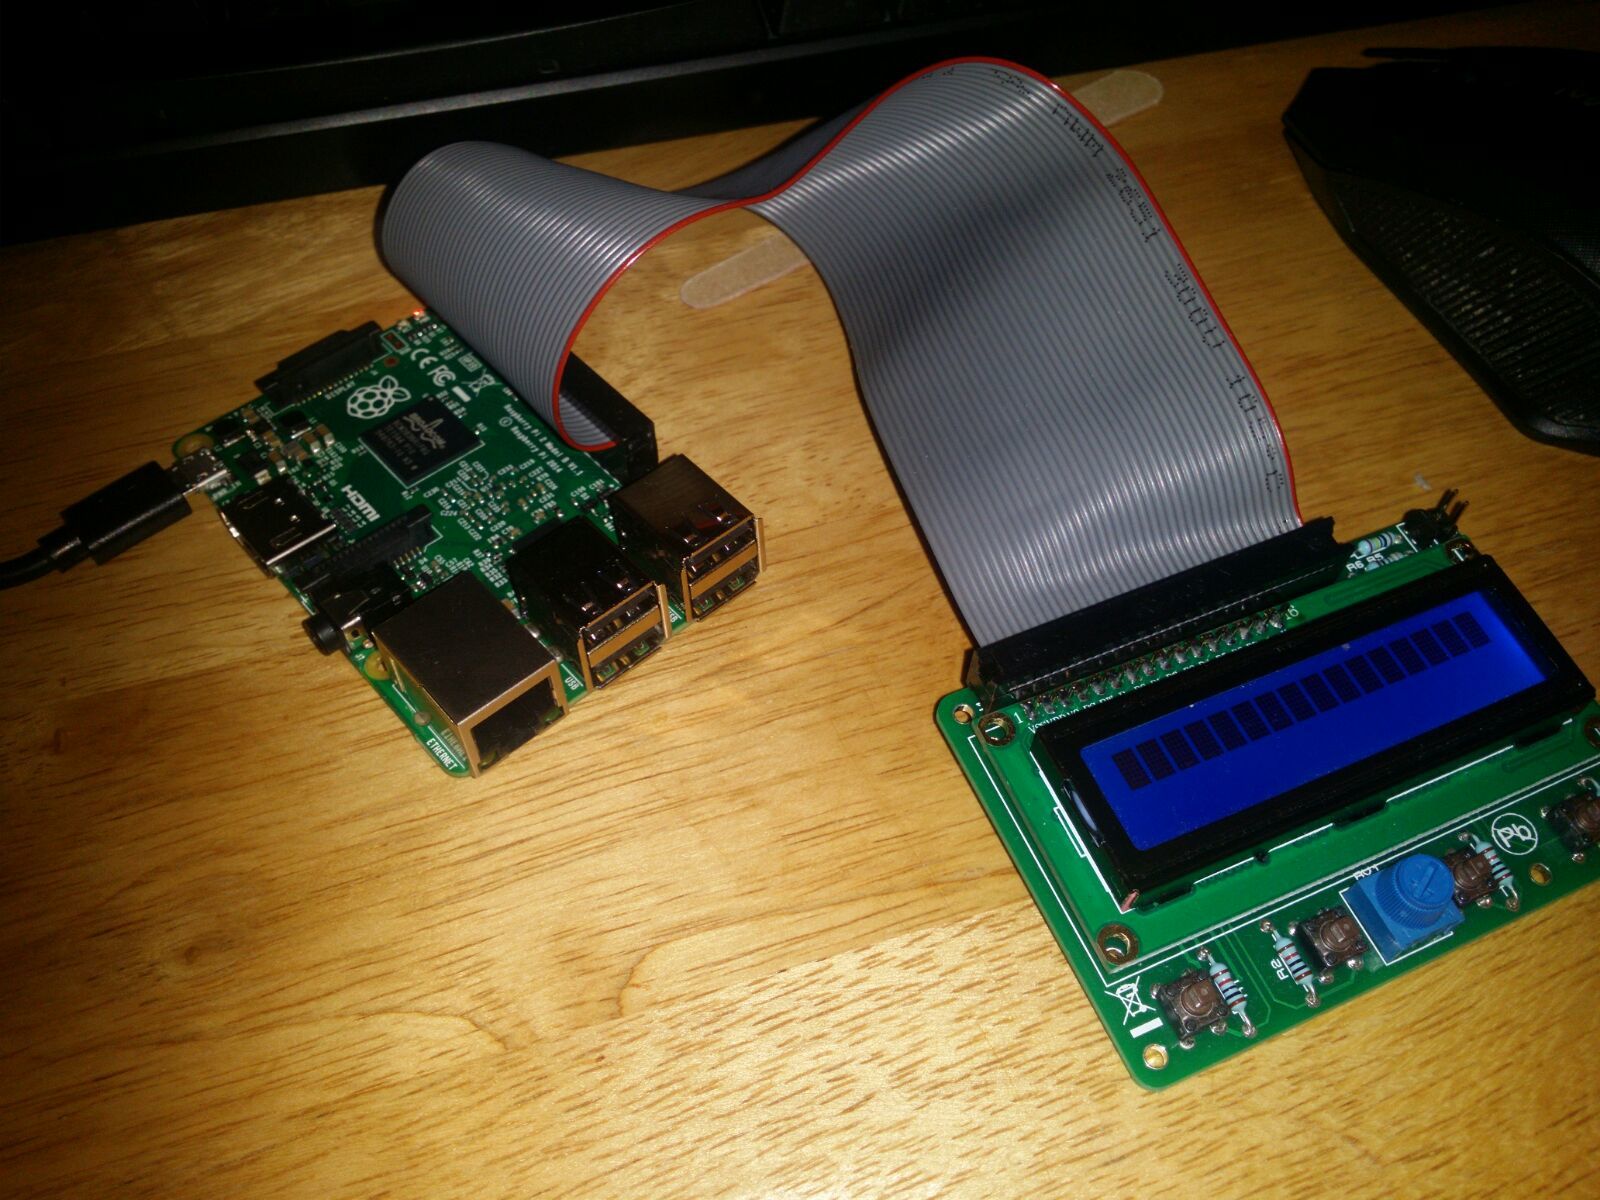
Not sure if it makes a difference but the red stripe on the cable is a Pin #1 marking, on the Pi #1 is near the corner, the cable is backwards. Also the first image is wrong, the boards are meant to stack on top of each other. Are these pictures you took or did you download them from somewhere?
Hooking up backwards may have damaged some circuits on the Pi or LCD board.