…Collector is an exaggeration…just buying, a little tinkering, sell a bit and keep a bit.
Greetings
Mark
…Collector is an exaggeration…just buying, a little tinkering, sell a bit and keep a bit.
Greetings
Mark
Marc will understand:
Ja kenne ich, irgendwann findet sich immer eine Verwendung. Wünschte ich hätte keine Platznot bin irgendwie von Microcontrollern zu Microprozessor’n erweitert, und Linux ist ja auch schön.
I know, somehow there is a way of use for everything. I wish I would have enough space to store, somehow I have extended from microcontrollern to microprocessors, and linux is also nice.
@mark-aus-51 well your collections is admired, wish my pis had some of your cases 
…and a last one before I go to sleep ![]()
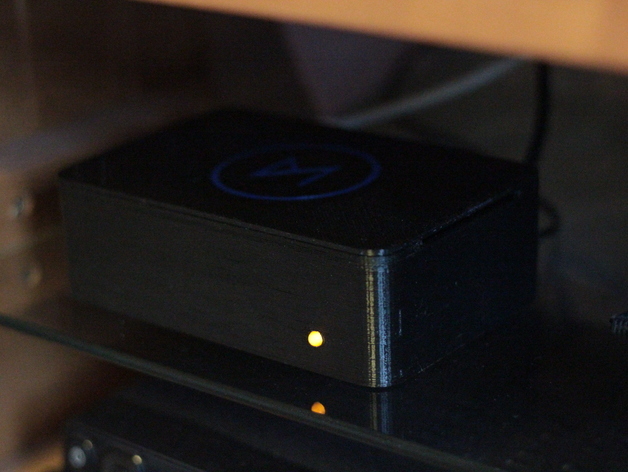
The Orbital Case is well-suited for wall mounting and has a flat construction (3,8 cm)…with a self installed IR-Sensor, again:

Good night!
Mark
I just bought a few cheap ebay clear cases for $2 each. Don’t need anything fancy since the Pi’s are hidden behind the tv.
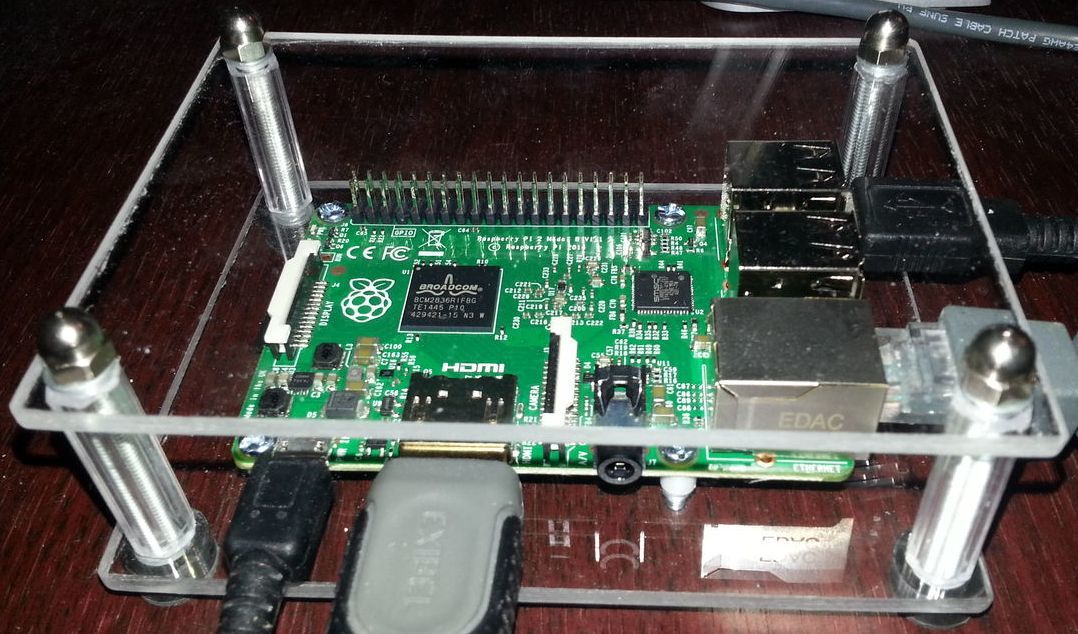
Hi, on my Rpi2 I’m using the RemotePi+ board from MSL Digital. And I also got their transparent acrylic case, which makes the power button easily accessible. And obviously because it’s a see-through material, the LEDs can be seen as well as the IR receiver having a clear ‘view’ for incoming signals ![]()
Rather simple case but it does what it’s supposed to do.
(I bought it all through SOS Solutions in The Netherlands, the store mentioned above by @Theetjuh).
@mark-aus-51 i know one case you dont have yet ![]()
For anyone that has a 3d printer here are the files and her e is the link to the case on thingverse and for alot of more designs check out this link
Use same short crust plus for RPI2 for a while. Really like about these case, that it’s toolless and good looking small peace of plastic.
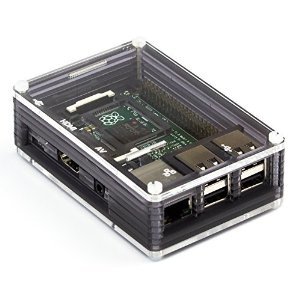
I use the PiBow Ninja on my rpi2, it’s pretty cool if you aren’t planning on using the anything but the USB, HDMI, power and Eth because it’s pretty well sealed.
My bundles ship with these.
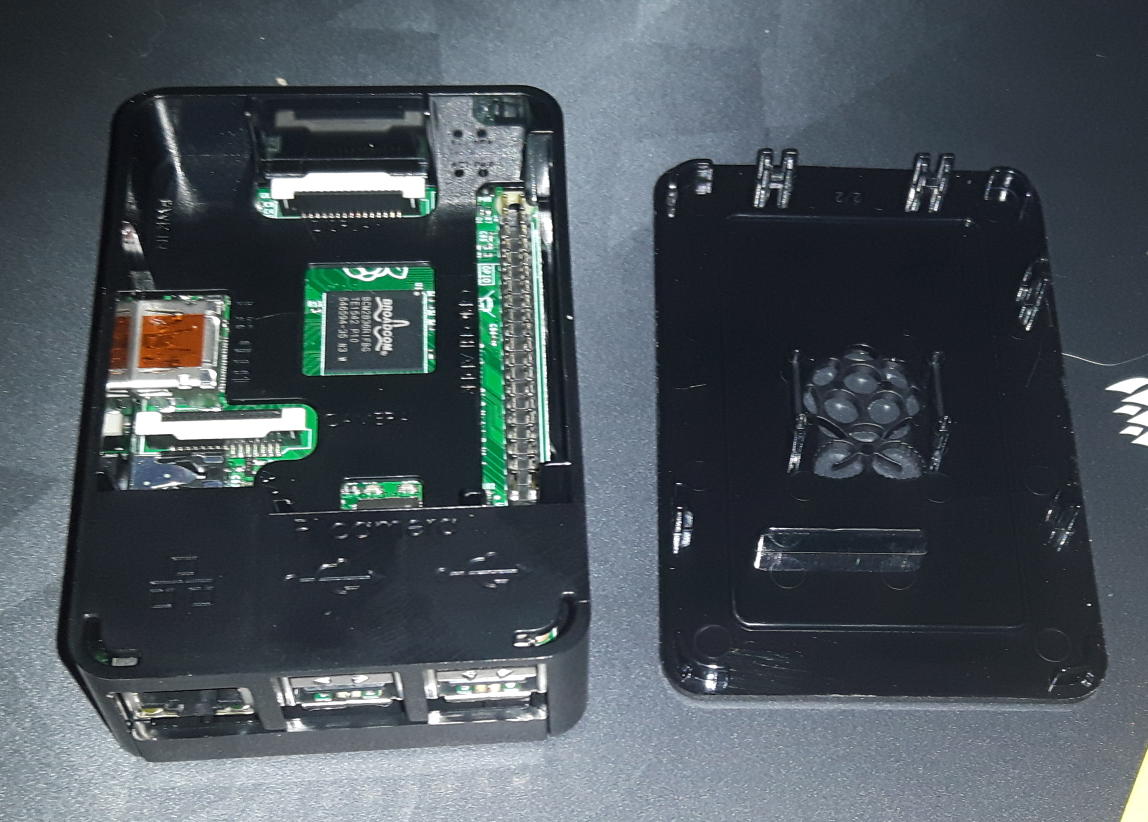
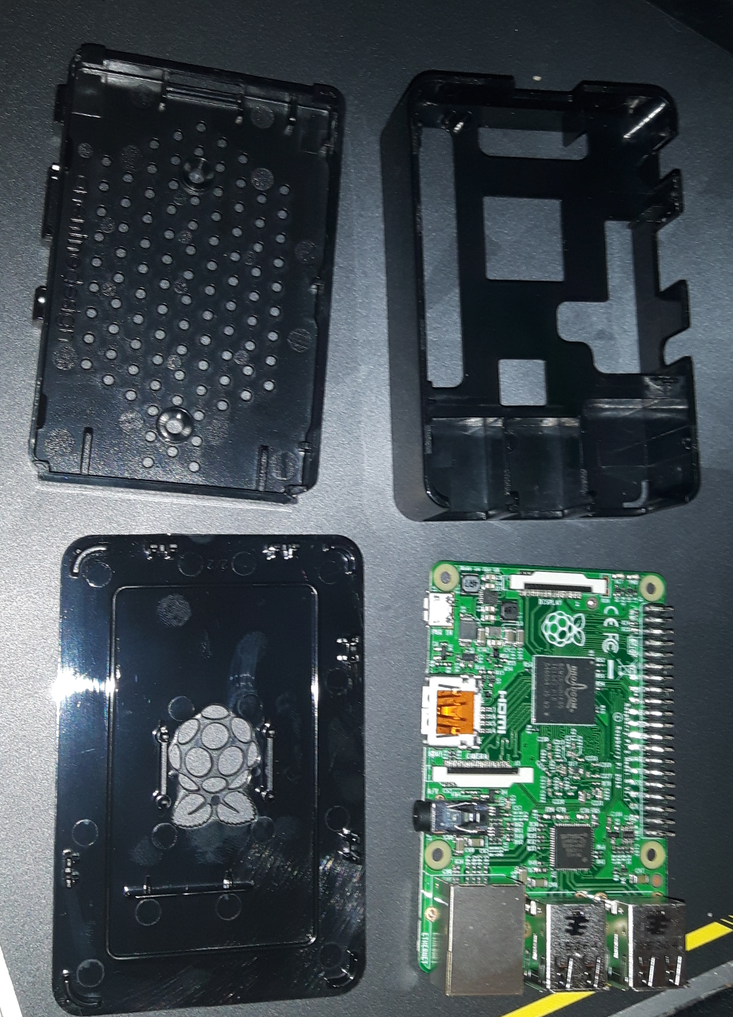
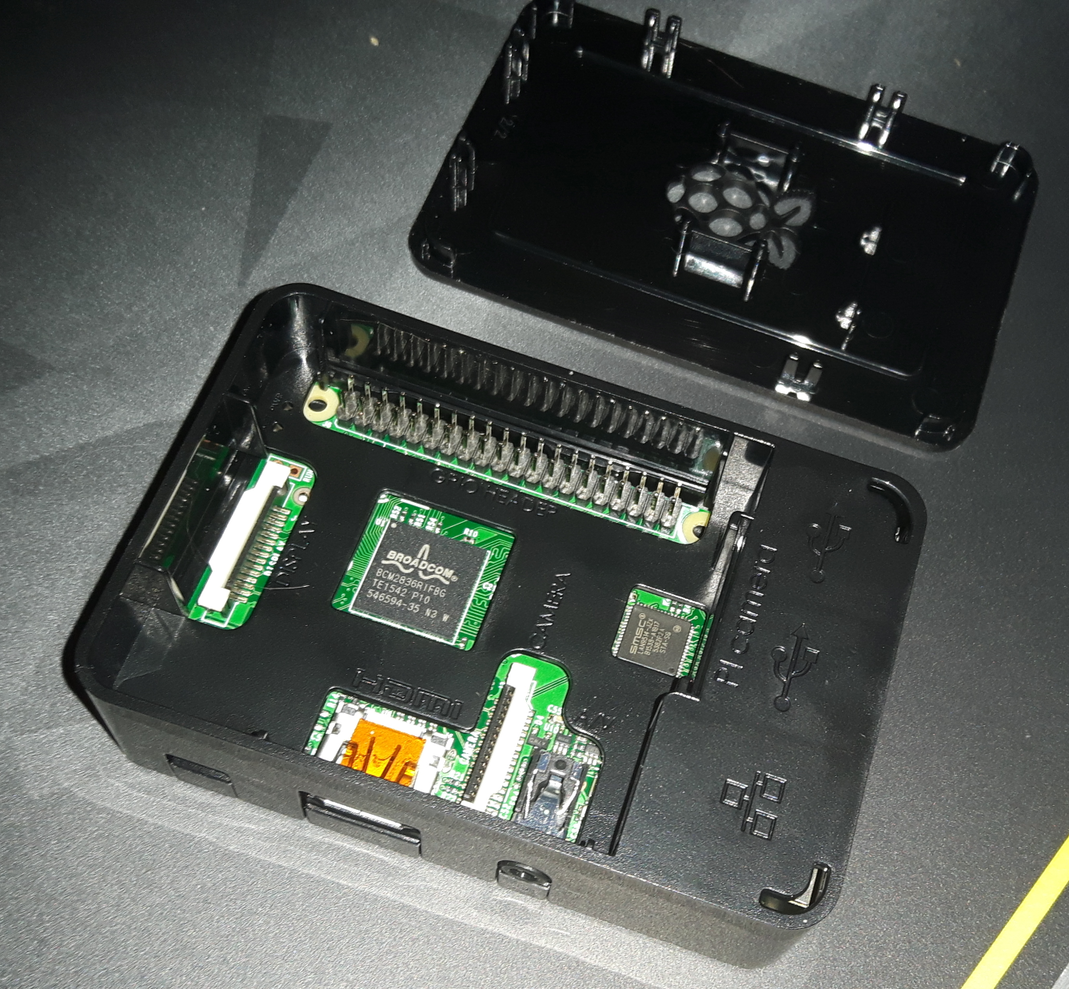
I’ll grab one later and take some pics of the innards.
Crappy phone pics.
I’m also using the Plusberry Pi the same as @mark-aus-51. I quite like it although the power button that is meant to trigger a GPIO monitored script isn’t that well implemented, It’ll cut power 8 seconds after pressing the button whether the Pi has completed shutdown or not. I’ve put a 1Tb hard drive inside the case so now no need to keep pulling out and connecting my USB hard drive whenever i want to watch a film.
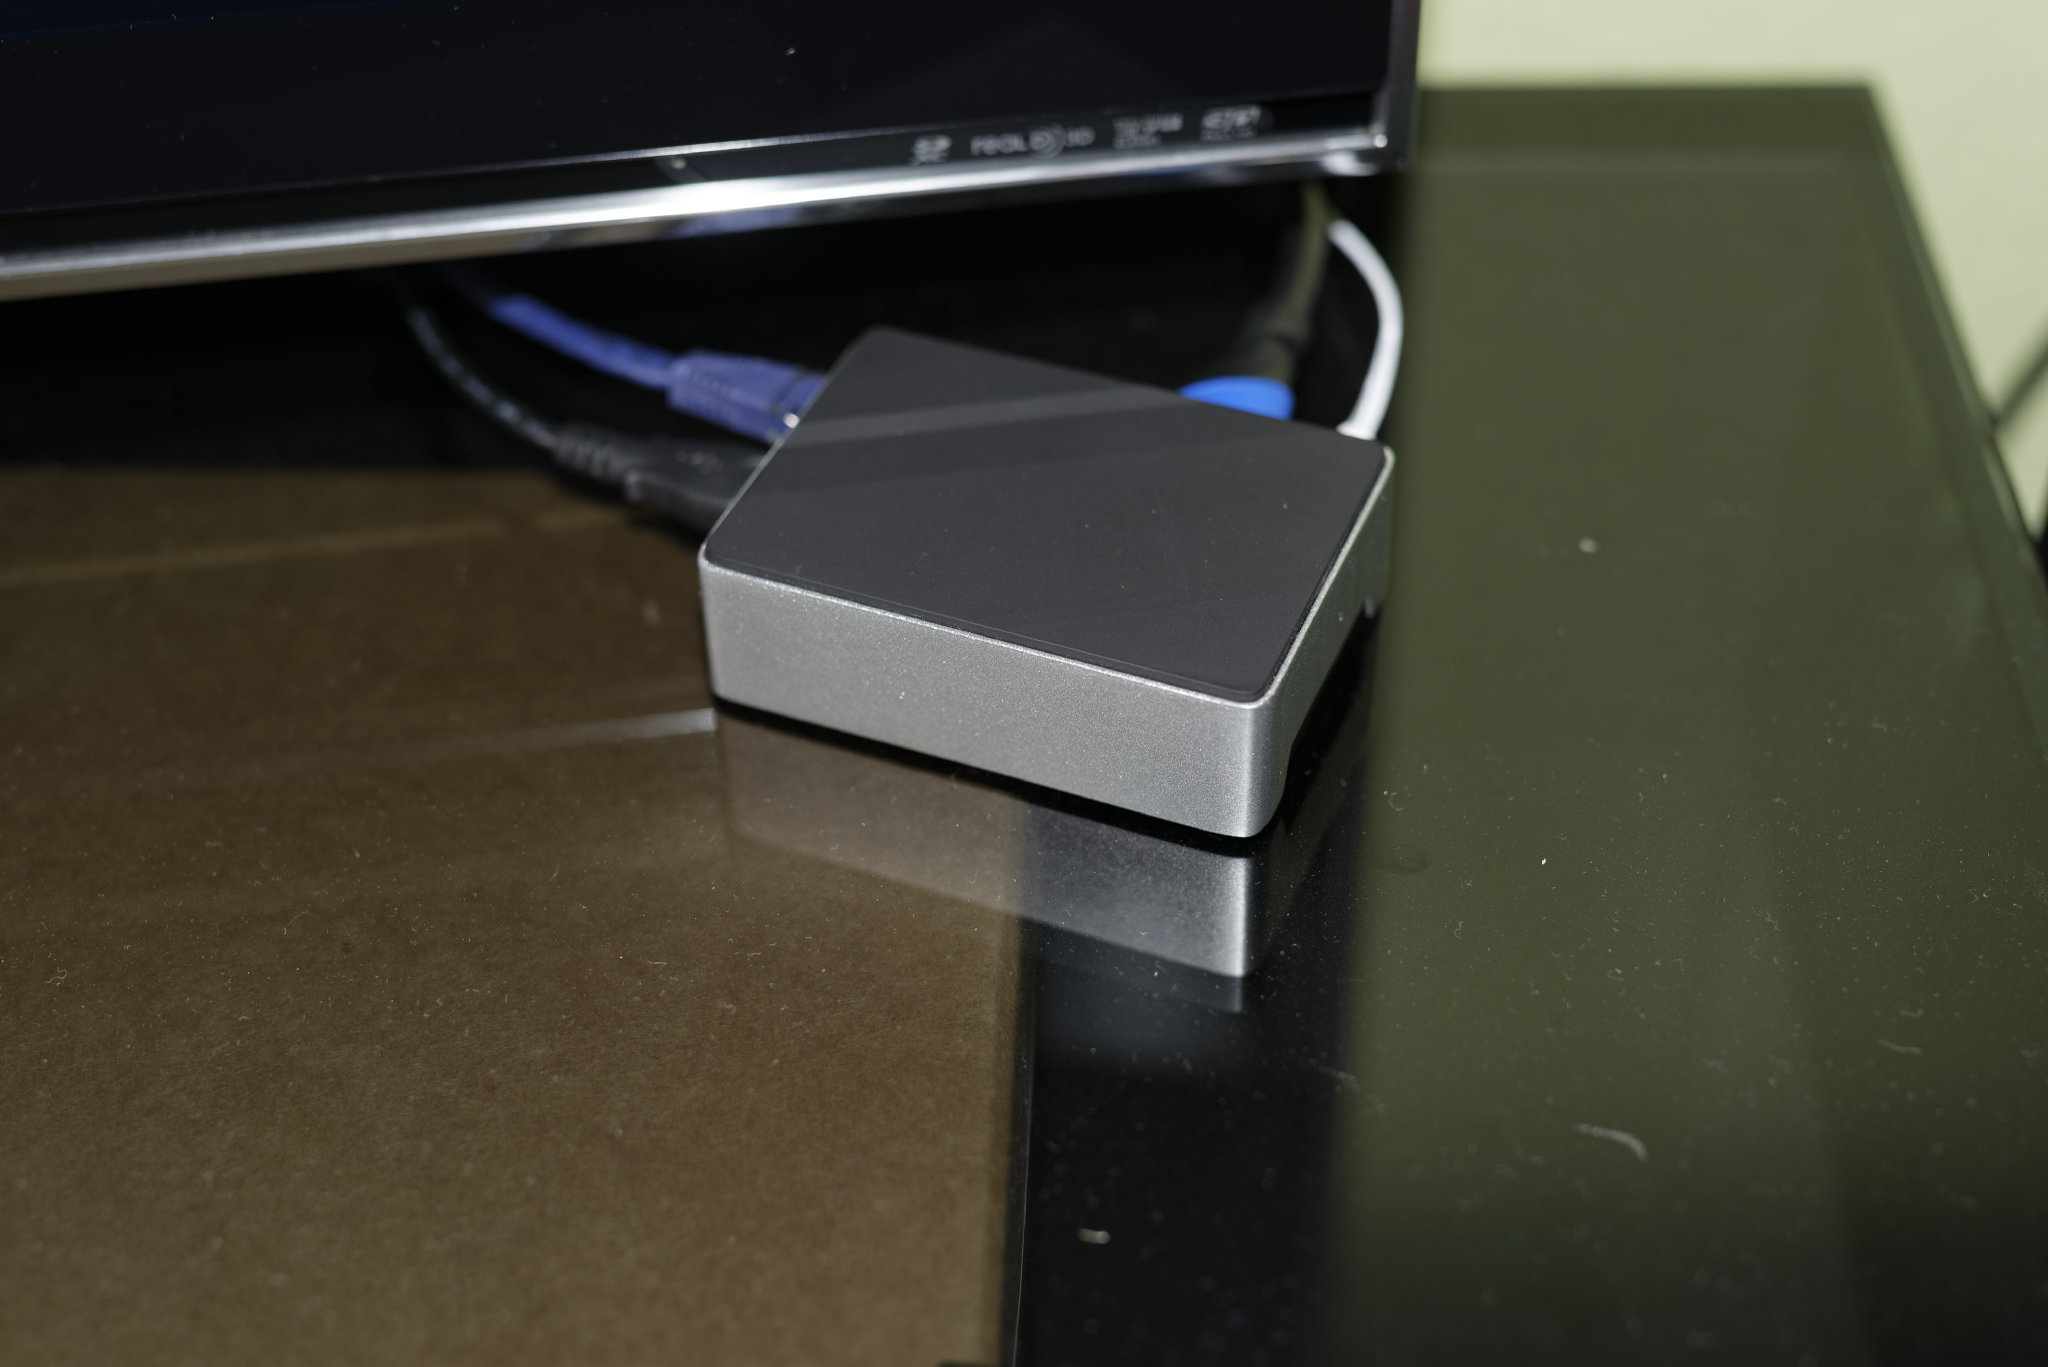
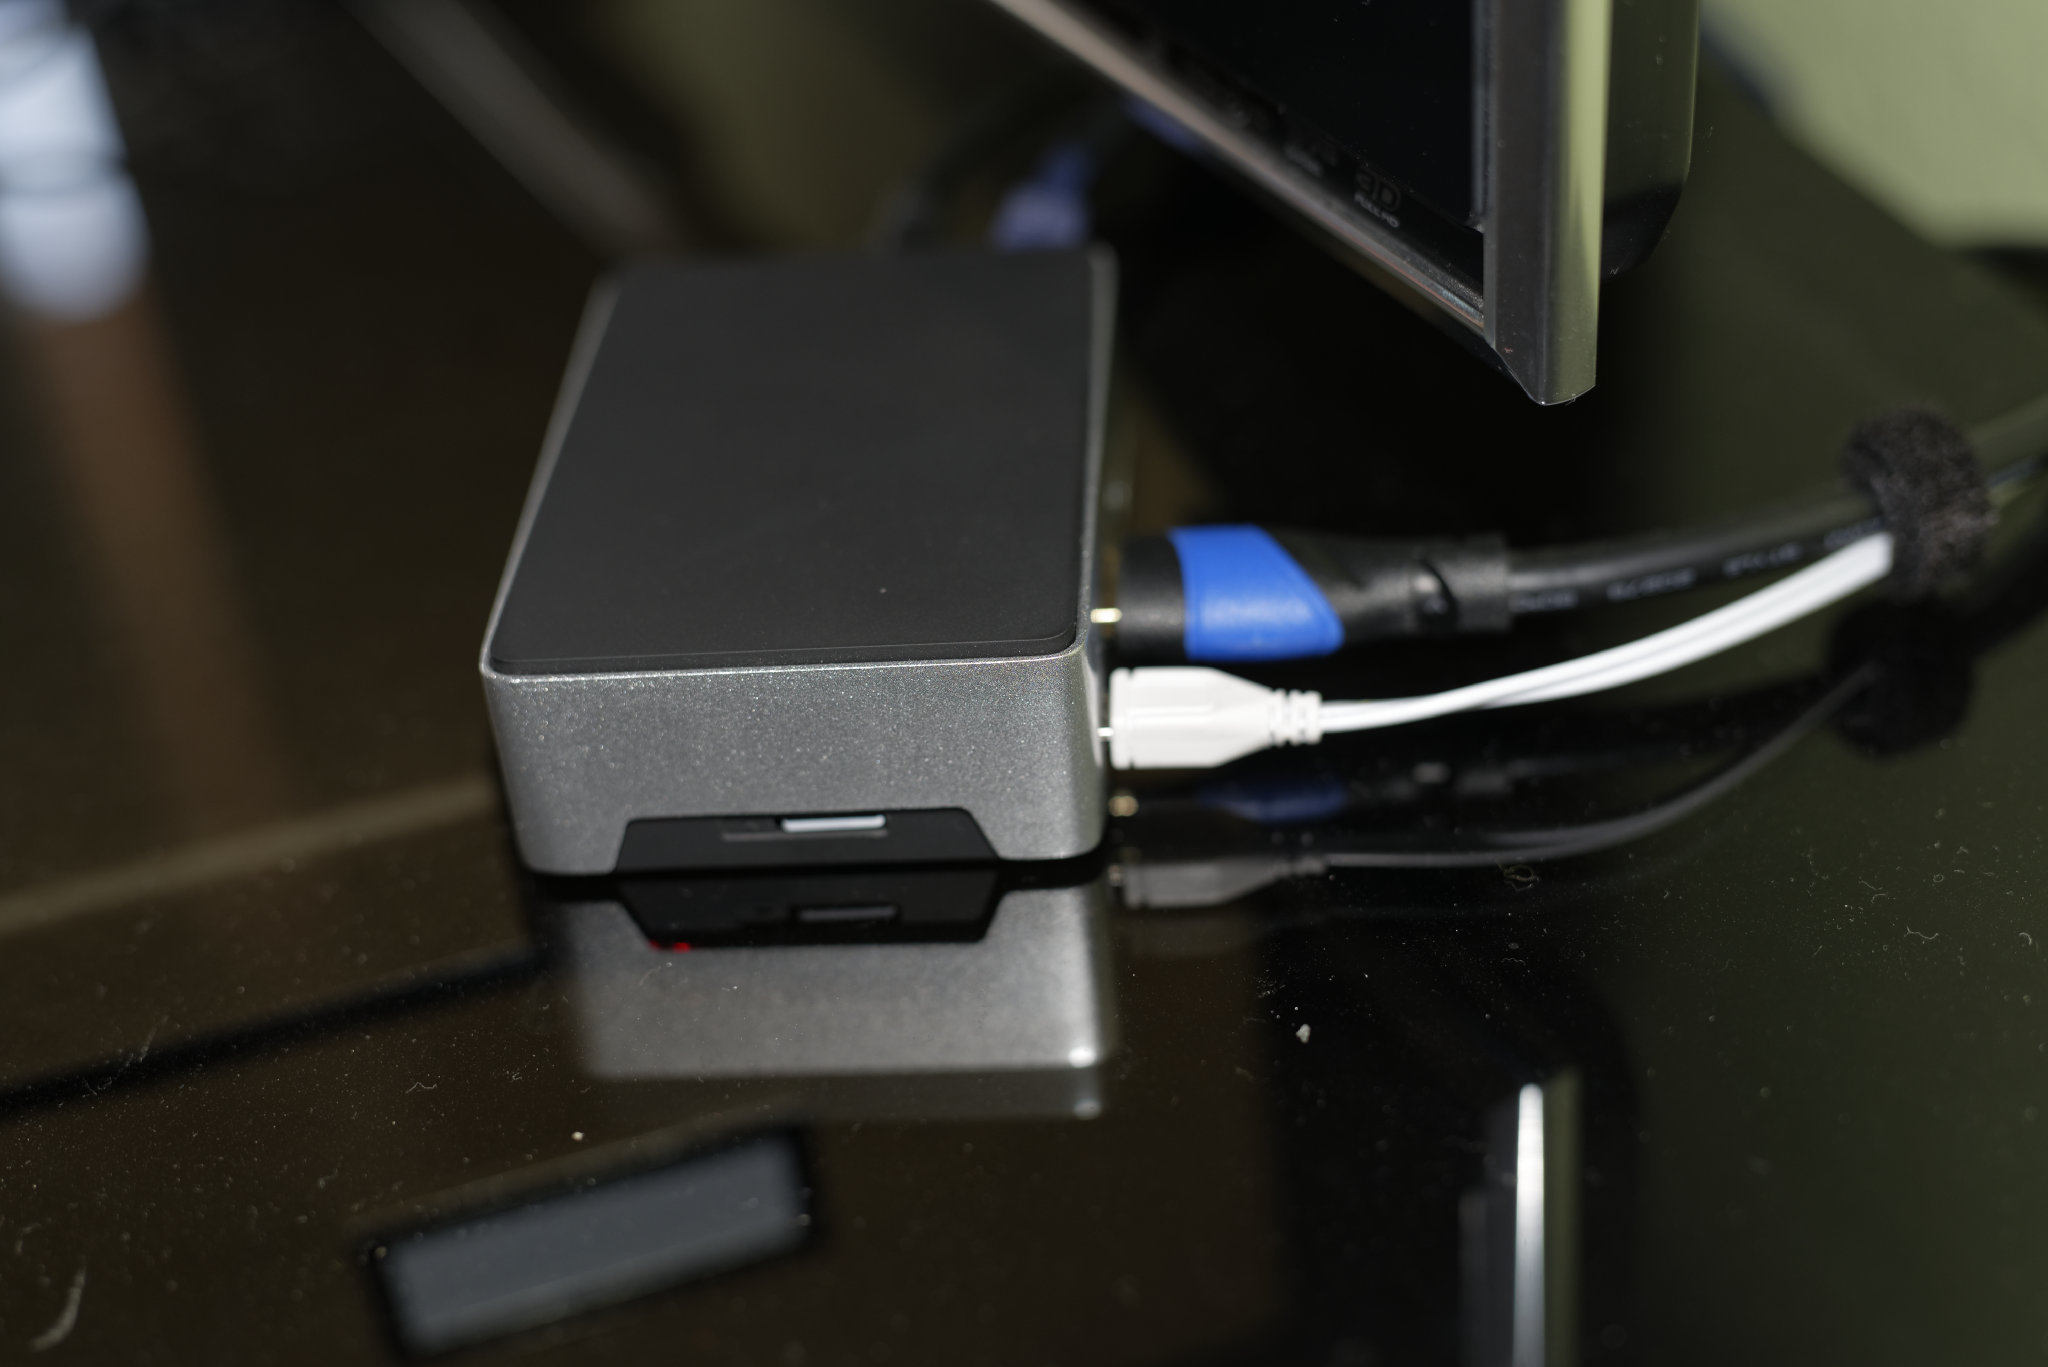
As a sucker for aluminum cases, here’s my contribution: The Flirc Raspberry Pi Case.
Sort of okay priced for an aluminum case, has a built in heat sink that actually works (after some tinkering), status LEDs can be seen… Have yet to surpass the 35°C mark in pretty much every situation. Looks neat on the sideboard. Quite pleased all things considered.
I have a Flirc case too, its nicem but I needed to add a GPIO IR receiver, and I can’t seem to figure out how to get the wires from the GPIO out the case so it can be used. Does anyone have any suggestions? Even other cases, or ideas about how to secure such a thing? Right now its just some wires and a TSOP31238, its not very secure and easily can come off and I have to keep the case off too 
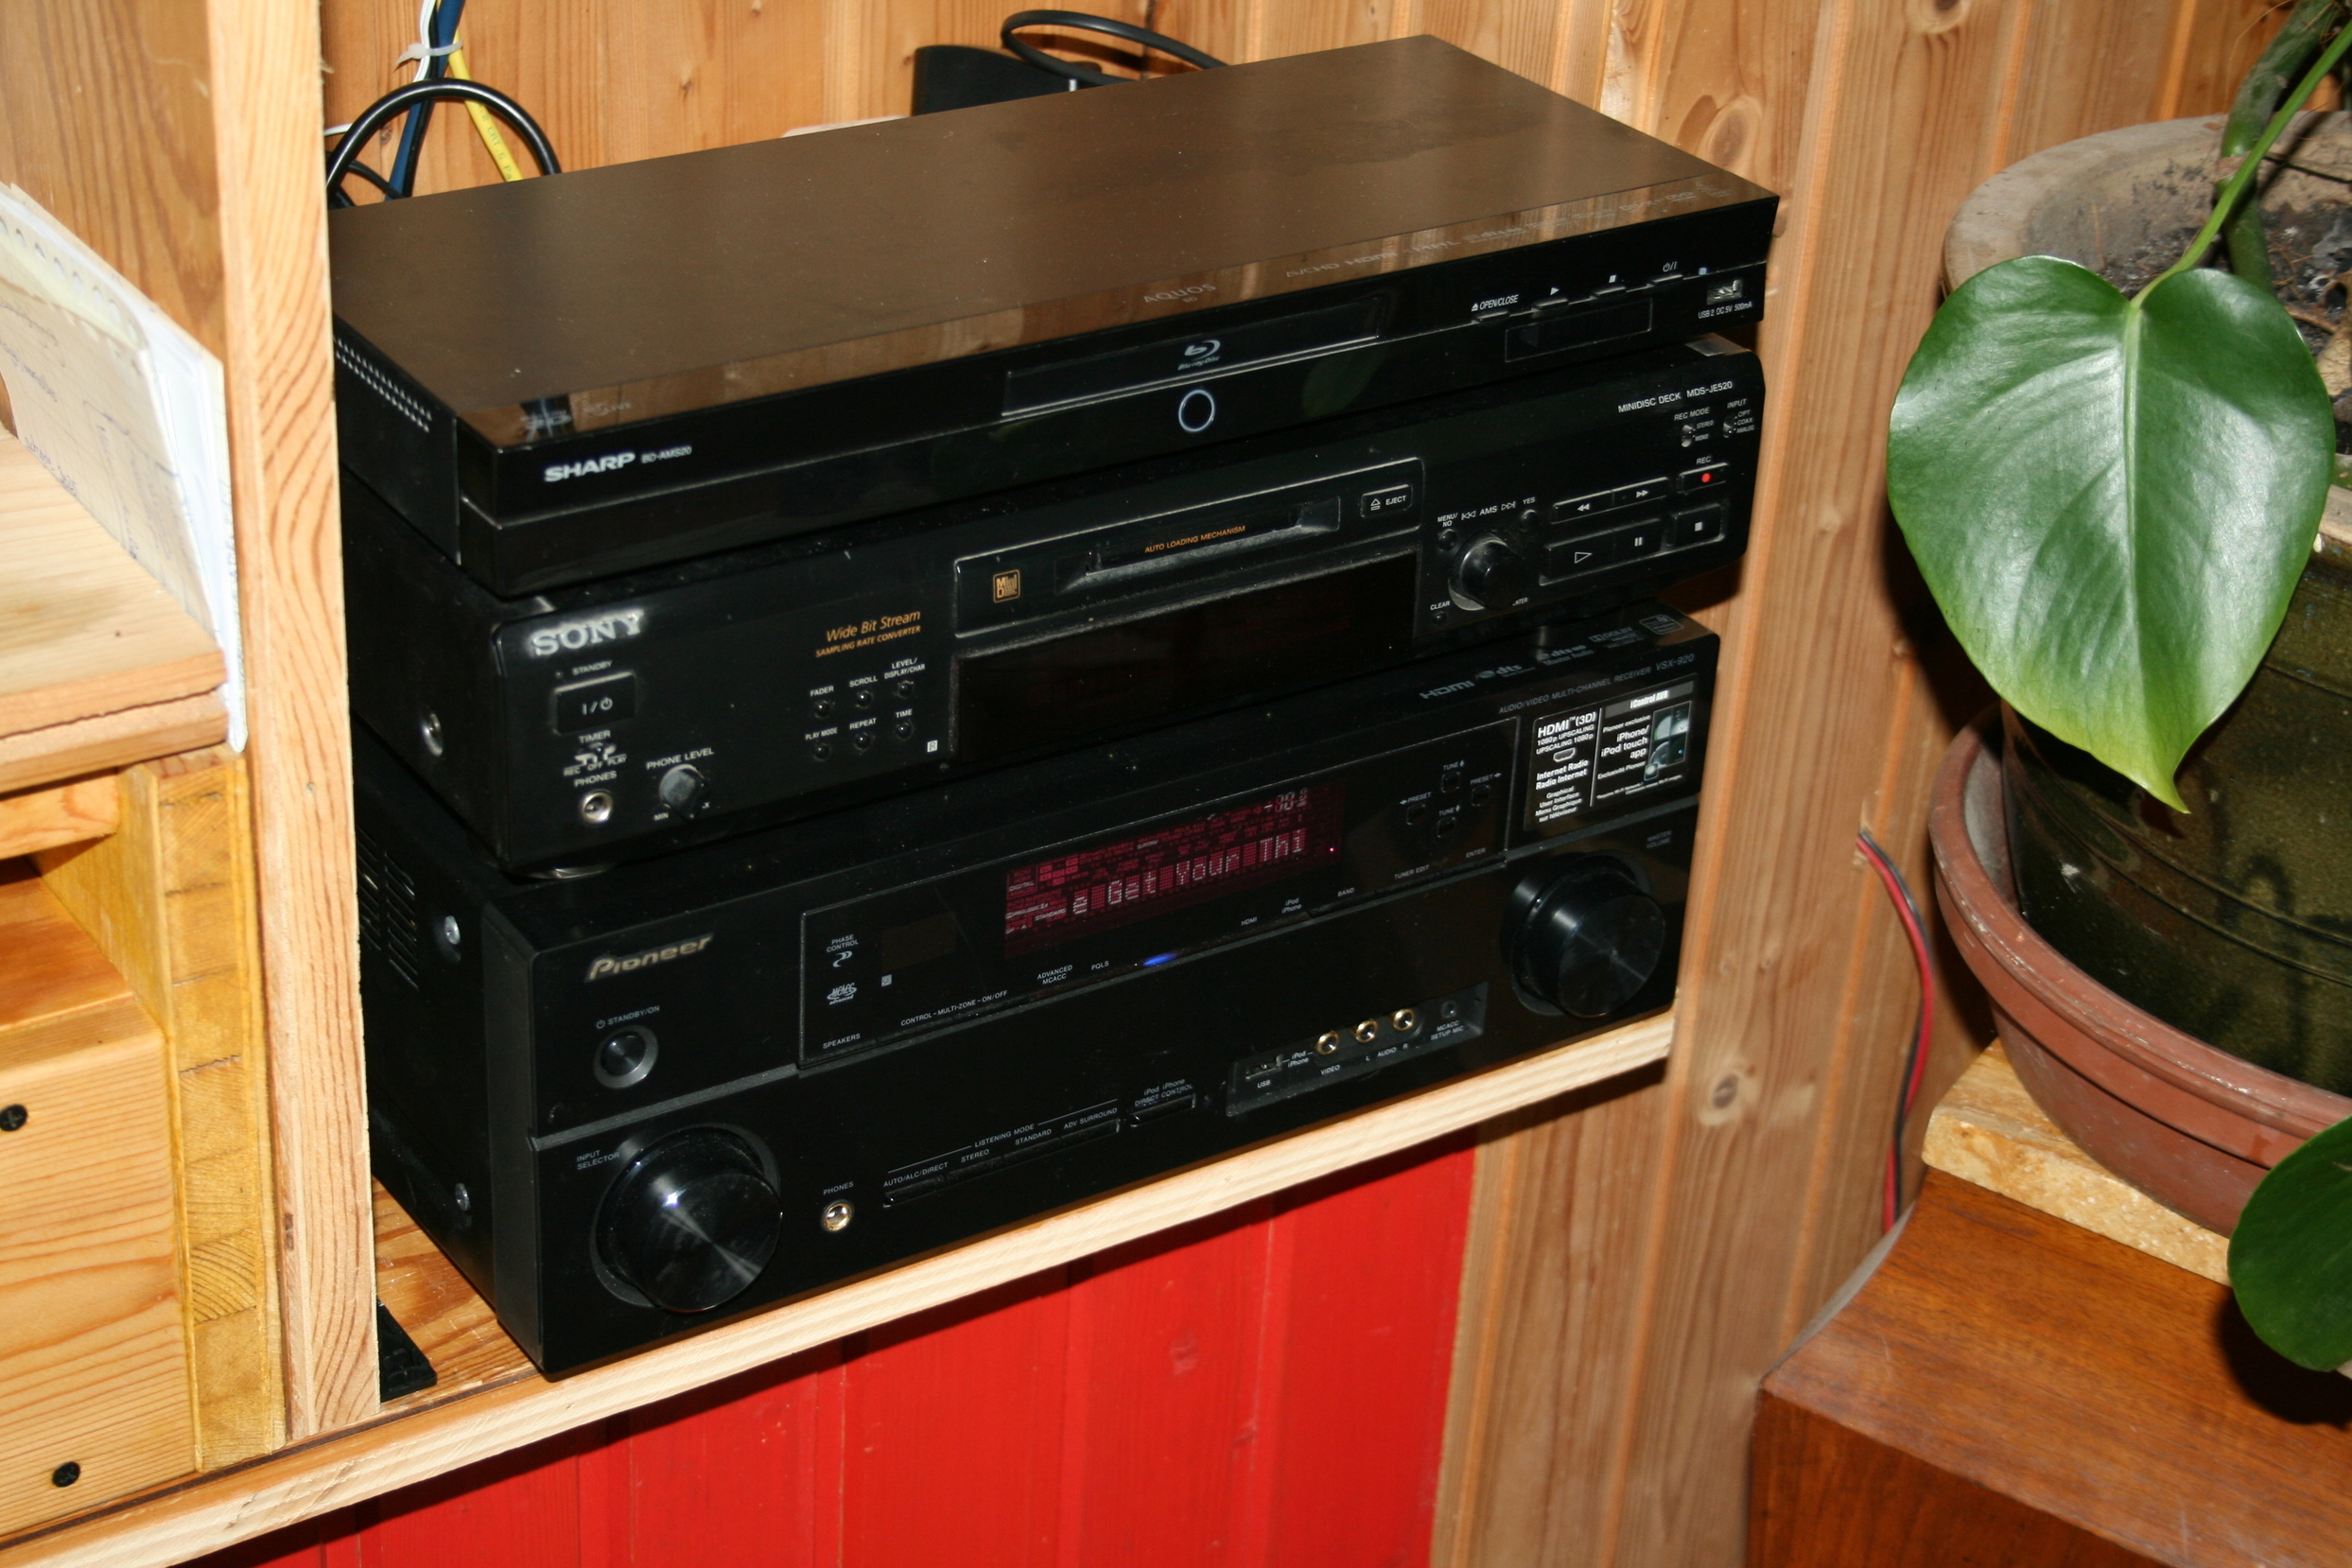
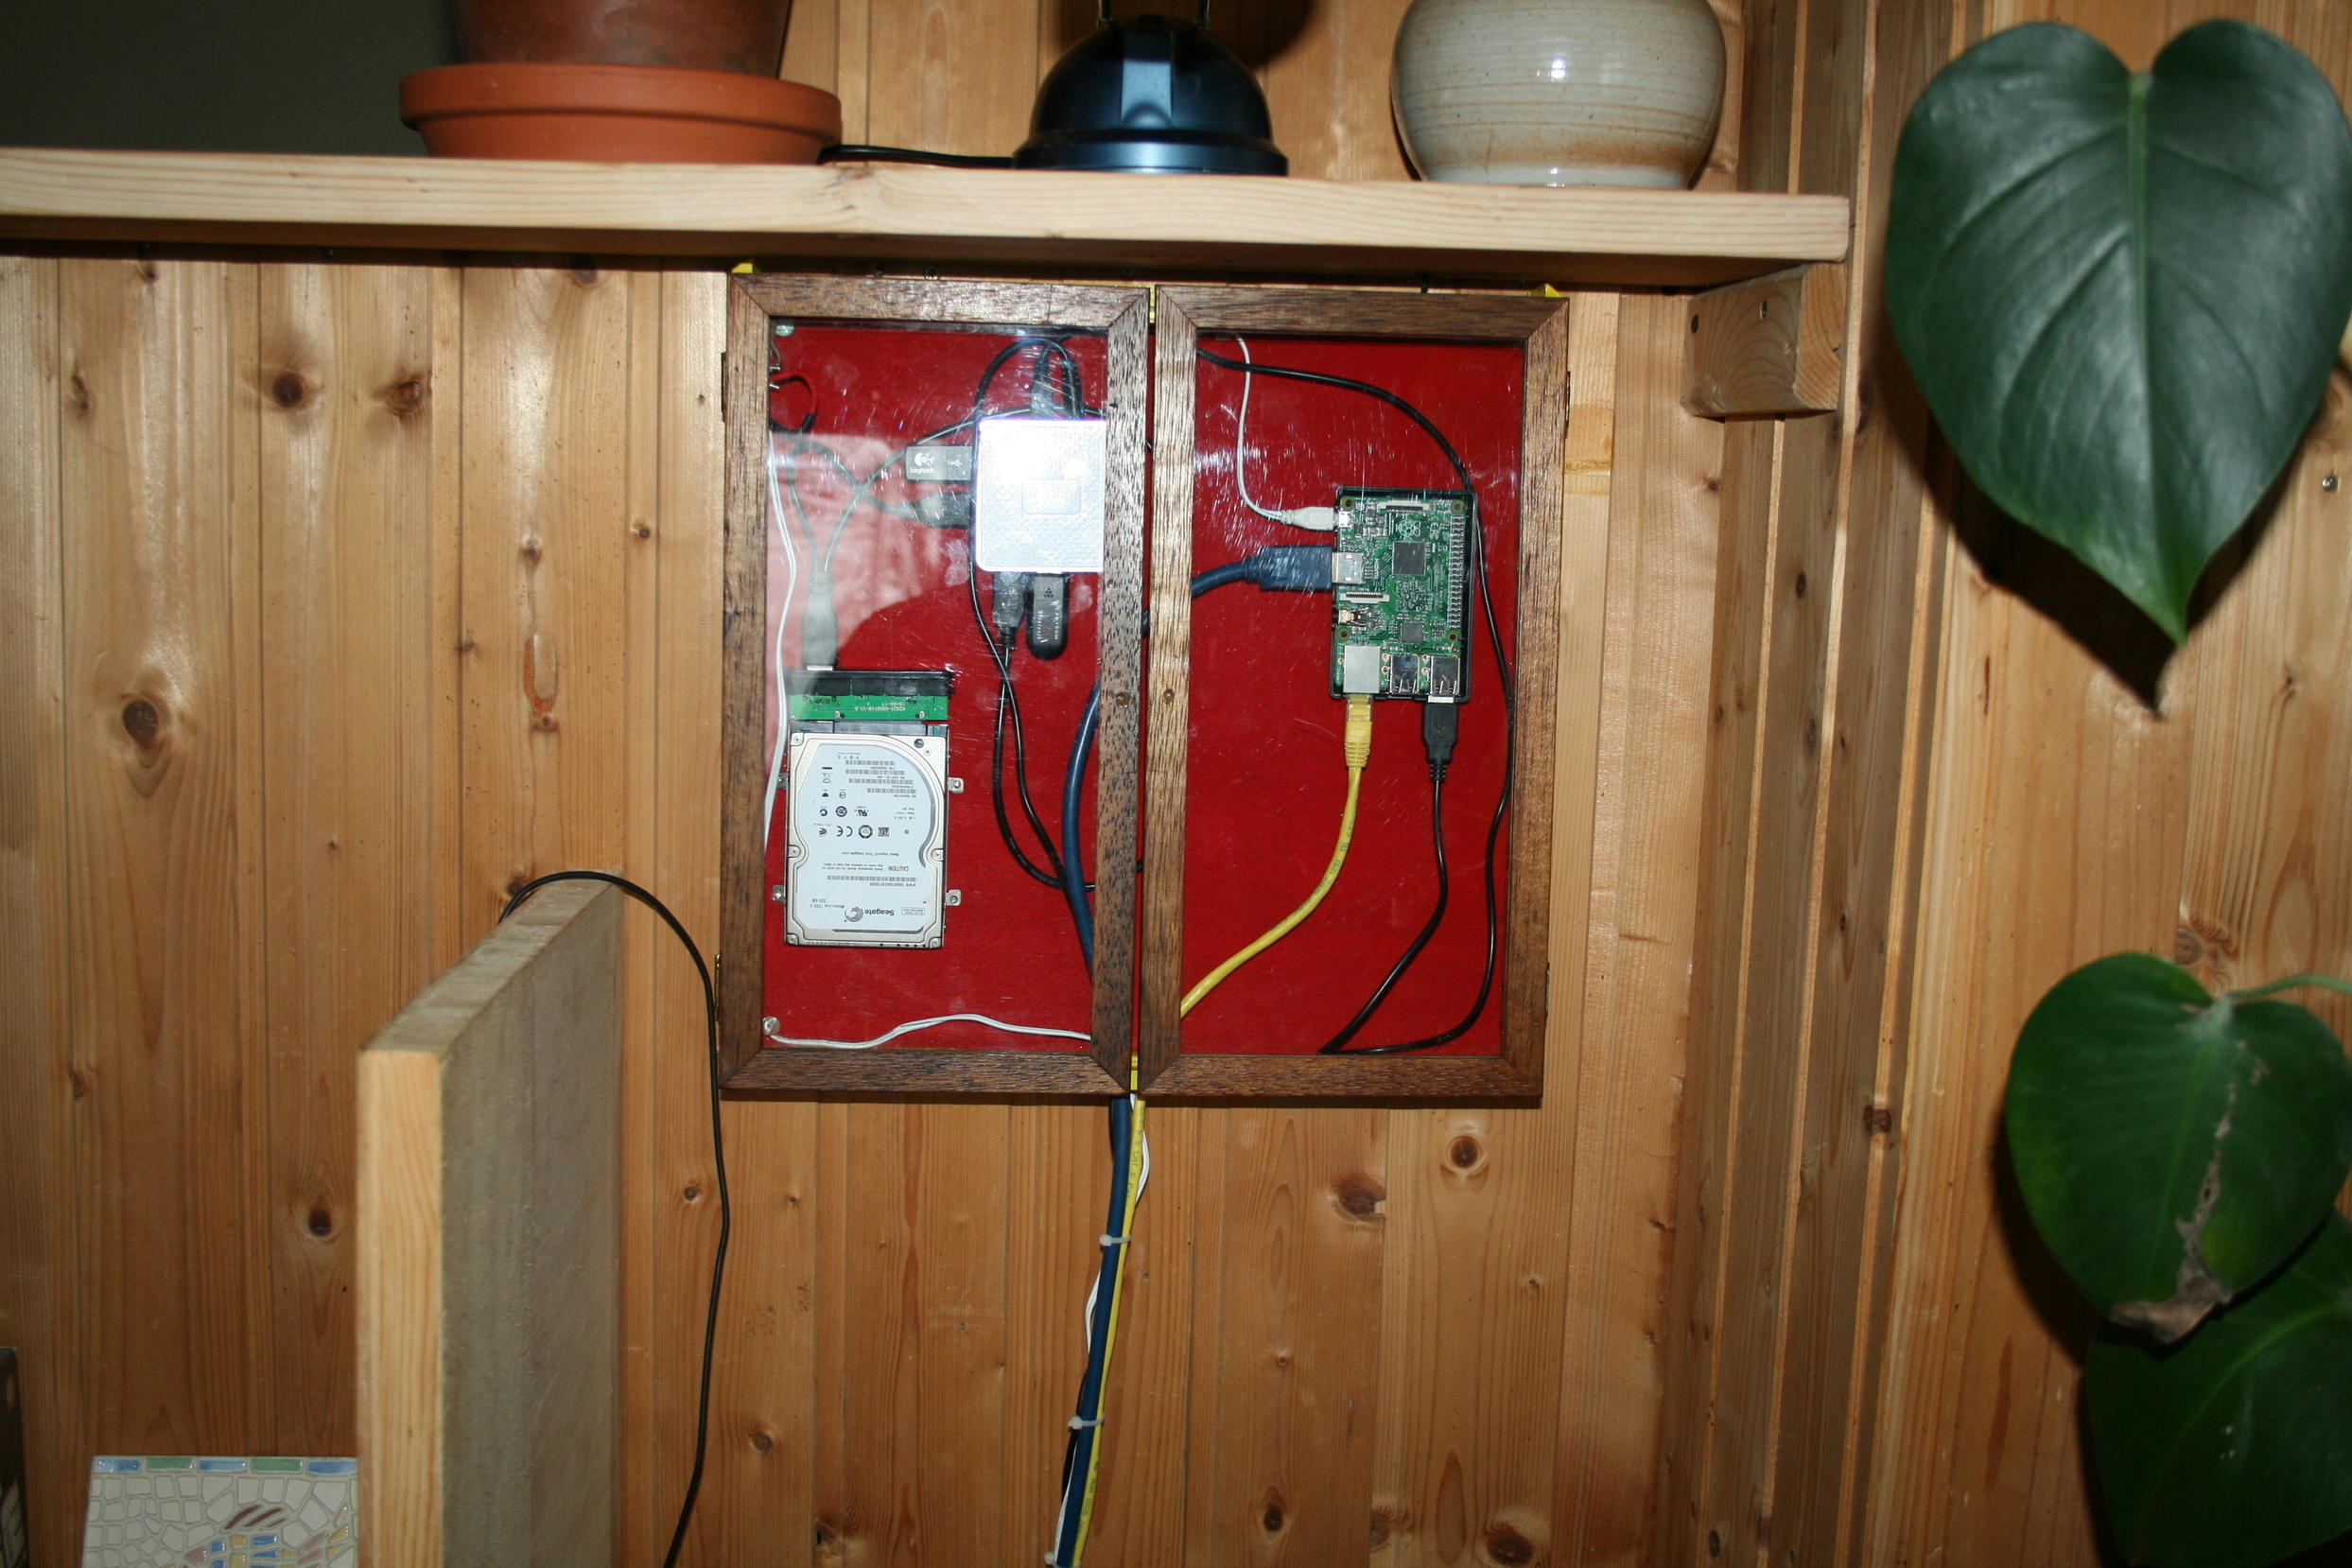
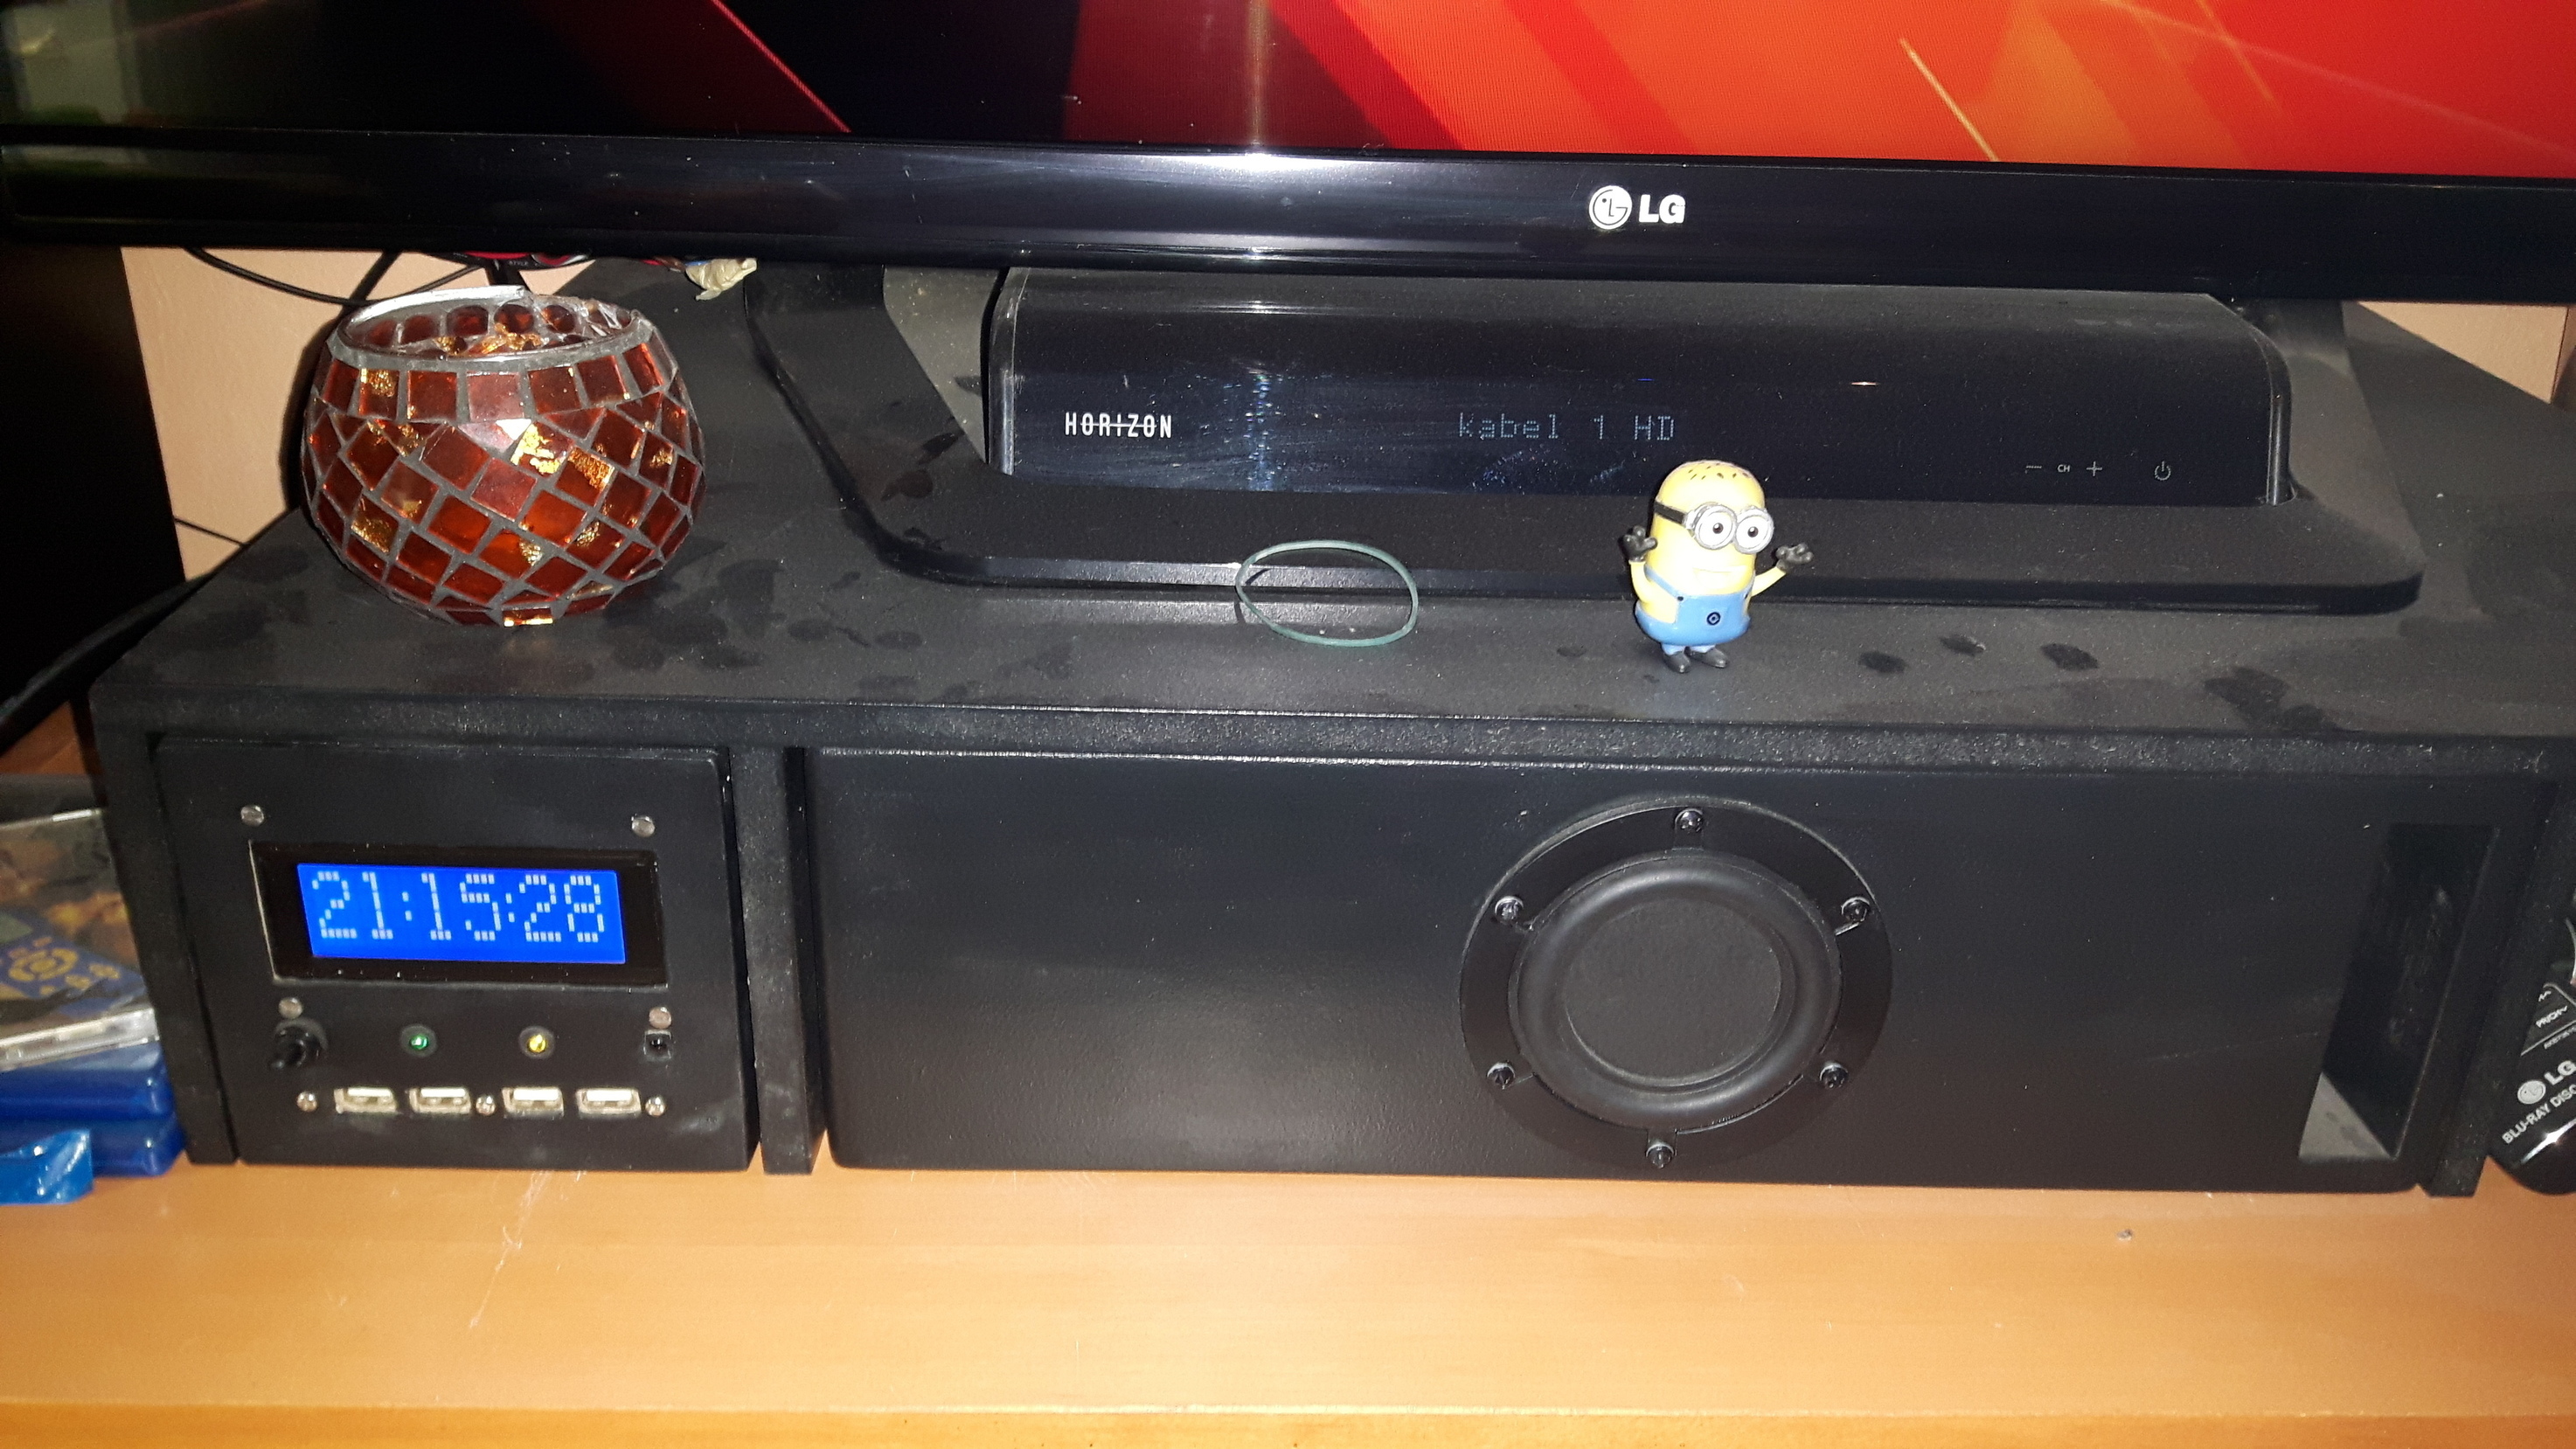
Built my own mediacenter case to fit into my tv setup.
Complete with integrated hyperion 10A powersupply, fan, lcd and 4 front usb ports.
Hope you don’t mind the dust…
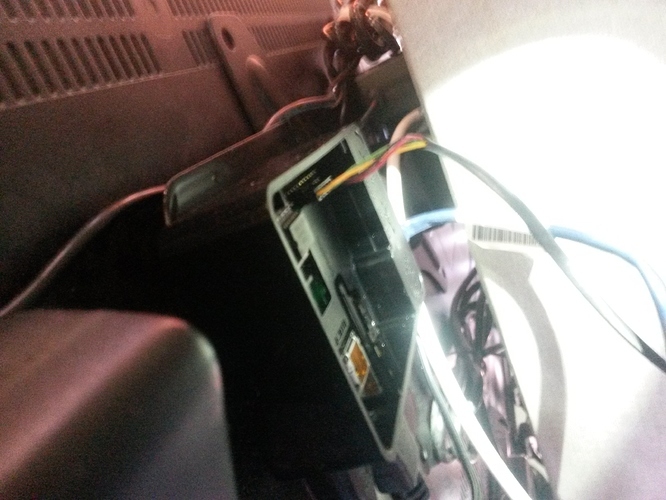
Here is one of my setups this is my bedroom OSMC installation got my lightpack hooked up to my installation the case is a standard case mounted on a custom vesa mount that my buddy built for me.
wow thats pretty nice! id love to build one of these, any tips, and or steps…including parts etc…?
Some good stuff here.
Keep them coming, and I’ll do a blog post highlighting the best setups
Sam
Sure. Buildibg a new, slightly smaller one atm. Will post pictures and a partslist if you like.
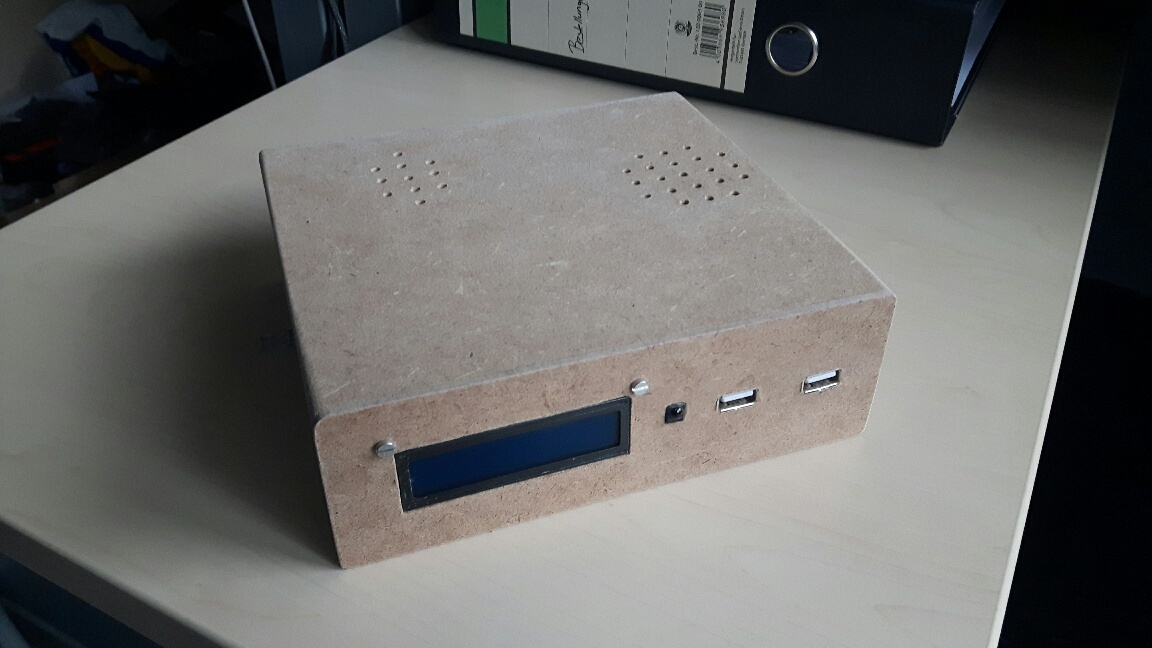
Finished my latest build:
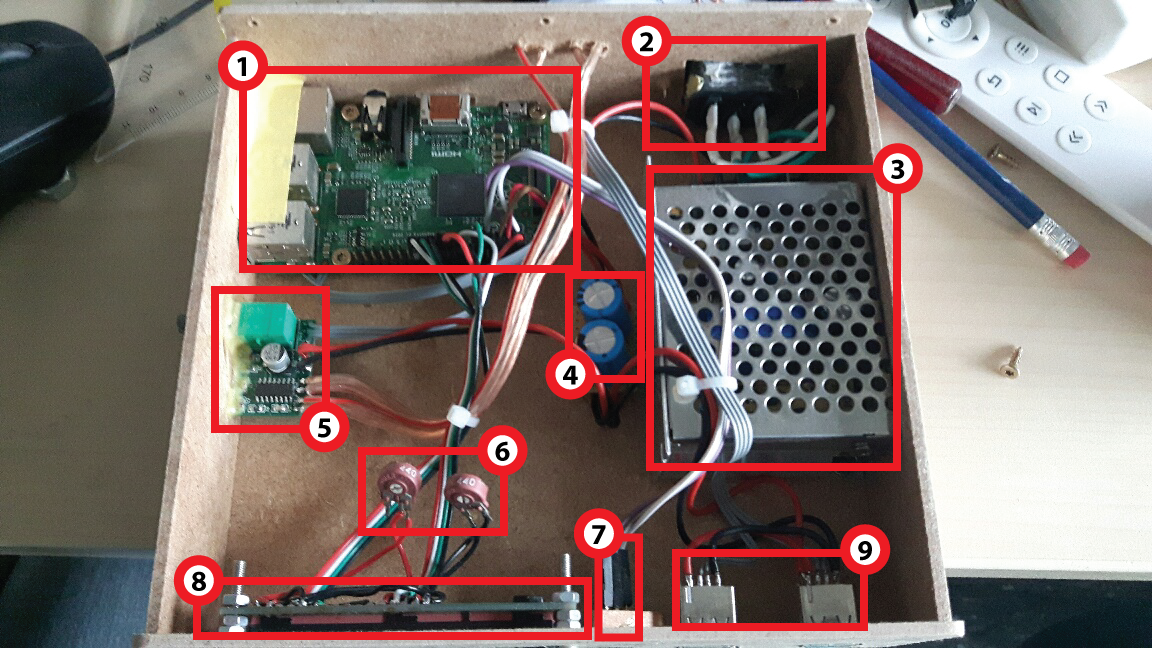
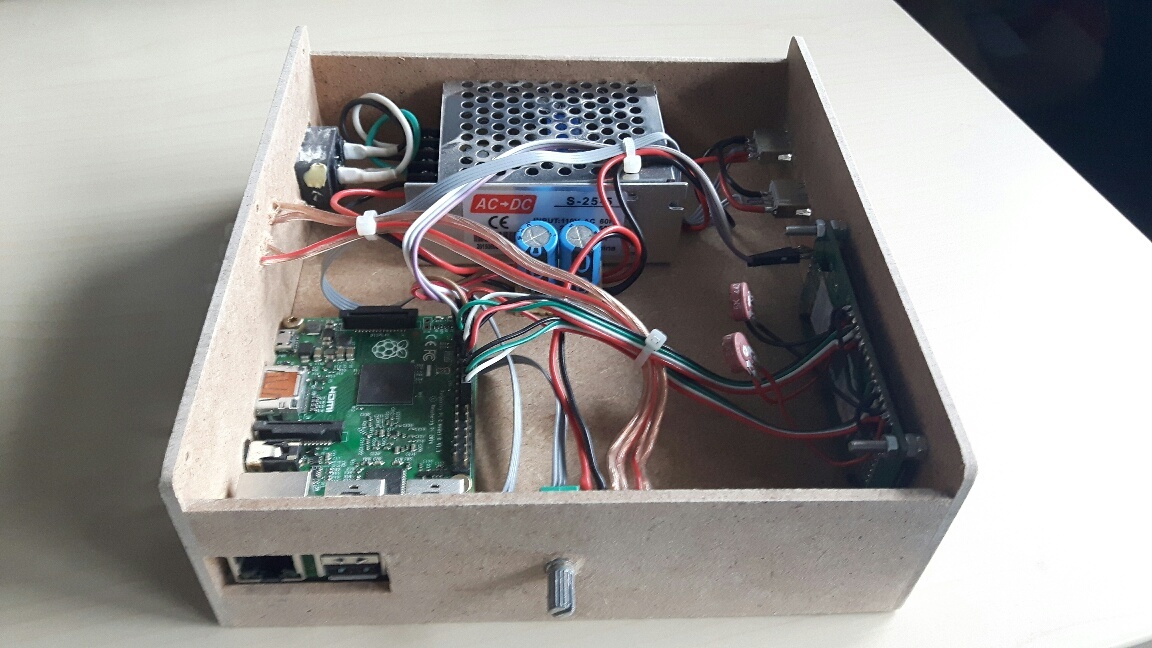
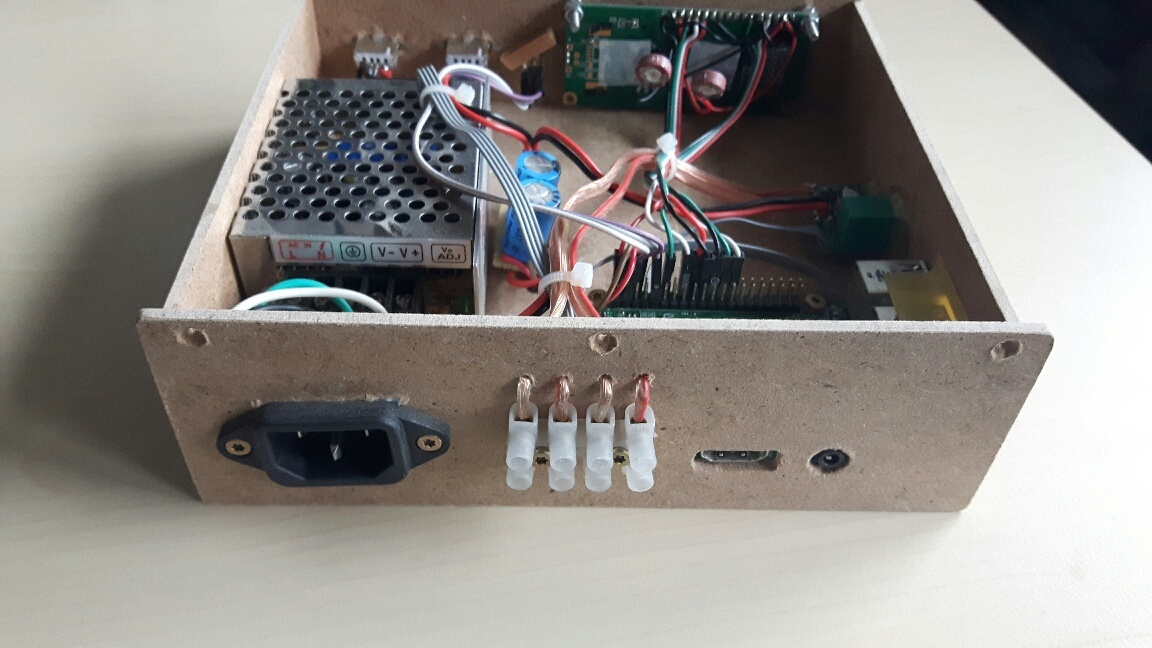
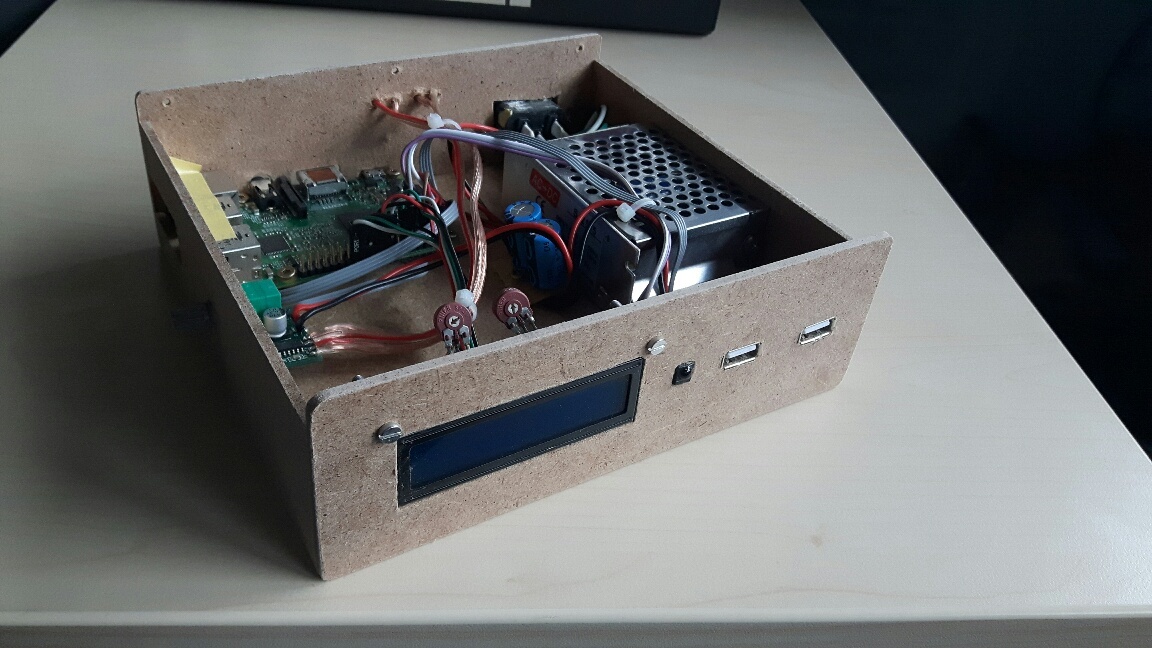
Here is a photo from the inside:
Description:
(1) Raspberry Pi 2 B
(2) Mainspowerconnector (from an old PC powersupply. Be careful with mains power!!! Use sufficient insulation and make sure you won’t accidentally touch the contacts!)
(3) AC in: 100-250V, DC out: 5V, 5A powersupply from Ebay.
(4) 2 x 2200 µF 10V in parallel (because I had them here and I don’t trust the filtering of cheap powersupplies.)
(5) 5V, 2x3W@4Ohms amplifier with potentiometer. (Audio in cables are directly soldered to the testpoints of the analog jack on the backside of the raspberry.) There are some simple connectors to connect the speakercables to in the back.
(6) Two potentiometers to control the brightness and contrast of the LCD.
(7) IR receiver glued in place and supported by a small piece of wood behind it.
(8) HD44780, 16x2 characters LCD display
(9) Two USB ports from an old hub. The datalines are directly soldered to the USB contacts under the Raspberry Pi board. The powerlines are directly connected to the powersupply. (Maybe not the best way to do it, but if you enable usb_max_current in config.txt, you basically do the same thing 
Here are some more pictures from all sides:
The case:
The case is made of 10mm and 3mm MDF and held together by woodglue. All ports are drilled, sawed and filed to fit.
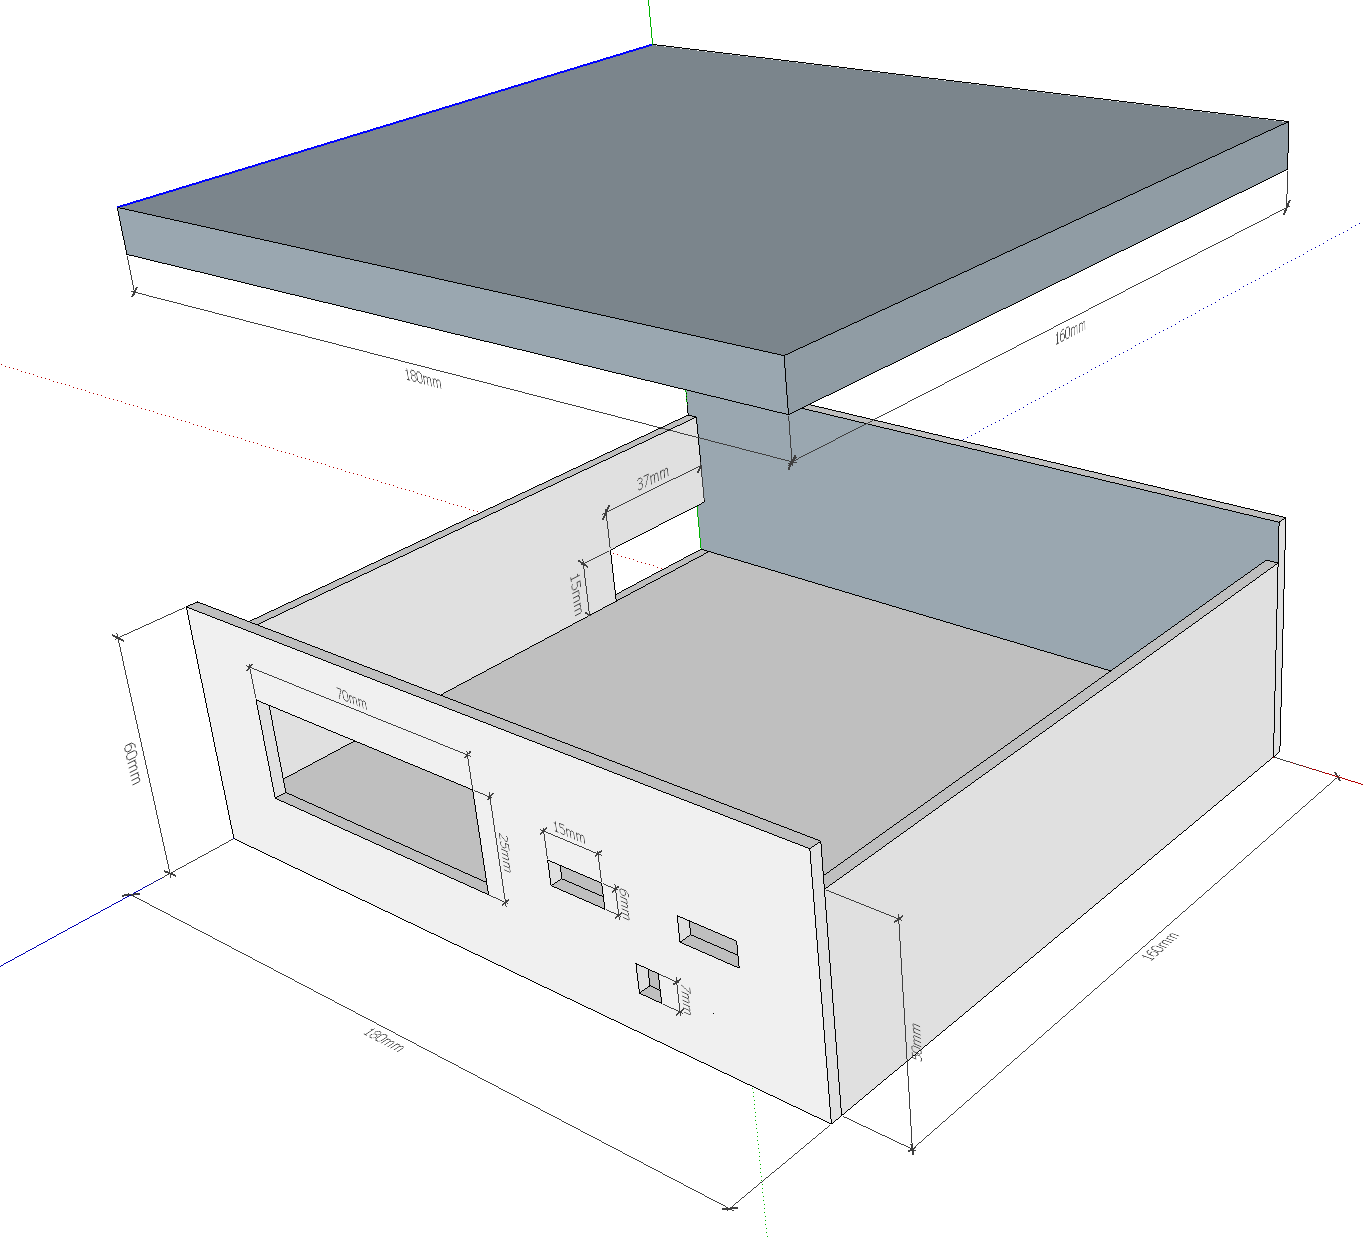
Here is a Sketchup picture with measurements:
List of wooden parts:
10mm MDF:
Amount: Size:
2 180mm x 160mm
3mm MDF:
Amount: Size:
2 180mm x 60mm
2 160mm x 50mm
After putting everything together, sand it and paint it in your favorite color.
Of course this is still unfinished, as I will paint it black with acrylic paint.
If you have questions, feel free to ask.