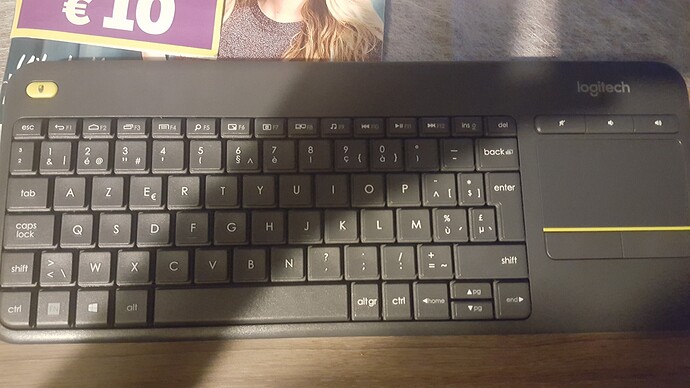
Dear all,
I have a problem on OSMC. My keyboard is AZERTY which is standard for our country (Belgium).
I use a raspberry pi 3 with OSMC.
I also have read some things to change in Root.
Is it possible that someone can explain everything from A tot Z because i don’t have any programming background. Don’t know how to get into root,…
same for France, we are using AZERTY.
Kodi it self doesn’t turn to AZERTY keyboard when you choose your language/country.
It stays to english/QWERTY.
The second issue is that even if you turn it to french/AZERTY in Kodi’s interface then it doesnt have any effect on the command line keyboard that remains QWERTY.
That is making typing any command (update, ugrade and so on…) a real nightmare.
The only thing I did found to bypass this issue is :
- quit kodi
- when the logo appear hit ESC
- enter login/pass
- sudo apt-get update
- sudo apt-get install console-common
- then select “Keymap from full list”
- then choose “AZERTY / French / Same As X11 (latin 9) / Standard”
Thanks. This worked. But symbolskeys are totally switched up
This should be the setup but the french one got diffrent symbols on numeric keys.
Hi,
As I’m experiencing some problems to get the physical keyboard input of OSMC configured for Azerty I was thinking about submitting a post in the Wiki. But I’m not ready yet because after spending a lot of time I’m still unable to make it work.
The first time I wanted to configure the keyboard I succeeded by applying the method of this post:
- Either plug a usb keyboard or connect a remote keyboard to OSMC (note that if it's an Azerty, you'll have to type as if it was a Qwerty, that is to say 'q' instead of 'a' etc).
- In Kodi home screen select 'Quit' in the 'Power' menu, and keep the 'ESC' key pressed just after
- When the input console appears, enter login/pass (by default: osmc/osmc)
- Then type:
	> sudo apt-get update
	> sudo apt-get install console-common
- When the wizard opens select “Keymap from full list”
- Then choose “AZERTY / French / Same As X11 (latin 9) / Standard”
BUT a couple of days later the layout reverted to Qwerty (maybe due to an OSMC update or whatever, I don’t know). Therefore I read across the forum again and found that the following method should make the choice persistant (Bug installation - #9 by grahamh).
Method 2:
- In the console, type:
	> sudo nano /etc/rc.local
- When the confirmation appears in the bottom line, enter 'Y'
- File edition...
The problem I encountered then is that on the TV the first 7 columns of characters on the left are cut off.
Anyway I searched on the Internet to know what is written by default in this file to be able to move the cursor in the hidden zone and to make so that both lines follow the comments:

	sudo loadkeys fr
	exit 0

- Type 'Ctrl+O' + 'Enter' to save the modification
- Unplug/Replug the power alimentation of the Vero-4K.
But unfortunately this procedure does not work (I also tried with “sudo loadkeys fr-x11”).
Then I tried the Method 1 again but the wizard did not show anymore.
Another search told me that you can make it appear again by calling the following command:
> sudo dpkg-reconfigure console-data
Thus I could reselect ‘AZERTY … X11’ in the list, which is well taken into account just after in the console. But after restarting the Vero-4k, when entering some text in Kodi it’s always in Qwerty.
Could someone please help me to find a definitive and strong solution (so that eventually I won’t have to enter the console mode anymore)? Any suggestion is welcome.
Eric
I’m not clear what you have done. Can you post the contents of /etc/rc.local please?
(Impressive : I never got such a fast reply from any support in my life, all the more so that we are sunday…)
The file looks like this:
#!/bin/sh -e
#
# rc.local
#
# This script is executed at the end of each multiuser runlevel.
# Make sure that the script will "exit 0" on success or any other
# value on error.
#
# In order to enable or disable this script just change the execution
# bits.
#
# By default this script does nothing.

sudo loadkeys fr

exit 0
PS: the 7 first columns are cut off on the left of my TV, but I took care to delete anything from the end of the file back to the right of the last comment, then write the two lines before moving them after by inserting the necessary line feeds.
You don’t need sudo in rc.local. I recommend:
- try to find the setting on your TV that stops overscan. It may be called 1:1 or such.
- instead of
sudo loadkeys fr, write loadkeys fr-x11
- reboot
And if you type ls -l /etc/rc.local you should see this:
osmc@osmc:~$ ls -l /etc/rc.local
-rwxr-xr-x 1 root root 497 Aug 12  2017 /etc/rc.local
If you don’t see those x’s, type:
sudo chmod +x /etc/rc.local
1 Like
You gave me the appropriate advice.
- I discovered the setting for the TV not to overscan (named “show all pixels”)… far more confortable.
- I changed the file text as per your recommendation, but it still didn’t work
- osmc@vero:~$ ls -l /etc/rc.local returned: “-rw-r–r--” so I’ve executed chmod, which has solved the issue.
And now I’m able to write a candidate for the wiki.
A big thank you to you!
Eric
2 Likes
Maybe we can start a list of TV Brand command name. What’s your TV Brand/Model?
SONY Bravia KDL-40W4500 (not very young…). The command path is “Settings / Screen settings / Display Area / All pixels”
