installing files
its stuck on installing files. how long does it take do you know, thanks
I suspect that may be the problem.
So you initially inserted the stick with the ATV1 powered up ?
If so, you can’t do that, because the act of powering the ATV off with the stick inserted can corrupt the stick.
- Recreate the stick.
- power the ATV off
- insert the stick (when the atv is off)
- power the atv up
- follow the prompts
that was it man spot on. thanks a million
Spinner,
Now that you mention different TV’s, I wonder if that’s it. I’m trying this on an old (9-10 yrs) TV. It’s not even 1080p, it’s 720p… Hmmm. Anyway I’ll try your suggestions when I get home and let you know. Thanks very much.
Hmm… Interesting. Glad I could help. Thanks for confirming it.
I’ll add that detail to the ATV HDD install walkthrough I’m putting together.
That may be the issue. I’m not sure how well X11 handles older HDMI displays.
If that’s the problem, as I suspect, you should be able to complete the install on another TV, then hook it back up to the original TV, and then edit the X11 config via command line.
@kram351
Same basic HDD install method yes.
You create a USB stick that will do the actual installation to the ATV’s HDD.
Installation works without an internet connection to the ATV.
The Crystal HD card is supported. In fact Sam already has it working with the upcoming Kodi Jarvis.
Good morning Spinner,
I suspected something similar so this is what I tried. I’m sorry I didn’t mention that my connection goes through a Yamaha A/V receiver(about a year old) and to the TV - all HDMI. So I tried re-installing and connecting it directly to the TV - same result. Then I re-installed and took it to my new (1 month old) TV in the living room and used a brand new HDMI cable - still same result. I am using a Sandisk 16GB USB stick. I delete all partitions, format to Fat32, and then use the installer for windows and select the updated file for HDD. I’m not greatly skilled. I tried searching for a SSH How-To but didn’t know which one to use, so I gave up last night. I had Crystalbuntu for about 2 yrs. and loved it, and now I’m missing it. Hope I can get this working. Anyway, sorry for the babbling. Thanks for your help.
Hi
If you see nothing at all, it’s certainly not X11 related. OSMC’s installer doesn’t use X11, which means you should see console output, the installer, and then the OSMC splash screen before Kodi if X11 is indeed the issue.
Sam
Maybe give us a step by list of what you did and what you saw on the screen at each stage ?
Sam and Spinner,
Thank you both for your help. I’ll try the step by step:
- Plug in USB stick and then power on unit
- Watch it boot until it gives message to unplug USB and power down for 10 seconds and then power it up.
- Unplug USB and wait at least 10 sec to power it back up
- A screen indicating “formatting” appears but the progress bar does not move.
- Instead of completing, the screen switches to “installing”. On this screen the progress bar moves to completion.
- Then it indicates a successful installation
- It appears to reboot and the OSMC splash screen appears
- Then black
To the best of my memory, this is how it occurred - several times. I also installed a CrystalHD card in hopes that it might help, but no. I tried the install both with and without the CHD card - all the same result. I wonder if the hard drive finally failed? Anyway, thanks again.
How long did you wait when the screen went black before booting up again. ?
This was the first and maybe second attempt. After this, I let it sit for hours, even overnight
Great info.
From that list it looks like you did it correctly.
On the ATV version of OSMC… X11 (the system that gives a gui interface on linux) and then Kodi, launch after that splash screen, (item #7 in your list).
In addition, there are some initial configuration tasks that need to complete before Kodi launches.
In some cases, it seems that kodi may try launch prematurely, before the initial configuration is complete, which will cause problems. Usually rebooting and waiting a few minutes will get past that.
So to recap…
- You tried a different TV with a different HDMI cable ?
- After you got a black screen (item#7 in your previous post) you waited a few minutes, and then powered the ATV off and on and waited ?
If reboot doesn’t work, we’ll have to try get some logs from the ATV.
To do that we’d need to try ssh into the machine or use a USB keyboard.
What OS are you using on your normal computer ?
First installl failed after the required re-start of aTV1.
Tried again.
Painless installation. And so far no problems At All!
Thank you So Much, Sam! I imagine getting the last few bits and pieces together has been a drag, but man, it paid off!
Well done! Will donate.
You don’t know the half of it. The last 5% took 95% of the time. But when you start, you’ve got to finish.
Cheers, much appreciated. Will keep supporting ATV1 as long as I can
Sam
Ok this may end up being a longer comment than most so I apologize ahead of time, I just want to be extremely thorough with everything I have attempted thus far.
- @sam_nazarko, @Spinner, @elfnino, and everyone else thank you so much for your hard work and your due diligence in helping the rest of us get this going.
- I have gotten the regular USB install to work with multiple sources and playing 1080p. using the HDMI cable to my TV.
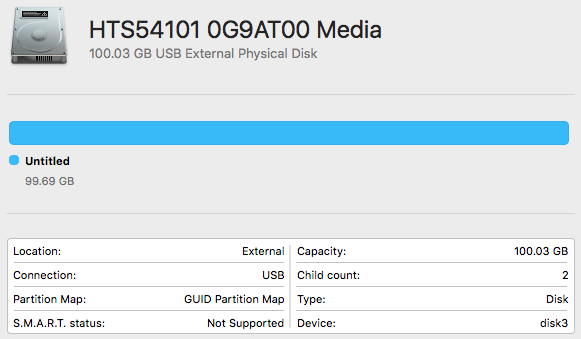
- Even with the new installed for 12-4-HDD install on both OS X and on windows neither one recognizes my mini-SD to IDE hard drive (connected via USB to IDE adapter cable. Or a regular 100gb IDE Hard drive.
- Currently I have my mini-SD drive installed internally and OSMC booting off of the USB Flash drive.
Disk /dev/sda: 29.3 GiB, 31488000000 bytes, 61500000 sectors
Units: sectors of 1 * 512 = 512 bytes
Sector size (logical/physical): 512 bytes / 512 bytes
I/O size (minimum/optimal): 512 bytes / 512 bytes
Disklabel type: gpt
Disk identifier: 43433D21-6446-4729-BFAE-6BAEC1854012
Device Start End Sectors Size Type
/dev/sda1 40 500000 499961 244.1M Apple TV recovery
/dev/sda2 503808 61499391 60995584 29.1G Microsoft basic data
Disk /dev/sda: 3828 cylinders, 255 heads, 63 sectors/track
sfdisk: Warning: The partition table looks like it was made
for C/H/S=/251/63 (instead of 3828/255/63).
For this listing I’ll assume that geometry.
Units: 1MiB = 10241024 bytes, blocks of 1024 bytes, counting from 0
Device Boot Start End MiB #blocks Id System
/dev/sda1 0+ 255- 256- 261631+ ee GPT
start: (c,h,s) expected (0,0,2) found (0,0,1)
end: (c,h,s) expected (33,22,49) found (1019,250,63)
/dev/sda2 0 - 0 0 0 Empty
/dev/sda3 0 - 0 0 0 Empty
/dev/sda4 0 - 0 0 0 Empty
osmc@osmc:~$ sudo blkid
/dev/sda1: UUID=“7a1fbd6a-f1a2-3d05-8c40-d7a45adeaf57” LABEL=“qjpipha`” TYPE=“hfsplus” PARTLABEL=“primary” PARTUUID=“a561d03d-58d0-4bc3-ad3d-99af903a1363”
/dev/sda2: PARTLABEL=“primary” PARTUUID=“89a6e8a4-bcc3-4eb3-a564-42e427b620aa”
/dev/sdb1: UUID=“e9ce85cb-d831-3c95-aa05-12ad12f35ce1” LABEL=“untitled” TYPE=“hfsplus” PARTLABEL=“primary” PARTUUID=“a561d03d-58d0-4bc3-ad3d-99af903a1363”
/dev/sdb2: UUID=“92232a15-bcab-4334-b585-eca95940f23d” TYPE=“ext4” PARTLABEL=“primary” PARTUUID=“c741526e-27e7-487c-8991-875b7733e68d”


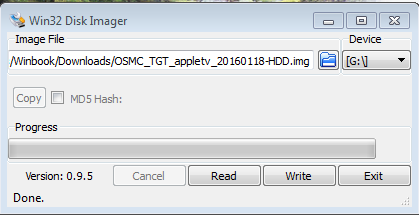
The only way I have gotten the HDD image to work is through windows using Win32Diskimager on drive G: with that image.

I connected my 100gb drive via USB adapter with the internal micro SD drive installed. - (could use your original apple drive if you wanted). It goes through a partial boot process, and then says unplug your USB drive and power off the Apple TV. Leave the power unplugged for 10 seconds then plug it back in. (summary of what it says).
Currently now the internal microSD is going through the OSMC install process screen.
I then had to do a HARD reset for another 10sec or so, and then it booted up into the OSMC setup screen. (this is a total first BTW, was not expecting this result).
Originally, if i tried to boot from USB and follow, @elfnino directions with the whole DD command. see below:
cd /home/osmc/
wget http://download.osmc.tv/installers/diskimages/OSMC_TGT_appletv_20160118-HDD.img.gz
gzip -d OSMC_TGT_appletv_20160118-HDD.img.gz
sudo dd if=OSMC_TGT_appletv_20160118-HDD.img of=/dev/sda bs=4M
this had the updated image file names. The steps all complete successfully though it did take some time, after its done copying over and you unplug the USB and reboot the apple TV i would end up getting to the AppleTV icon with a question mark “?”
this go around for whatever reason is working!! ![]() my internal microSD drive is installed! loading time is quicker than from just the USB, and I am in the process of adding all my sources!
my internal microSD drive is installed! loading time is quicker than from just the USB, and I am in the process of adding all my sources!
Hope this note is helpful for any and all!
I think you have greatly overcomplicated this.
To install OSMC to the hard disk:
- Insert a USB stick, select an HDD install
- Plug the USB in to an AppleTV
- OSMC will then install from the USB on to the disk.
This is to save people the trouble of removing the hard disk.
Sam
Bravo Sam! Patience paid off. Once the installer was perfected the installation went quick and smooth.
OSMC on hdd works great on my ATV1. Looking forward to Jarvis. Donation on the way.