Well you live and learn as it’s how I’ve been using it with a created menu link to the path. No library created just straight access to the file location share.
I have played a bit with a library on a different location where I have movies but never got too far into it with the scraper sites etc causing me difficulties kind of gave up on that way
Totally agree with regards all the devices spinning up etc. See your point. I should put time aside to reconsider just a little bit of age making me lazy
apologies to the OP for the small hijack but I think that if you got libraries going you would find it a much preferable experience. Honestly I spend most my time just working the home screen (Esturary) for the widgets showing in progress and recently added.
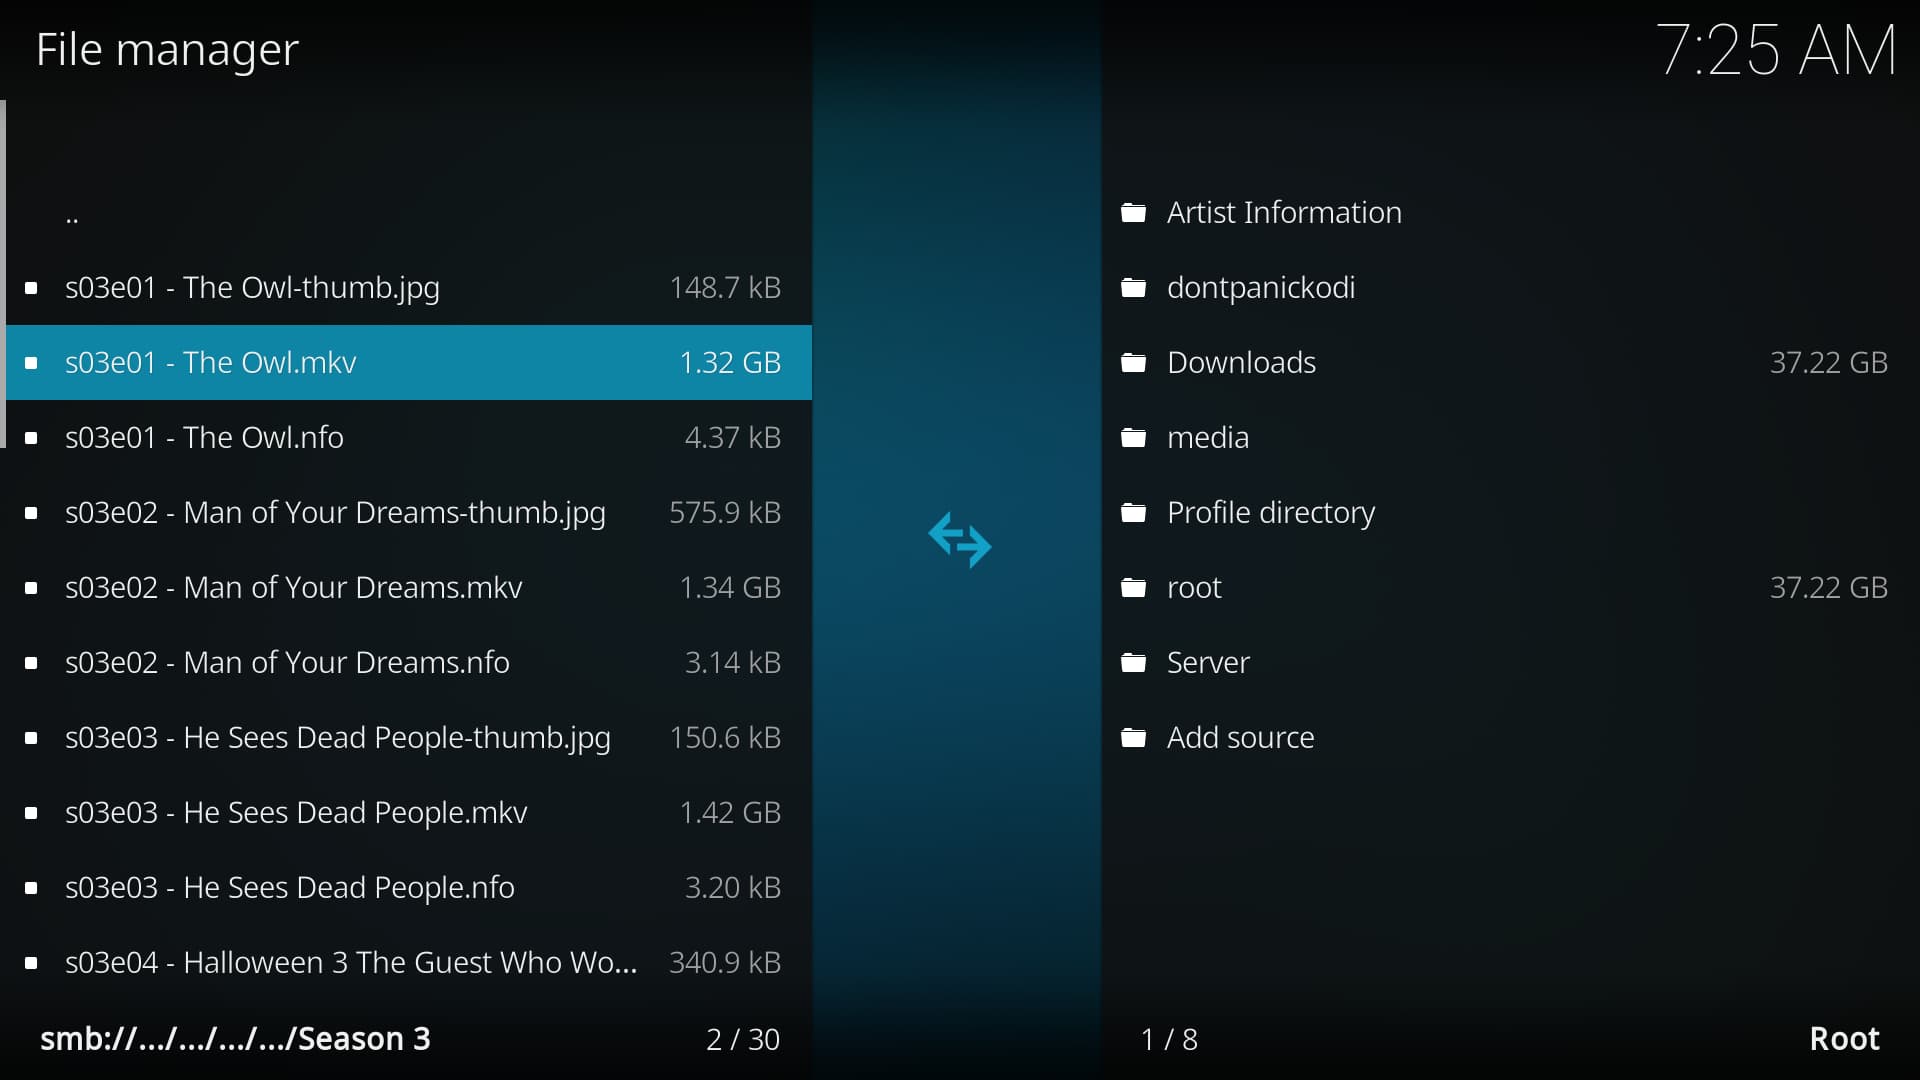
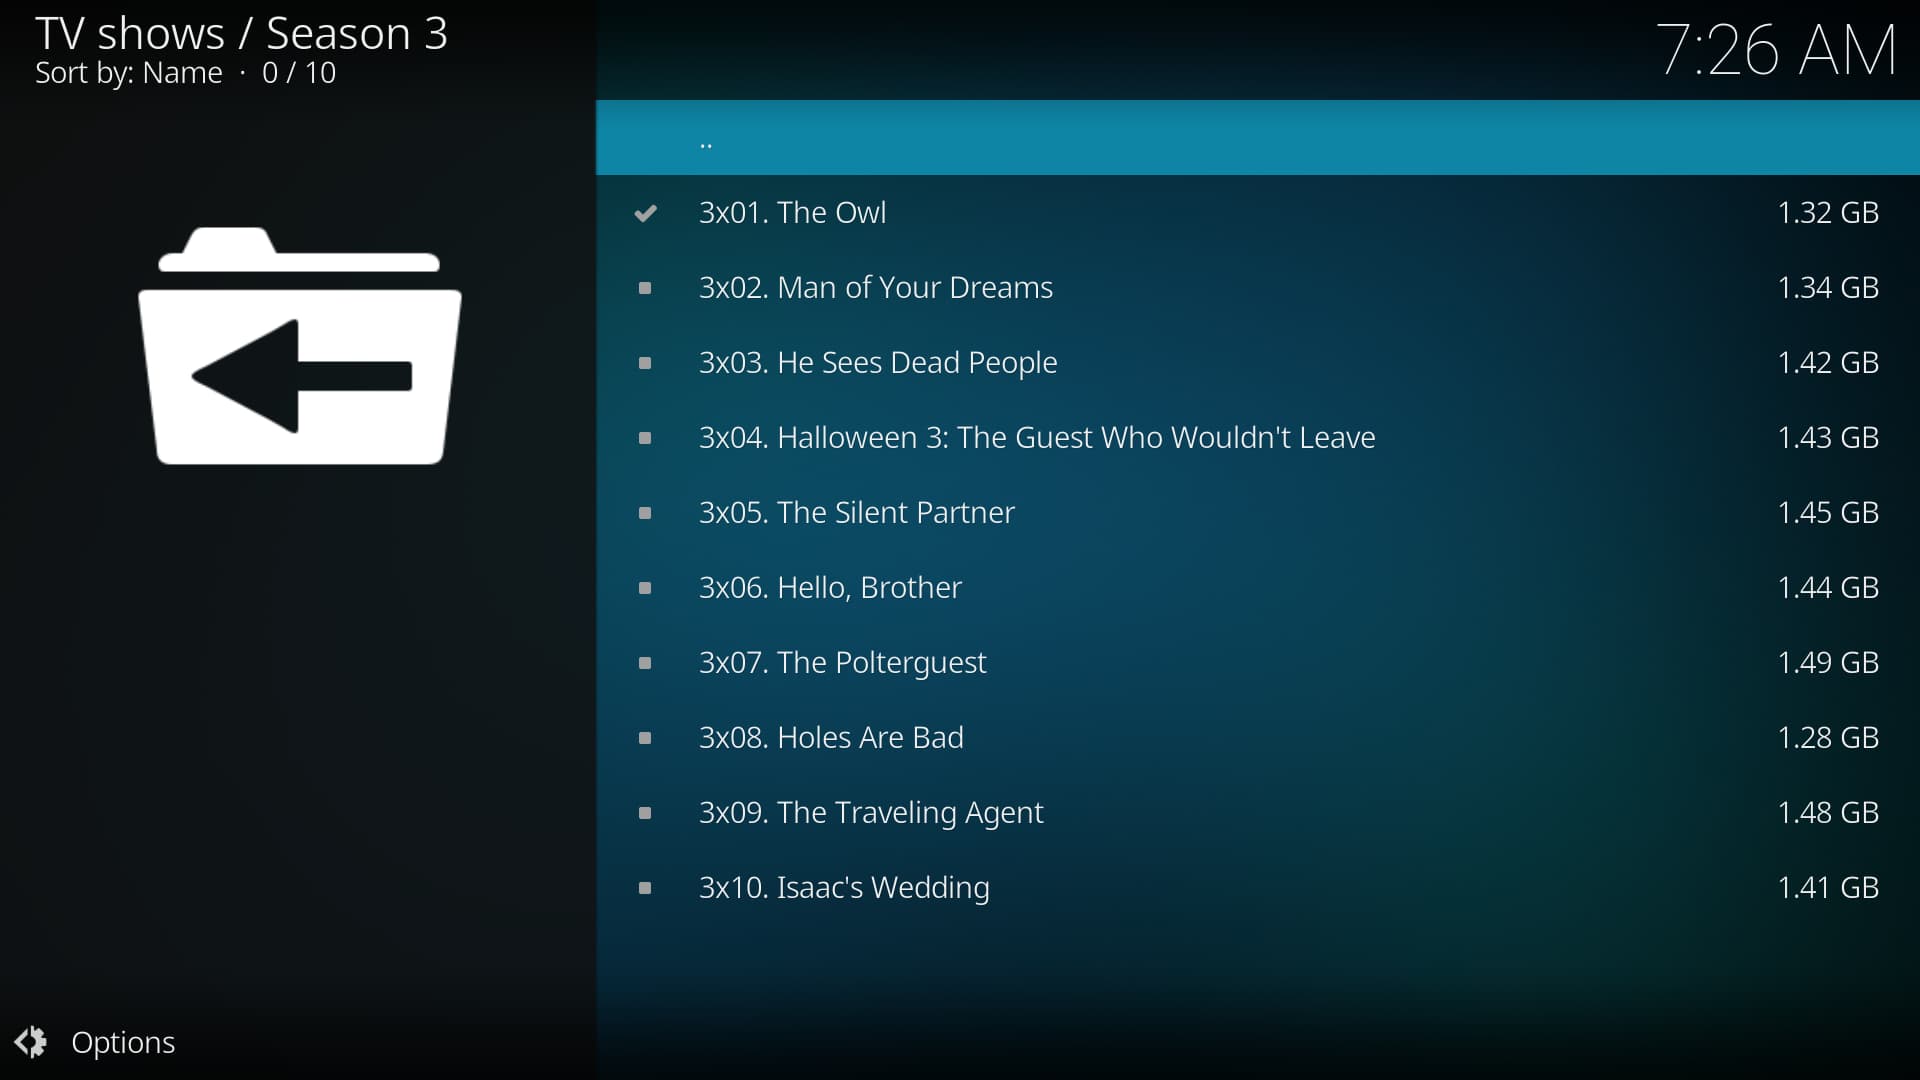
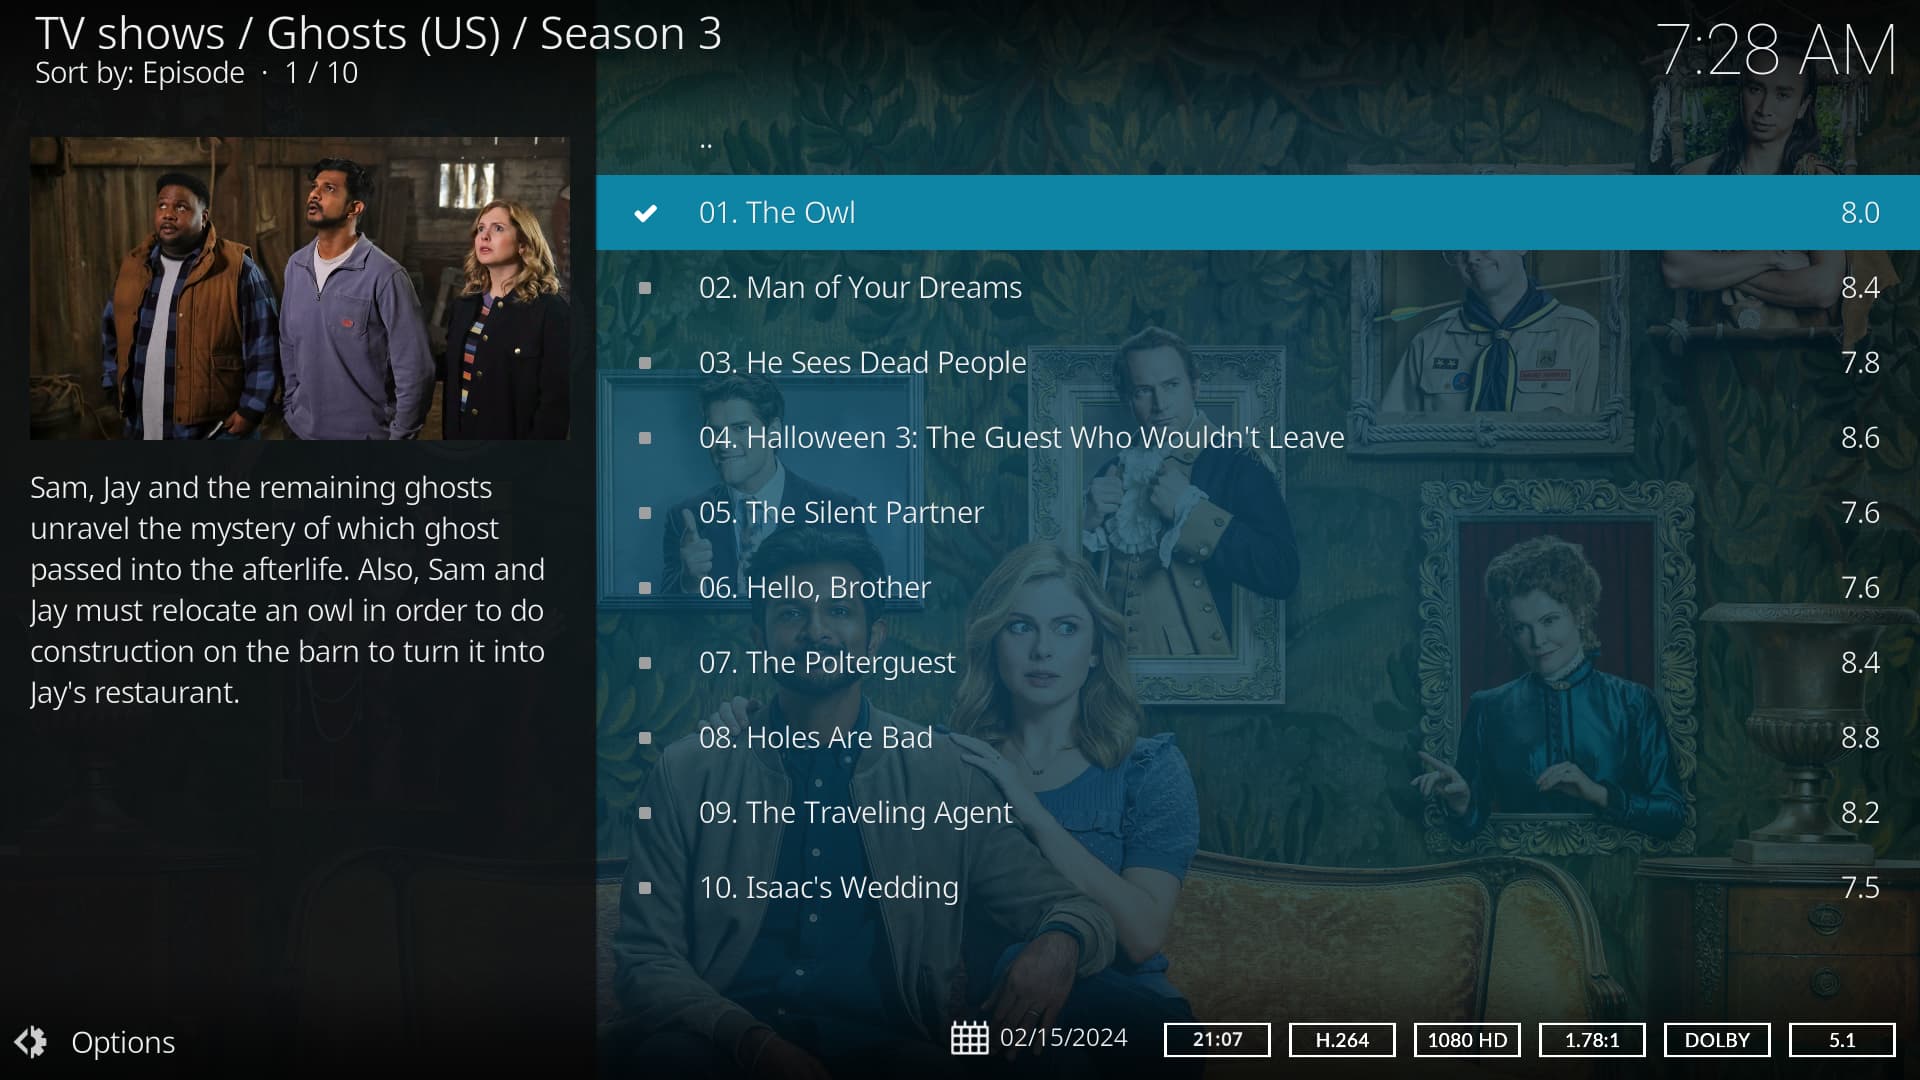
The main thing to having an easy experience adding a library is having your files named and structured in a way that Kodi can easily understand. Kodi is actually quite flexible but the main points would be…
Don’t nest sources
Name your movies with the same year and name as what the scraping site your using has.
Unless your movies are ALL in the file structure of movie name (year)\whatever.ext do NOT click the scraper option for “folder name matches…”. If you do check that box also make sure that there is no nesting of movies (ie sorting your movies in alphabetic folder names or putting multiple moves together in a folder for a collection or genre)
Keep any given series under a single folder structure using the exact name as the scraping site which probably does NOT include the year (Doctor Who excepted ). Note that some shows differ in how they list seasons and episodes between TVDB, TMDB, and IMDB. Don’t fight this, pick your scraper and rename your files to match.
Every episode should have in the file name s1e1, s01e01, or 1x1. There are other options but those are the most standard and the only part of the file name that the scraper is looking for. It does not try to match episode names.
Don’t nest sources
There are oddities that can come up, (DVD order, the need for a parsing nfo, etc) but I wouldn’t worry about any of that until you’ve got a library scrapped and are trying to figure out why some particular show isn’t scrapped correctly.
Well after a long and ‘exciting’ process I have finally got this Vero to do exactly what I want… for now. The tip that ‘Eternal Pessimist’ gave was spot on. I used his directions to add all my NAS drives and now have them all listed in the correct folders and in my favourites. I even have VERO kicking up direct into my favourites which lists all the NAS drives. This is all I wanted and so I will go away happy for now Eventually I will get into looking at what else this remarkable vero can do but for now I am happy that I can now turn off my ailing Med8er and use the Vero. I would like to thank everyone who has helped me, especially EP whose advice was spot on. Cheers,
What exactly was it that you found easier to understand and/or accomplish? Was it using UNC paths with credentials (ie \\user:password@source\share) or using file manager to avoid perceived complications with libraries and scraping? I’m genuinely interested to know as it isn’t the easiest thing to step into the mindset of someone completely new to Kodi after using it for so many years.
For a bit of extra info, the UNC path method also works entering sources for the library. Where you were going to add source and then browse you just move over to the box on the left and click and it lets you type in the address. Kodi will automatically strip the credentials and save them while creating a source using just the path. I didn’t mention it as an option as giving multiple options seems to confuse some people, and by going the long way round and browsing minimizes how much typing one needs to do.
I’d also suggest, as someone who has been using Kodi for a very long time, that using file manager instead of a library source is objectively a suboptimal option. I’d suggest that if you wanted to avoid the library, the proper setup would be to add the library sources as discussed earlier and just select “this directory contains - none” in the “set content” window when it pops up. This allows you to browse in file mode like with file manager but navigating from the home screen through “videos” instead. Sources configured like this will show all playable audio and video media types in file mode. However, configuring your sources in the library, even when they are not scrapped, gives you the benefit of file filtering so your not viewing any extra files your not going to be playing that may be present, and also gives you watched status. If you watched part of a movie and stopped it you will get an option to pick up where you left off. You will also be able to see what you have and have not watched.
Way over my head I’m afraid. All I know is that it works as i have it. I have a lot of home made clips as well as old TV recordings and various 4K clips. Vero plays them all so I am happy with that. I may get into it in detail like you mention in time, but for now i am content to just use it as it is, however one thing that cropped up is subtitles. In a few of the clips they are embedded in the TS file but do not show on playback. I am wondering if the Vero can extract and show these?? Not a big problem as most of my clips have permanent burned-in subtitles, (I am deaf so need subs)
OK Thanks. I cannot see where this screen settings set to view advanced is, but I have done the subtitles setting and subtitles are now viewable but they are very sparce, ie some of the conversations are missing. Any way to solve this?. Thanks for your advice. Barry
Sorry for all this. Yes it works fine. I had zoomed the picture to try and fill the screen (this is with an old video of DOS quality) and it had cut off the bottom. By zooming back out it brought all the subs into view. Cheers again.
Closed captions are what they are. They are literally a black and white image that is hidden in the data between video frames and when you turn them on the image gets overlaid on top of the video. What your seeing is what is there. I have no idea how the UK did their CC’s but in the US where I live I know there was a period of time where they were commonly typed out by a person live and the results were not always optimal.
The “solve” for this really depends on what exactly your source is. If the file is some popular enough TV show or movie then subtitles may be available on a site like opensubtitles.com. The wrinkle here is that if your have CC you probably have a broadcast recording and it is unlikely that the timing lines up very well, if at all. This could be adjusted with a subtitle editor such as “Subtitle Edit”, but the learning curve on that is steep. That program does also have audio to text capabilities built in so it does provide a one stop program to deal with any subtitling needs one has. I actually just tried it to satisfy my curiosity and the automatic audio to subtitle option worked shockingly good with just a couple clicks. I was going to suggest to do a general web search for text to subs but Subtitle Edit worked so well, and it is free, I’m not sure there is a better option to be had.
And one final note on external subtitles, they should be stored in the same folder as the video file, and named exactly the same as the video they are for with optionally a language tag slapped at the end. ie “This is a video.avi” would have a external sub titled something like “This is a video.eng.srt”
Yes, I am aware of the subtleries with subtitling. As I said, these particular videos; were sent out by a company in 1980-s so the subs were done then and are not bad, when viewed. The modern programmes I have SRT files for some of them. Some are the CC type you refer to embedded in the file.
The thing with subtitle generation is you have to be able to hear what is being said in order to check the pace and poisitioning etc. Not being able to hear anything, like myself, puts a block on that! I will download that subtitle edit nad install it over the weekend to have a play with
If not the closed captions but the rendering, is the issue you zoomed in the screen with your TV and they got cut off? There is options with 4:3 videos to have Kodi zoom in instead of doing it on your TV which would avoid the cutting off problem.
As for adjusting sub and hearing I did have that in mind. I’m familiar with the program and have used it without the sound on. It will draw a spectrogram and it shows the video. If one becomes familiar enough with the program it is quite doable to realign around commercial breaks. With the visual resync tool it would be trivial to get a good enough rough alignment to make preexisting subs work. And for personal use where one wasn’t looking to have a flawless translation, the audio to text removes the need to adjust anything. You just load a video, select the option and tell it to go. It spits out the subs and you just need to hit save and give it a file name. Really my only hesitation in recommending that program is I remember having a tough time figuring out how to use it initially so I assume others would as well.
I don’t know how far down the rabbit hole you want to go or where you source your media from , but a program called Bazarr will download and sync subtitles to a media file. It will show a percentage score of the match of sub to file which might be useful in your use case.
That sounds good. The auto-transfer of speech to text is what I am after, but so far have had little success. The best of these happen to be on youtube. Their auto-subs is quite good. Not perfect but good enough to tell you what is happening. I will have a look at the softwaree over the weekend.