I have been successfully using a portable USB HDD for my source for quite some time, but I want to go to either a NAS or maybe just use my old PC as a new source. Either way, I would have to change the Sources info on my 4K+. I had a heck of a time setting up the Sources for the HDD before.
Has anyone ever made a similar switch, and if so were there any lessons learned? Also, is the a “how to” for setting up sources besides the Kodi wiki?
First of all NEVER “change” a source. You have pretty much two options that will not cause you duplicates in your library and dead links. One option is to delete your sources and select the option to remove the items from your library. You then setup a new library from scratch with new sources. If you don’t want to lose any tweaks and watched status you can export your library (to individual files) before removing your sources. You would then make an advanced settings.xml file adding in the option to import watched status. At this point when you scrape in your library new it will retain your old art and info. The other option which can be much less involved is to just configure a new location with the content using the same relative file paths (ie setup network file share and copy over the content from your existing hard drive exactly as is) and then use path substitution to tell Kodi to use the new location. With this method you make one file and change nothing at all inside Kodi. You just reboot and everything stay as it was with the only exception being your files are being pulled from the new location. A howto regarding this method can be found at the following…
EDIT: If you completely remove a library to start from scratch there will be a lot of old artwork and possibly some dead links left behind. It may be prudent to manually delete the Thumbnails folder along with texturecache13.db and if you really want to have a clean setup the video and music db’s as well.
Thanks for the info. I’ll have to decide which way I want to go. When I first set up my sources, I had some trouble, and at one point, I got so fouled up that I detached the HDD, cleaned the library, and started over. If the only downside to starting over again is losing “watched” status and having to delete old artwork and dead links, I might lean toward that.
On the other hand, because the initial setup was so difficult for me, perhaps using path substitution might actually be easier. I don’t currently have a keyboard interface with my 4K+, but your directions show how to use SSH, which is new to me.
I guess a keyboard interface might make either option easier. I bought the 4K+ a few years ago, mostly to play multichannel, hi-res music, and it’s been mostly flawless. Other than setting up sources, which I guess is more of a Kodi thing, it’s easy to use, and that was/is its major appeal to me. I get a bit uncomfortable when I have to go beyond simple operations, but if I want to make the switch I’m thinking of, I suppose I’ll have to.
If your not all that comfortable navigating a command line there is the option to install samba server from the My OSMC add-on and then you would be able from a Windows PC just open File Explorer and in the address bar you type in two backslashes followed by the ip address of your Vero (it can be found in settings>system information) and this will give you access to manipulate Kodi’s userdata in a more familiar environment.
Also if you want the ability to work out a new setup without taking down your existing setup first you could add a second user (settings>profiles) and use that as a playground to work everything out. You could also install Kodi on a PC to do the same. Once you get something working how you want it is possible to copy settings around (UI settings between platforms excepted and this does require using the command line a little bit).
While this quite likely won’t be necessary, you may want to read up on how to mount remote shares at OS level:
If you decide to do this then you get the operating system to mount the remote share as if it were a local folder, and Kodi then thinks it’s reading from within the root file system. Doing this will result in faster data transfer - but obviously you don’t need data to be transferred from the NAS faster than the maximum bit rate of any of your videos, so it may well not be necessary.
I ended up connecting a larger HDD with the same folder structure instead of a NAS or PC. After Kodi detected the drive, I was able to edit the file path of all my sources. As far as I can tell, all I lost was the “watched” status of titles.
As far as I know, you can prevent the loss of the watched status. To archive this, you need to edit your advanced settings of Kodi. So when you re-import your database, the watched status is also recognized.
It is a bit more nuanced than that. If you don’t have nfo files then (with the exception of I think just one older version of Kodi) watched status is preserved when you refresh a library entry. If you do use nfo files Kodi 19 and earlier had a default setting to not import watch status from nfo files so if you exported your library to save watched status you had to change that setting via an advancedsetting.xml file to turn it on. As of Kodi v20 the default setting has changed to enable the import by default so this would not be necessary. However this comes as a mixed bag particularly for people who use a media manager to create nfo files but don’t bother keeping the watched status updated in them. With the old no import default you could refresh a library entry and watched status would stay the same as what was already in your database. Now for someone who makes the files when they add them and don’t update them a refresh will actually remove your watched flags. So in this case some people may want to add the old behavior back via advancedsettings.xml.
As for the OP’s watched status it is unclear to me what exactly was done. If the new drive was made to mount the same as the old and the folder structure was the same then there shouldn’t have been an issue or been in need of an edit. If the source was changed and the library redone then watched status is going to be lost unless an export to individual files was done prior to the swap (which saves the watched status in nfo files).
Losing the watched status was not a big deal for me. I use my Vero 4K+ mostly to listen to multichannel and stereo music and occasionaly to watch concerts or music videos. Knowing that I’ve listened to an album or watched a concert is not that important to me.
I considered using the path substitution method darwindesign explained above, but I’m not that comfortable working on the command line or with xml files. I decided to simply mirror my old HDD to my new one, run Clean Library with no HDD connected, and then connect my new HDD.
The funny thing is that, when I ran CL under Video, not much happened, and even less happened when I ran CL under Music. I thought that when I had done the same thing years ago when I was first setting up my Vero, it did much more and took longer.
At any rate, when I tried to access my usual video and music folders after connecting the new HDD, I was unable to do so. I found that the file paths for those folders still had the name of my old drive, so I simply went to each folder, selected Menu on the remote, selected Edit, and replaced the old drive name with the new one.
Everything seems to be working okay, so I’m satisfied, even though there might have been an “easier” way to do it.
When you directly attaching USB storage it gets mounted automatically to /media/[something] and that “something” is the drive label if it exists. Thus if you new drive isn’t made to mount using the same mount point the files will no longer be in the same place even if the folder structure on the drive is the same.
/media/old_drive/movies/some.movie/some.movie.mkv
is not the same file path as /media/new_drive/movies/some.movie/some.movie.mkv
Yes, that was easy enough to understand and address. I’m still not sure while Clean Library did not seem to function as I expected, but all’s well that ends well. Thanks for your help.
In times past Kodi would happily erase your entire library with the source was no longer present. This was a bit problematic as there were occasions where people had auto-clean turned on or just ran clean when they didn’t realize their storage was no longer accessible. At some point a check was put in where when a location was MIA it wouldn’t clean without a confirmation to help prevent this from happening. Maybe they went one step farther now, not sure, haven’t tested it recently. In any event, the better way to actually do what you did would have been to go to library>files and tell it to remove the source which would have popped up a question asking if you wanted to remove these items from your library. Once you have done that you would then add the new location as a new source.
Update: I currently have a 12tb external drive connected to my Vero 4K+ via usb. Periodically, as I add music and video files to my PC in another room, I physically connect the external drive to my PC and use a program called SyncBackFree to add the new files and delete files that have been deleted on the PC.
This process has worked well enough, but I’ve often wondered if I could just play the files from my PC via my LAN. Part of what has prevented me from doing so is my rudimentary knowledge of Kodi and streaming files over a LAN. I tried a test where I allowed streaming in the Windows Media Player on my Windows 11 PC. I successfully played 5.1 FLAC files on two blu-ray players (Oppo 103D and Sony X-800) in two different A/V systems in my house, but I was less successful playing M4A (Atmos) files or MKV video files. That makes sense for the Sony because those file types are not supported, but I have played both file types on the Oppo before from a usb drive, so I don’t know why it won’t play them over the LAN.
I would like to be able to play all these files on both A/V systems. To do so, I assume I’d have to have a media player in each system that can play all those file types. I already have the Vero 4K+ in one system. In the other system, I have a Fire Stick 4K Max and a Windows 10 PC, either of which I could set up Kodi on. If I can’t get either of those to work, I might get a Vero V.
Another approach that might improve and/or simplify my streaming on the LAN is to set up a NAS. The drive where my audio and video files reside on my Windows 11 PC is a QNAP 2-bay external drive enclosure with two 12tb drives in a RAID1 configuration. I recently bought a QNAP TS-262. If I keep it and set it up, I would back up the existing folders and files on my QNAP DAS, remove the two drives, and use them in the NAS.
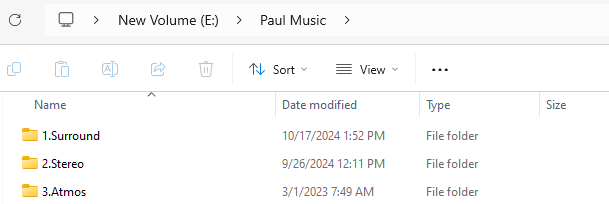
Another concern I have is that folder names and structures are slightly different on my DAS and on the drive I connect to the Vero 4K+, and I don’t know if one is better than the other. On my DAS:
*I don’t have any album folders in the 3.Atmos folder, although they’re labeled as “Atmos” in the 1.Surround folder. Would it help to move them to the Atmos folder?
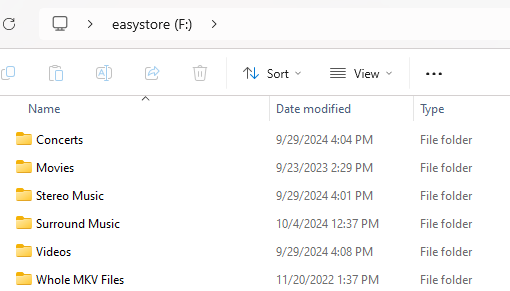
On my external drive:
*The video folders are in a “Video” folder on my DAS. From Kodi’s point of view, is it better to group music folders in an overall Music folder and video folders in an overall Video folder, or leave them separate?
When it comes to music files I don’t think Kodi cares as much about how you have your files layed out so much as what tags the files contain. Your best bet to have a trouble free Kodi music import experience is to run them through Musicbrainz Picard Kodi’s wiki is where I’d start for more complete info on the subject…
As for playback of multichannel FLAC files I don’t think there is any difference in capabilities there between a 4K and a V. I think most can be made to play in Kodi but you didn’t say what format the audio was actually in.You might try telling Kodi to play it with videoplayer instead of paplayer (context menu on file and select the “play using” option).
As for streaming over the network a PC or NAS doesn’t really make any difference to Kodi. Either way it is just some computer on the network using some protocol to share files.
I’m pretty thorough at tagging my files using MusicBrainz Picard, and I have no trouble playing 2.0, 4.0 and 5.1 FLAC files or M4A (Atmos) or MKV video files using my 4K+.
I probably wasn’t as concise and coherent as I could have been in my post, and I still have much to learn about streaming over a LAN, whether from a drive connected to a PC or from a NAS.
Okay, then. If there is no difference in file sharing over a LAN from a PC or a NAS in terms of performance or convenience with multiple Kodi media players, I might as well return the NAS unit and save some money.
If I choose to switch from USB HDD to a NAS, I’ll have to add the new sources for videos and music. However, I’m unable to remove the existing sources because, according to this thread and my own experience, because the existing sources are on a USB HDD, there is no “Remove” option for them:
Is that going to cause any problems, either with adding new sources or Kodi accessing them (Would they need to be named differently, etc.)?