1. Introduction
This article describes a setup of Tvheadend with the OSMC platform and the German AVM FRITZ!WLAN Repeater DVB-C which lets you watch live TV and handle private video recordings. Tested with
HW: Vero 4k + Raspberry Pi 2 B
OS: OSMC 2017.08-1
SW: Tvheadend Server (OSMC app) 4.2.0-3), Add-on PVR Client: Tvheadend HTSP CLient 3.4.27
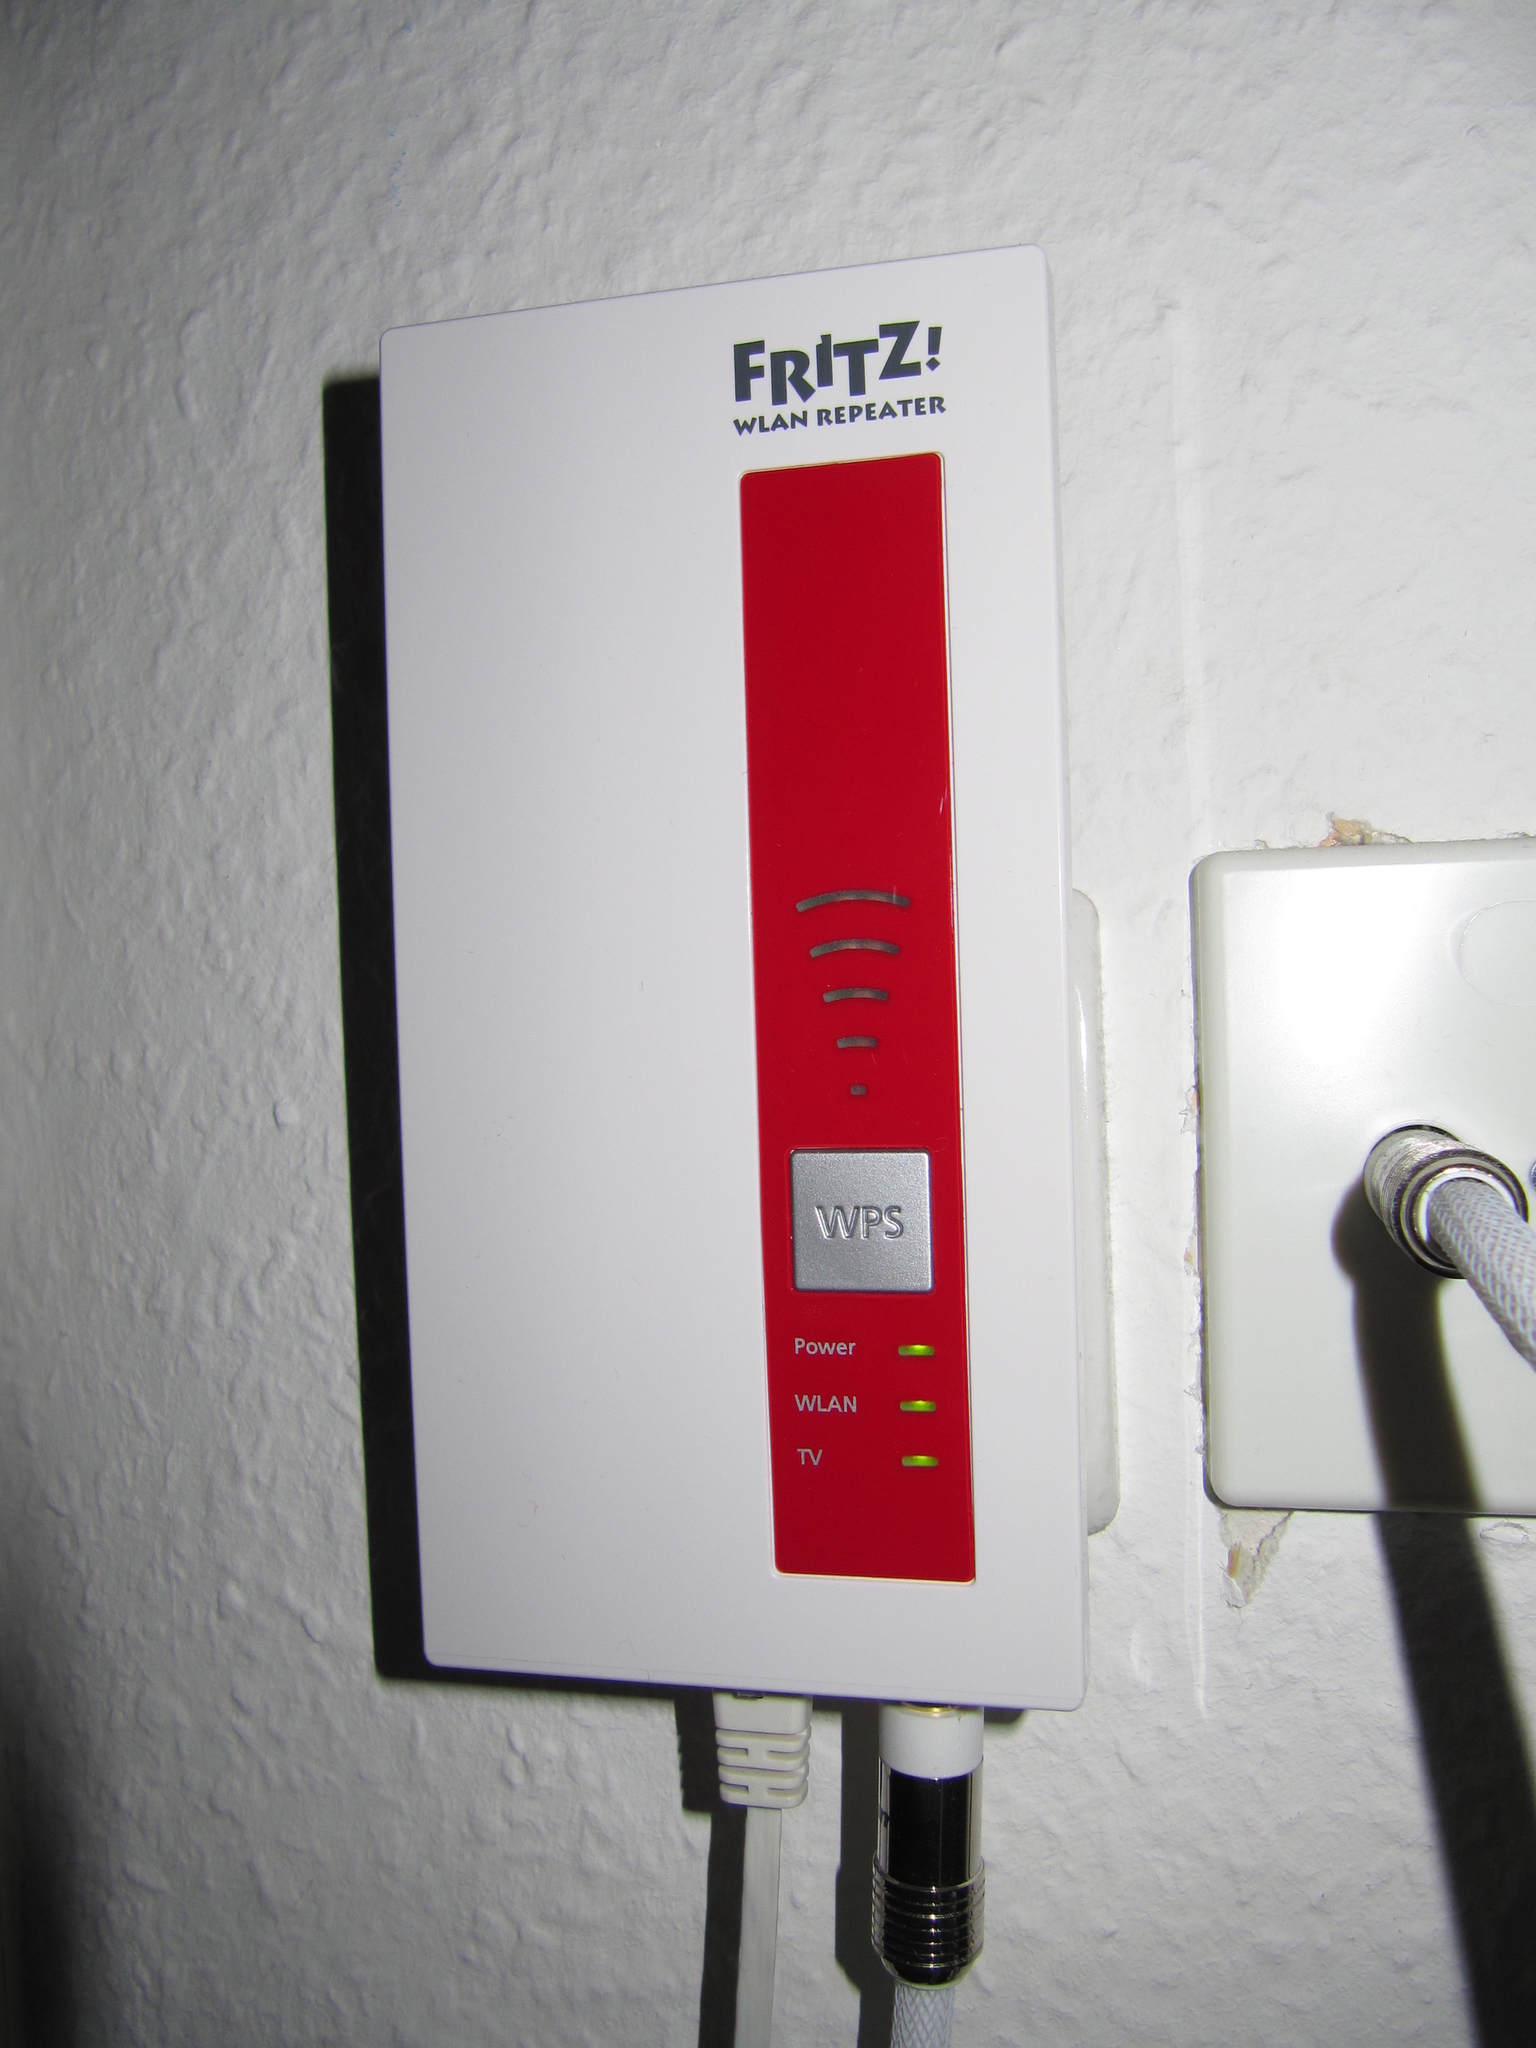
IPTV tuner: AVM FRITZ!WLAN Repeater DVB-C, FritzOS 06.51
The AVM FRITZ!WLAN Repeater DVB-C is a popular 2.4 and 5 GHz WLAN repeater in Germany with a Gigabit LAN connector and a dual DVB-C tuner which also works as Sat>IP server. It can operate in WLAN repeater mode as well as access point and provides IP TV via RTSP (real time streaming protocol).
2. Overview of Steps to Do
The following shows the sequence of actions to do for a typical configuration
- Scan for DVB-C Channels with the AVM DVB-C
- Prepare the Network of the OSMC Device
- Method1: Add an Additional USB-Ethernet Adapter
- Method2: Use the Built-in Network Interface
– Assign a Static IP Address to Your OSMC Device
– Assign Additional Static IP addresses to the Ethernet Interface
- Install, Activate and Configure Tvheadend
- Install the Tvheadend Server
- Install and Configure the Tvheadend HTSP Client
- Configure Tvheadend to Use the AVM DVB-C Dual Tuner
3. Scan for DVB-C Channels with the AVM DVB-C
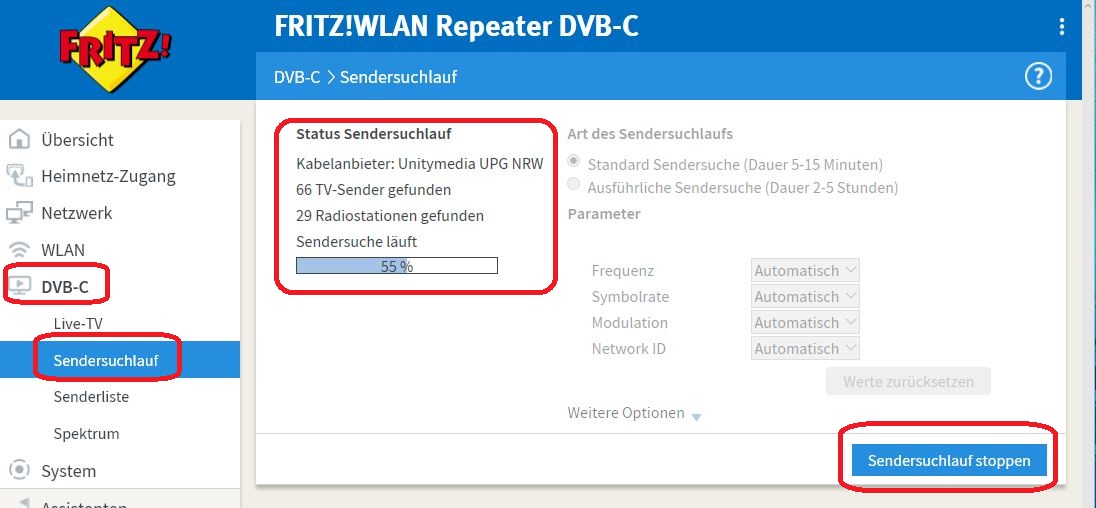
Configure your AVM DVB-C as described in the AVM User manual. Since the expected high bandwidth when using two parallel RTSP streams and the touchiness of Wifi of you have a lot of other SSIDs in your neighbourhood, we recommend to use the AVM DVB-C in the so called “LAN-bridge” mode. Start the station search in the menu DVB-C → Sendersuchlauf, see screenshot below
4. Prepare the Network of the OSMC Device
To fully operate the AVM dual DVB-C tuner you need to use at least two (2!) IP addresses assigned to your OSMC device otherwise the AVM DVB-C will only allow access to one of its tuners.
In this guide two methods are suggested:
-
Method 1: Add an Additional USB-Ethernet Adapter
This method is the simple one means there is only little to do. But it creates some costs since you require additional hardware: An USB-Ethernet adapter with typical prices around 10-15 Euro. Go to the chapter 4.1 if this is your preferred method. -
Method 2: Use the Built-in Network Interface
There are no additional hardware costs following this procedure but it is more complex since you have to reconfigure your OSMC device using static/fix IPv4 addresses. In this example we configure even three IPv4 addresses in OSMC: One for the device and two for the dedicated usage by Tvheadend with the DVB-C dual tuner. Go to chapter 4.2 if this is your preferred method.
4.1 Method 1: Add an Additional USB-Ethernet Adapter
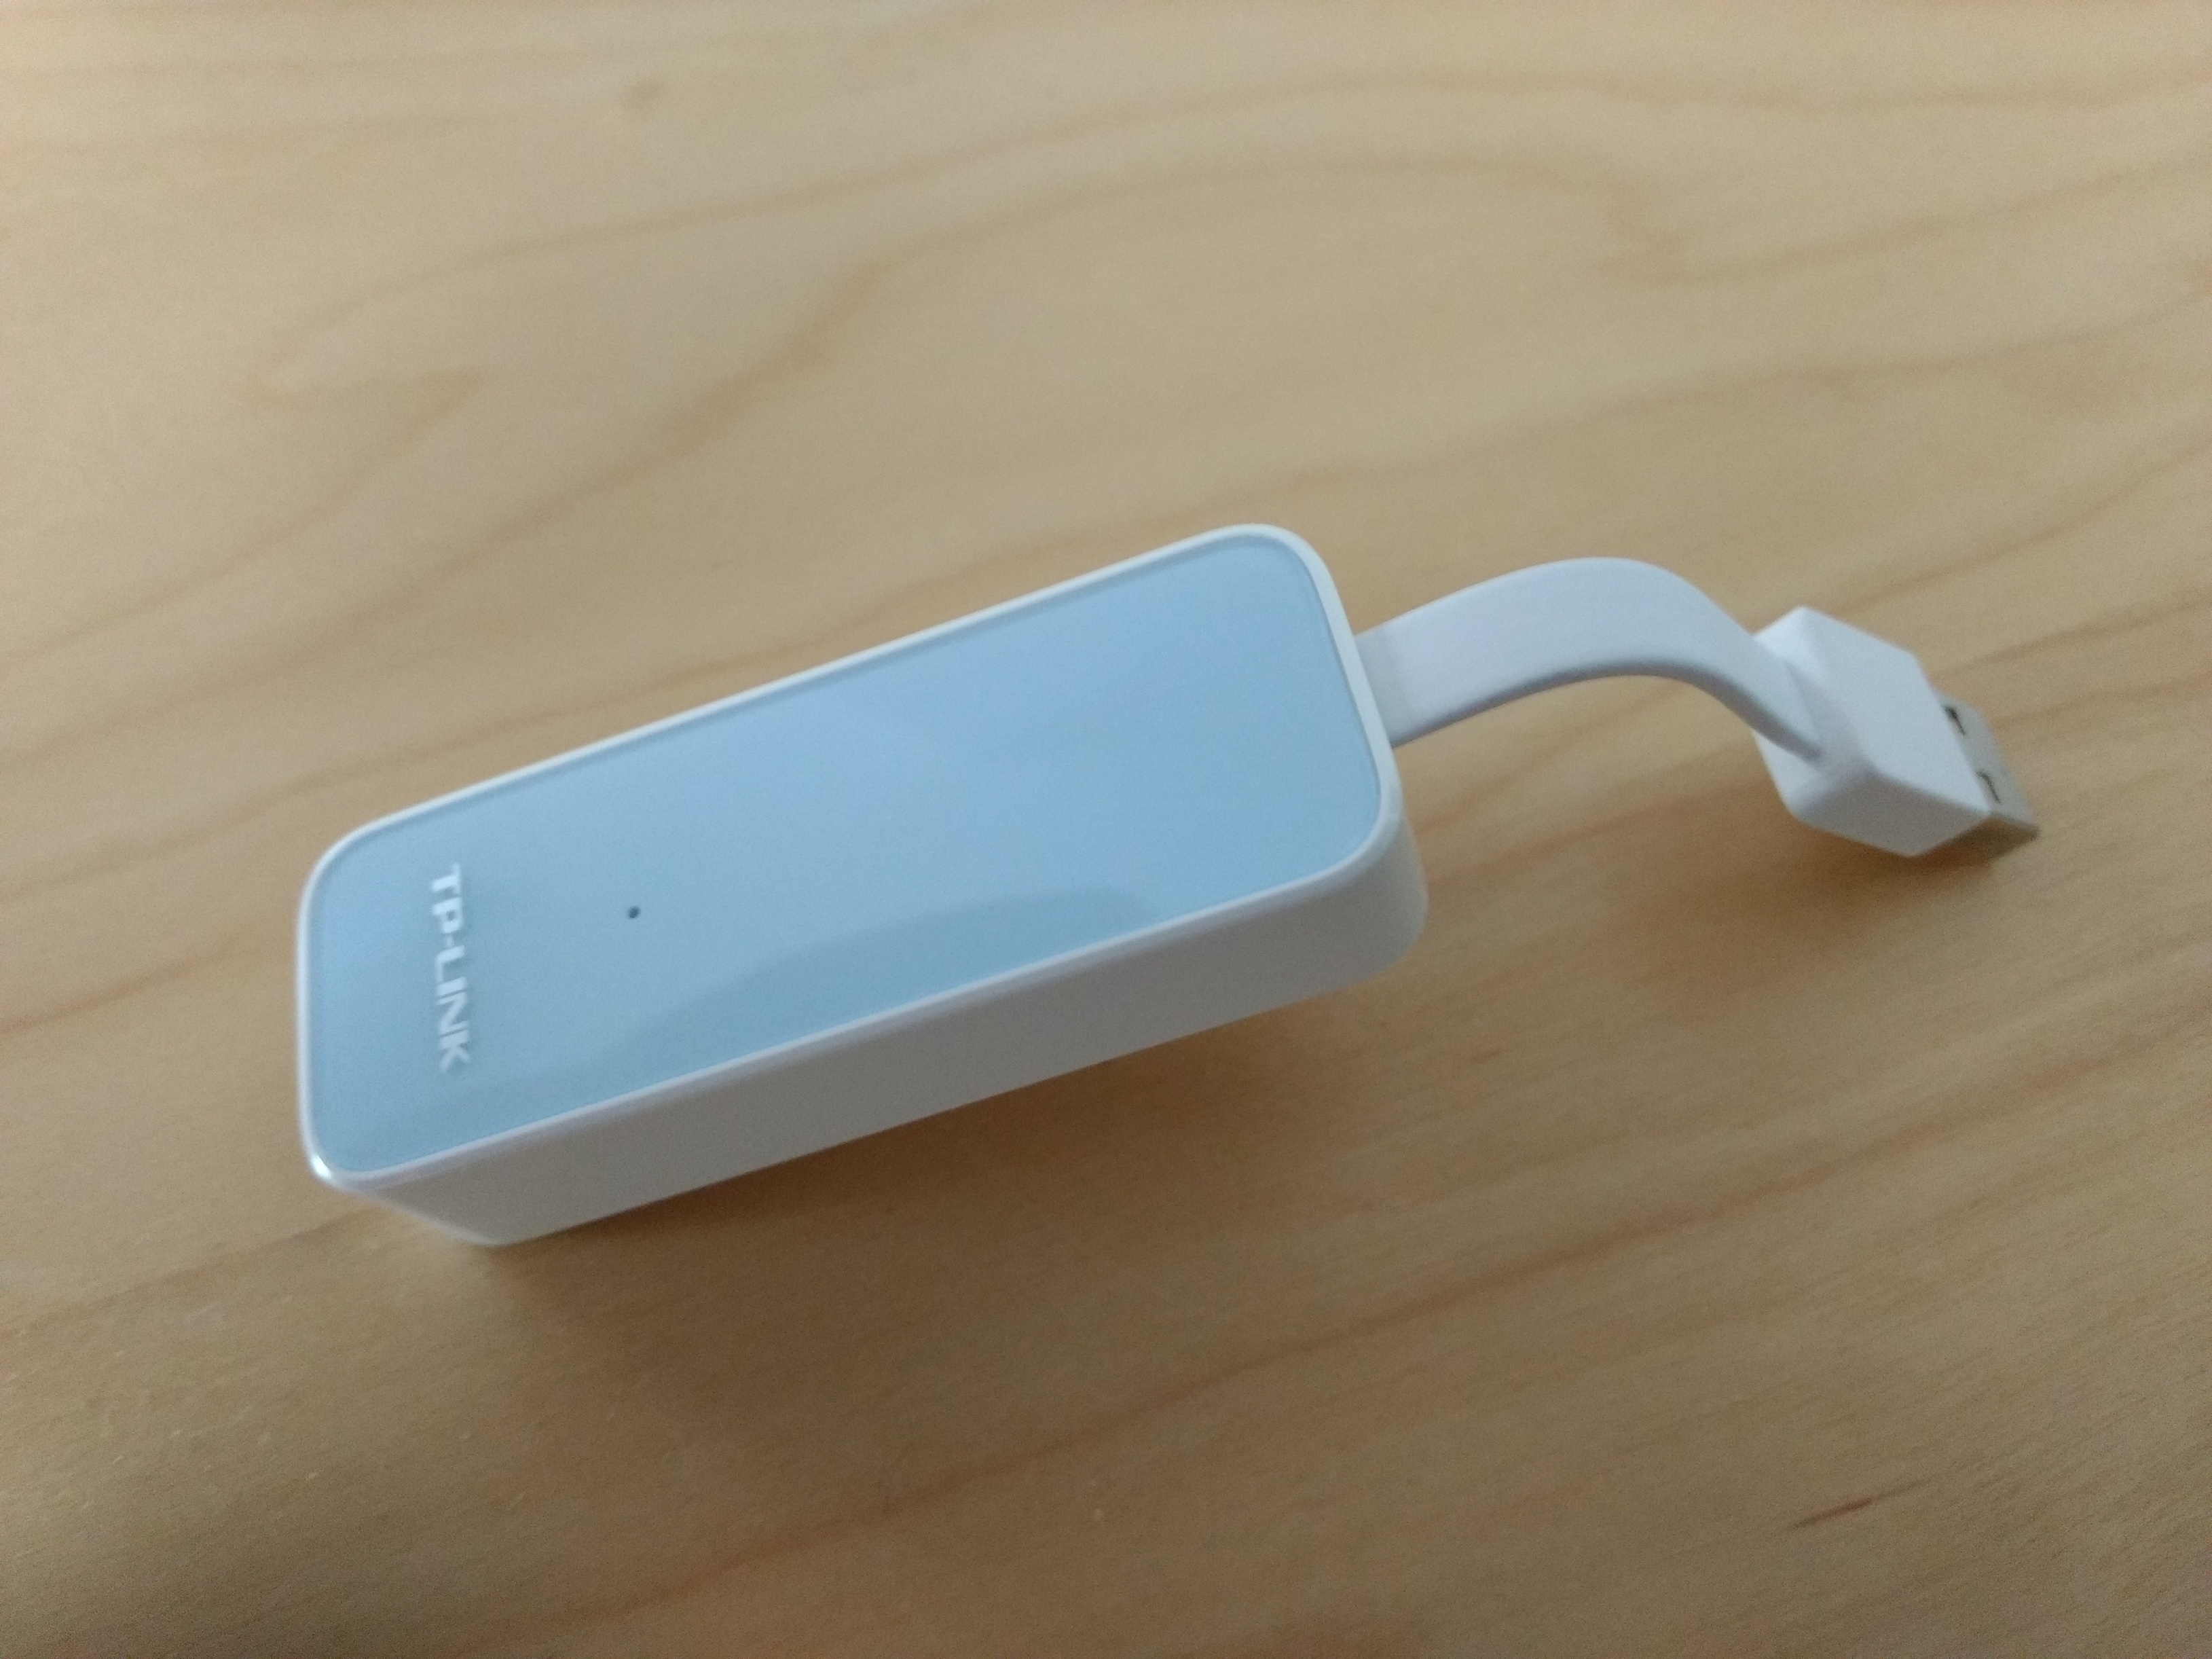
To get a second IP to work with Tvheadend and the AVM DVB-C you can simply plug-in a USB-Ethernet adapter to the OSMC device. In this example the adapter TP-Link UE200 was used which costs around 14 EUR that time. Later also an ** Anker USB 3.0 to RJ45 10/100/1000 Gigabit Ethernet Adapter** made an excellent job. It is assumable that the most USB-adapters working correctly with a Raspberry Pi also will function well with OSMC Vero hardware and software, see this link for a possible list.
After inserting the adapter and connecting to your intranet, your DHCP server should automatically assign a new IPv4 to this new Ethernet port but you have to care about the following topics:
- You have to configure your SOHO (Small Office Home Office) router to always assign the same IPv4 addresses to the OSMC device on the DHCP requests. For example in typical German AVM Fritzbox routers’ Web UI go to Heimnetz → Heimnetzübersicht → Netzwerkverbindungen and edit the both entries for your OSMC device. Set the flag Diesem Netzwerkgerät immer die gleiche IPv4-Adresse zuweisen. If you use another router vendor, look into the technical documentation how to do this with this router device.
- Write down the two IPv4 addresses your router always will assign to your OSMC device. It might be that your router does not display the correct IPv4 addresses but two identically ones. So do the AVM routers. For this try the following steps:
- Temporary disable the wired network of your OSMC device: In the OSMC TV user interface go to My OSMC → Network and disable the wired adapter(s). DO NOT LEAVE THIS MENU! This should send DHCP releases and stop sending any IP packets.
- Wait some time and then look into your routers Web user interface to identify the different IPv4 addresses used for your OSMC device. The ARP cache influencing the AVM Fritzbox routers’ display of the network devices will be cleaned/refreshed after 10 minutes latest.
- Enable the wired network of your OSMC device, again: In the OSMC TV user interface menu My OSMC → Network re-enable the wired adapter(s).
Go to Chapter 5 from here.
4.2 Method 2: Use the Built-in Network Interface
Using only the built-in network interface means that you have to change the OSMC network configuration to switch to a static/fix IPv4 one and require to use proceed command line actions.
4.2.1 Assign a Static IP Address to Your OSMC Device
A lot of SOHO (Small Office, Home Office) routers used in private environments have a problem handling DHCP for devices which requires/uses several IP addresses with the same MAC address, so also do the AVM’s FritzBoxs.
For this you should assign a static IP out of the pool of non-DHCP addresses of your router which is for example the address range
192.168.178.3 - 192.168.178.19
for the most current AVM routers by default.
- Attention: The addresses
192.168.178.1and192.168.178.2are used by some AVM devices as default IPv4, do not try these. - Attention: The pool
192.168.178.201 – 192.168.178.253is also a default non-DHCP range for the most AVM routers but will be used for VPN configurations, so do not use these addresses on such routers as long as you intent to use AVM’s VPN stack.
Attention: The IPv4192.168.178.254is an emergency access address for some AVM devices, do not touch this.
If your router is made by another manufactorer than AVM, research with the specific technical documentation what IPv4 you can use as fix/static IPv4.
In this article the following addresses
192.168.178.10,
192.168.178.11 and
192.168.178.12
exemplify the free fix/static IPv4s to use for the OSMC device.
4.2.1.1 Get the connman service name
First find out the connman service name of your OSMC device’s ethernet interface, so login into to your OSMC device using SSH, user osmc, password osmc:
# sudo connmanctl services
*AO Wired ethernet_b827eb104af3_cable
ethernet_b827eb104af3_cable is the service for the cable ethernet interface. The number (which is the MAC address of the LAn interface) is different on your OSMC device.
4.2.1.2 Get Current Network Configuration Parameters
Get out important current values from your network configuration (of course take your specific cable ethernet service), just an example:
# sudo connmanctl services ethernet_b827eb104af3_cable
From the output make notes about the used
- ethernet interface
- ethernet address (MAC address)
- current IPv4 gateway and netmask
- current nameserver
- current timeserver
- current domain
4.2.1.3 Set the Static/Fix IPv4 Network Configuration
Set the static network parameters. In the local example, I used
- IPv4 192.168.178.10
- netmask 255.255.255.0
- gateway 192.168.178.1
- nameserver 192.168.178.1
- domain fritz.box
Steps to do
# sudo systemctl stop mediacenter (stop kodi)
# sudo connmanctl config ethernet_c44eac0fdfc5_cable --ipv4 manual 192.168.178.10 255.255.255.0 192.168.178.1 (this is one command line, adapt to your Ethernet service and static IPv4 to use)
Now the OSMC device is unreachable from current SSH session and you need to re-initiate a new SSH session to the new IP address given.
# sudo connmanctl config ethernet_c44eac0fdfc5_cable --domains fritz.box (set the domain like before)
# sudo connmanctl config ethernet_c44eac0fdfc5_cable --nameservers 192.168.178.1 (set the nameserver like before)
# sudo shutdown -r now (reboot the device to be sure)
4.2.1.4 Verify and Correct Router Configuration if Neccessary
It might be necessary to correct the settings for your OSMC device in your router; check there whether the correct MAC for this device name is mapped to the new IPv4 address, so the internal routers nameserver can work correctly as well.
It might be necessary to disconnect the ethernet cable from the OSMC device, reboot your router, delete old entries in the router for the OSMC device MAC and create a new manual configuration for the static IPv4, MAC and name to use. Don’t forget to reconnect the ethernet cable, again.
4.2.2 Assign Additional Static IP Addresses to the Ethernet Interface
Since the net-tools package seems to get more and more obsolete with Linux distributions, we need a way to configure additional IPs with other commands than ifconfig which was a child’s play in the past. Here the iproute2 package with the ip command was chosen to be a good replacement.
4.2.2.1 Installation of the iproute2 Package
If not already done, we need to install the iproute2 package, login using SSH:
# sudo apt-get update
# sudo apt-get install iproute2
4.2.2.2 Setup a New systemd Service Unit ip-aliases
In this guide two further static IPv4 addresses are used for dedicated connections between Tvheadend and the AVM DVB-C device. For this we need two further unused IPv4 addresses out of the non-DHCP (and non-VPN) pool which are 192.168.178.11 and 192.168.178.12 in this example environment.
Now create a new file /etc/systemd/system/ip-alias.service with the following content
[Unit]
Description=Create alias IP addresses
After=connman-wait-for-network.service
Requires=connman-wait-for-network.service[Service]
Type=oneshot
ExecStart=/bin/ip addr add 192.168.178.11/24 dev eth0
ExecStart=/bin/ip addr add 192.168.178.12/24 dev eth0[Install]
WantedBy=multi-user.target
The editors nano and/or vi are appropriate tools to create this file. As you can see the ethernet interface eth0 from the output of the connmanctl services command above is used to add the additional IPv4 addresses, the subnet mask is specified in CIDR suffix notation namely /24 instead of the classic Dotted Decimal Notation 255.255.255.0.
Enable this new system service and reboot your OSMC device
# sudo systemctl enable ip-alias.service
# shutdown -r now
Afterwards login again using SSH and check whether three IPv4 addresses are now active for the LAN interface:
# sudo ip addr
…
link/ether c4:4e:ac:0f:df:c5 brd ff:ff:ff:ff:ff:ff
inet 192.168.178.10/24 brd **192.168.178.255 scope global eth0
   valid_lft forever preferred_lft forever
inet 192.168.178.11/24 scope global secondary eth0
   valid_lft forever preferred_lft forever
inet 192.168.178.12/24 scope global secondary eth0
    valid_lft forever preferred_lft forever
You’re done with the reconfiguration of the network! Your OSMC device’s ethernet LAN now has three bound IPv4 addresses.
5. Install, Activate and Configure Tvheadend
Tvheadend is a client-server implementation and consists of two parts. The server is responsible to transform the source stream (here with the AVM repeater based on RTSP, Real Time Streaming Protocol) to another namely HTSP (Home Tv Streaming Protocol).
It also implements functions like pvr, network, mux and channel coordination and maintenance.
The client always understands the HTSP streaming protocol and transforms the HTSP data stream for the target device.
5.1 Install the Tvheadend Server
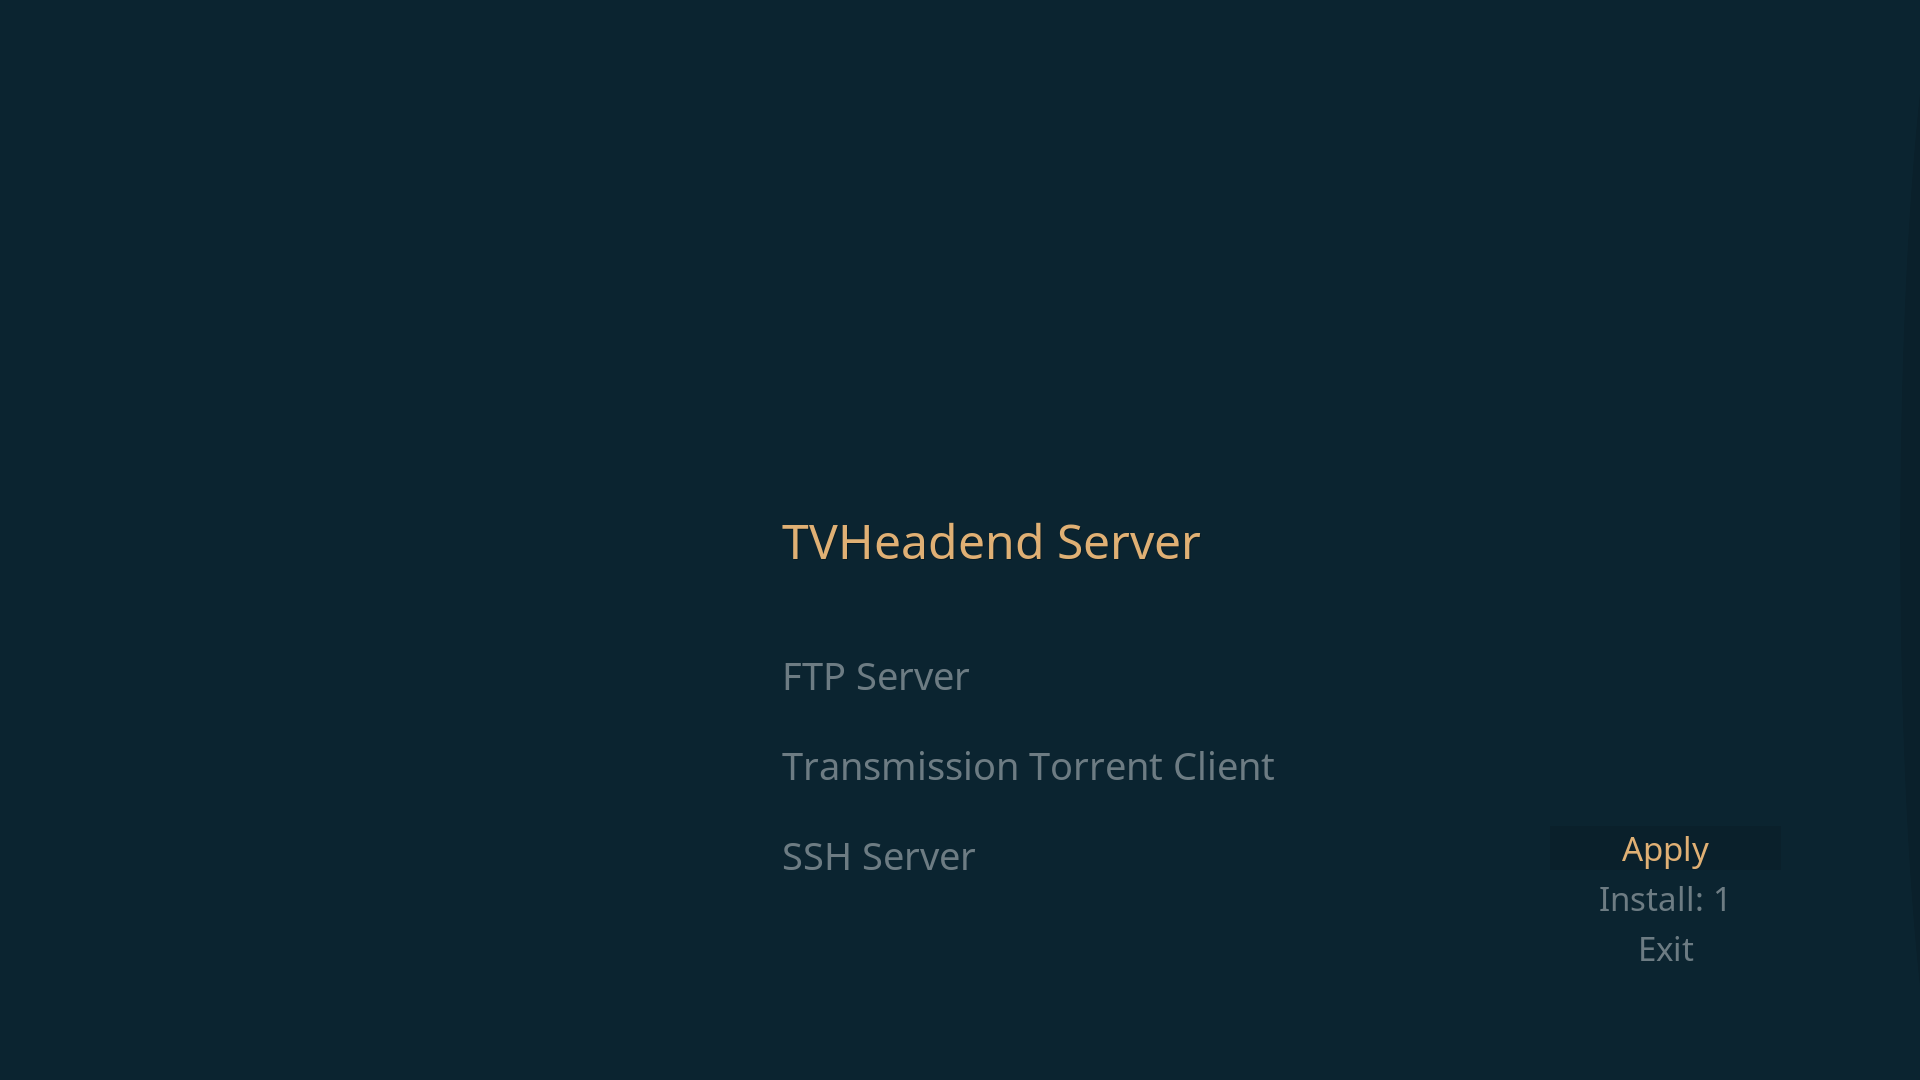
In the OSMC desktop GUI goto My OSMC → App Store and install Tvheadend Server
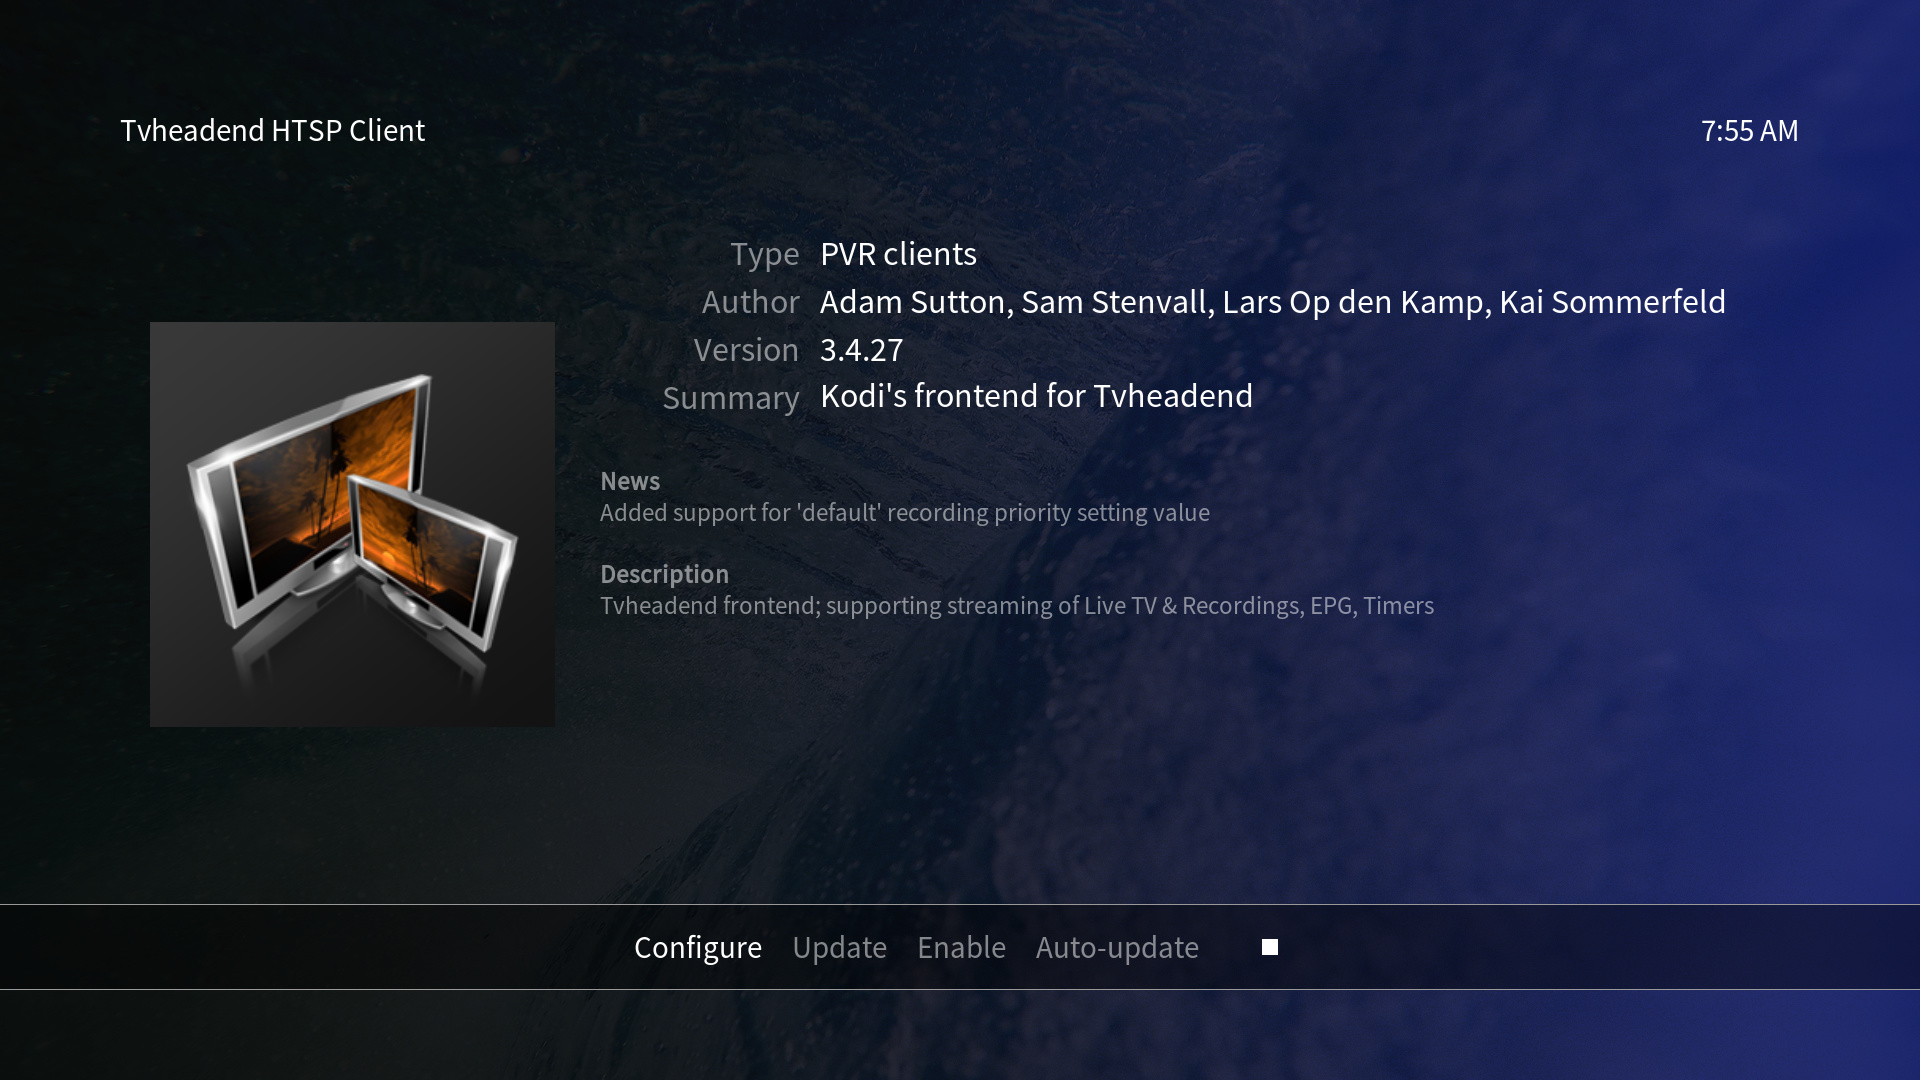
5.2 Install and Configure the Tvheadend HTSP Client
In the OSMC GUI goto
Settings->Add-ons → Add-on-browser → My add-ons → PVR clients → Tvheadend HTSP Client and Configure the user/password osmc/osmc in Connection Settings.
Since there seems to be a bug in Tvheadend using timeshift when EPG information changes, activate the flag Asynchronous EPG Transfer in the Advanced Settings.
Afterwards Enable the software add-on. Be sure the Auto-update flag is active.
5.3 Configure Tvheadend to Use the AVM DVB-C Dual Tuner
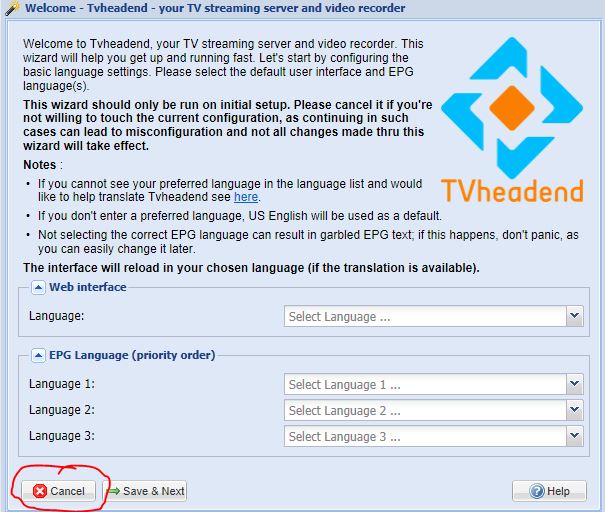
By default Tvheadend will be configured using the web interface at port 9981, so open the following link with a browser http://<IPv4/DNSname of your OSMC device>:9981.
You should be asked for a user and password which is osmc/osmc.
Cancel the setup wizard if it pops up.
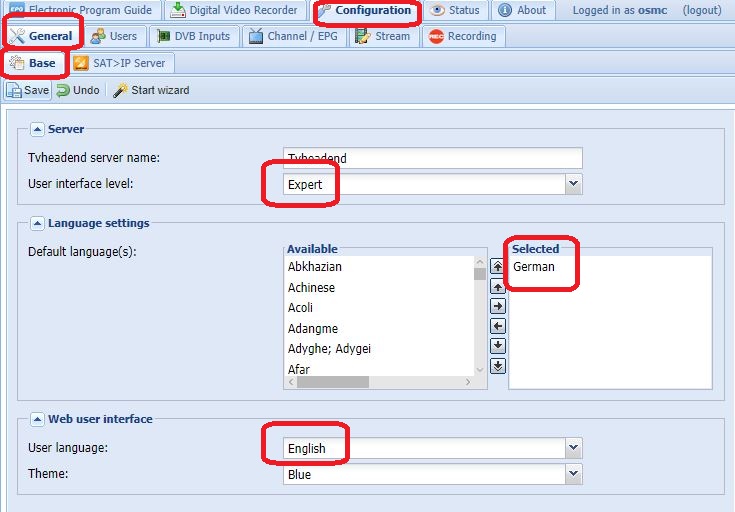
Go to Configuration → General → Base and save the expert mode and your preferred languages as shown in the screenshot below.
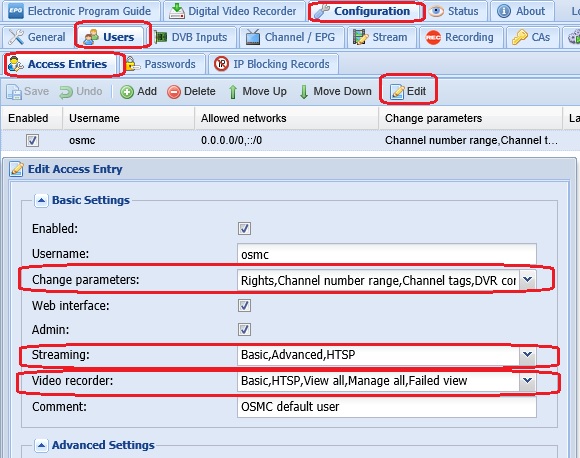
Go to Configuration → Users → Access Entries and edit the user entry osmc by giving all flags in the fields Change Parameters, Streaming and Video Recorder. (These missing flags took me nearly half an hour to locate the root cause why the local recordings cannot start and half a day to understand why pressing the button Play program in the web GUI again and again asks for user credentials instead of simply providing the m3u file so one can watch/play the program with the VLC client! The Watch TV button in the web GUI will not work since the most browsers are missing features to demux and decode the provided stream.)
Now it is up to configure the AVM DVB-C Tuner hardware.
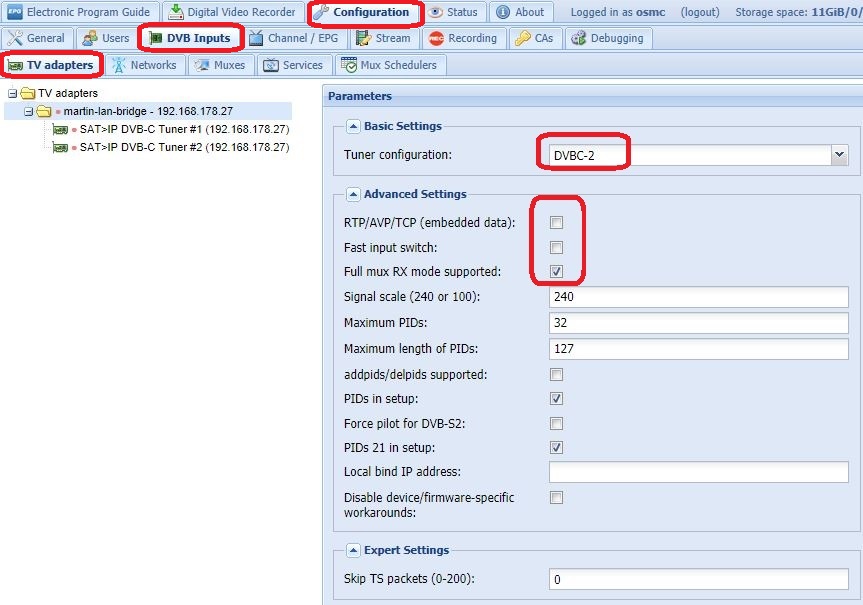
Go to Configuration → DVB Inputs → TV Adapters and you should see that the AVM DVB-C device was already found. This is since the AVM DVB-C supports SSDP (Simple Service Discovery Protocol based on UPNP).
Choose the right tuner type DVBC-2 and set the flags as shown below. DO NOT try flags like
RTP,
Fast Input Switch or
addpids/delpids
… it will not work.
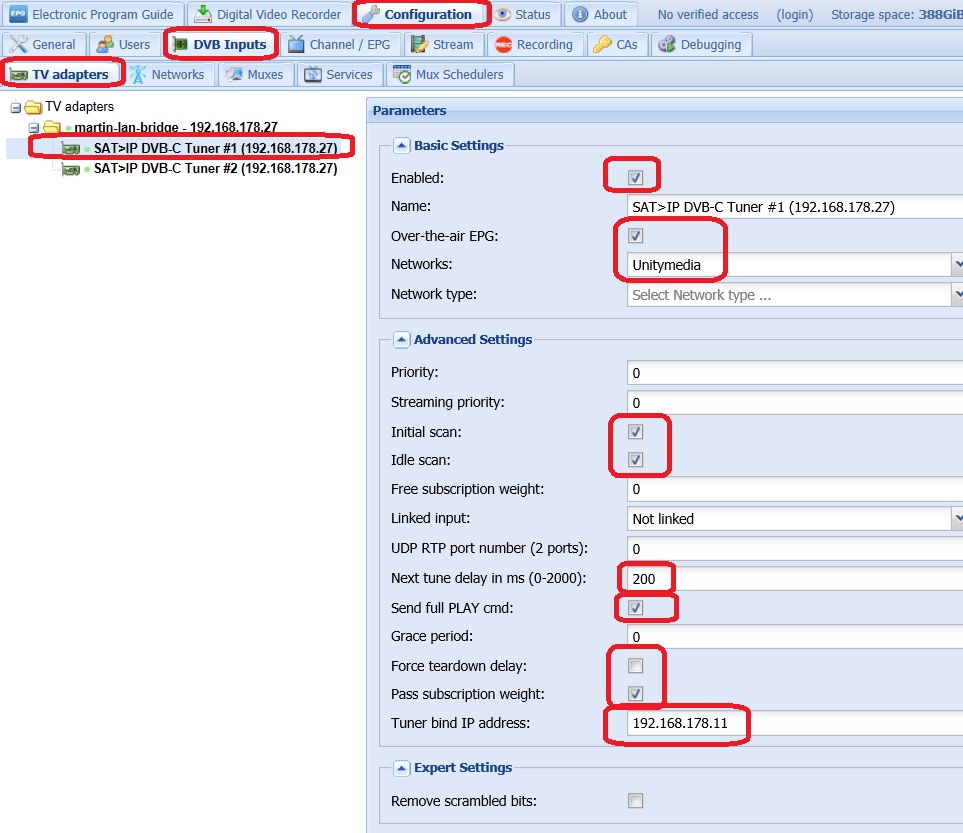
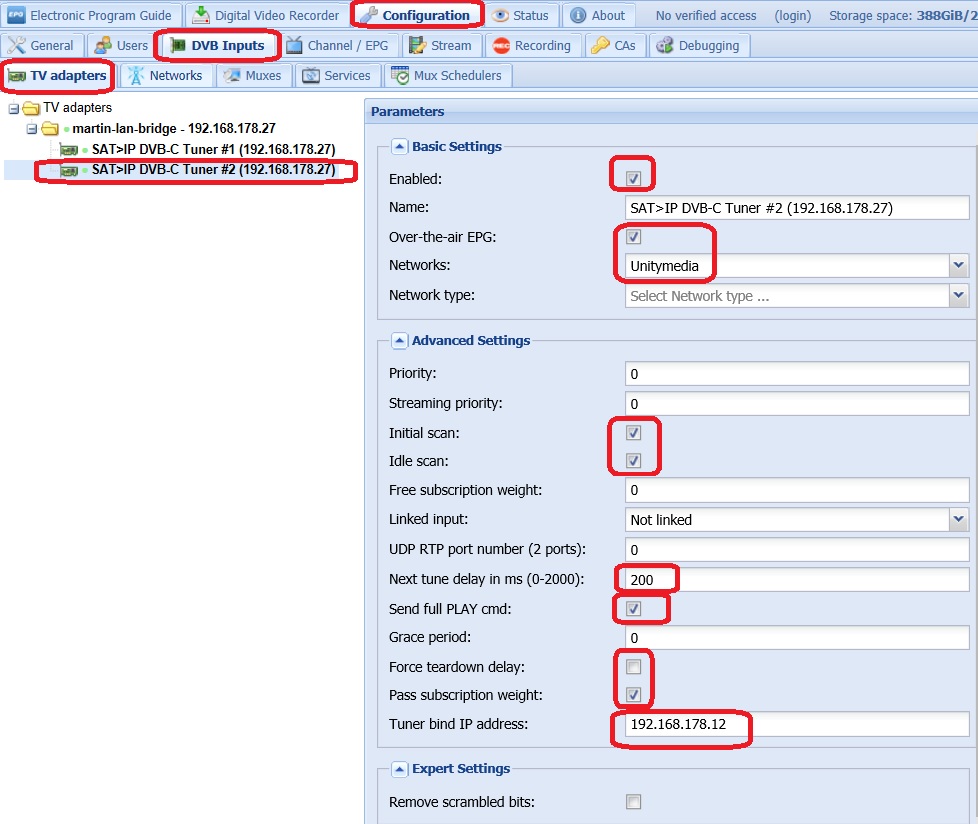
Open the both Sat>IP tuner entries at Configuration → DVB Inputs → TV Adapters and set the flags as shown. Do not forget to correct the next tune delay value and of course bind different fix IPv4 addresses to each Sat>IP tuner. In this example we assume to have prepared IPv4s 192.168.178.11 and 192.168.178.12 in the network chapter above either by having used method 1 adding a USB-Ethernet adapter or used method 2 by manually bound two additional IPv4 addresses to the OSMC device:
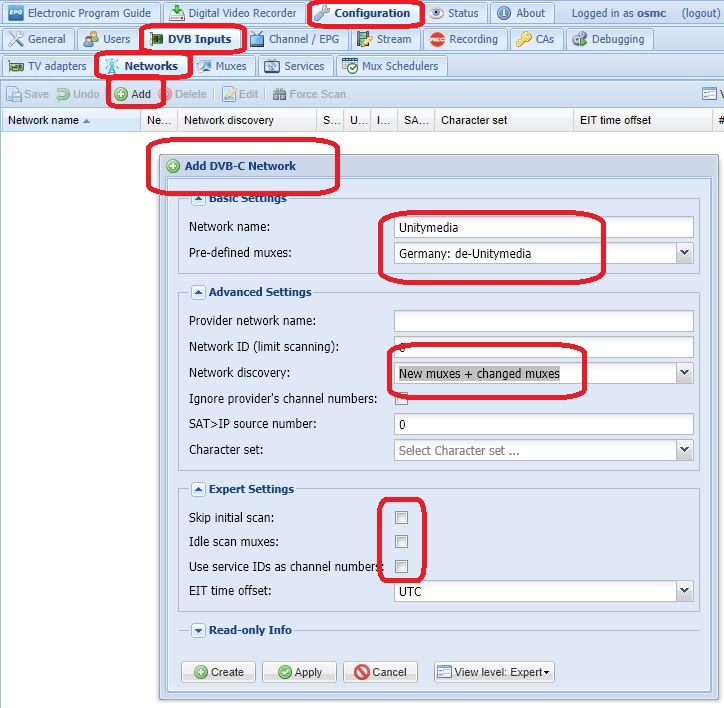
Next, we need to create a network where all the later muxes, services and TV/radio channels are hosted.
For this go to Configuration → DVB Inputs → Networks and create a DVB-C one with the following settings (choose the correct pre-defined muxes template according to your cable provider). If you do not want your OSMC device scan all muxes on reboot, set the flag Skip initial scan.
The DVB-C tuners have to be bound to this new network, so go to Configuration → DVB Inputs → TV Adapters and assign the new network to the both tuners , see

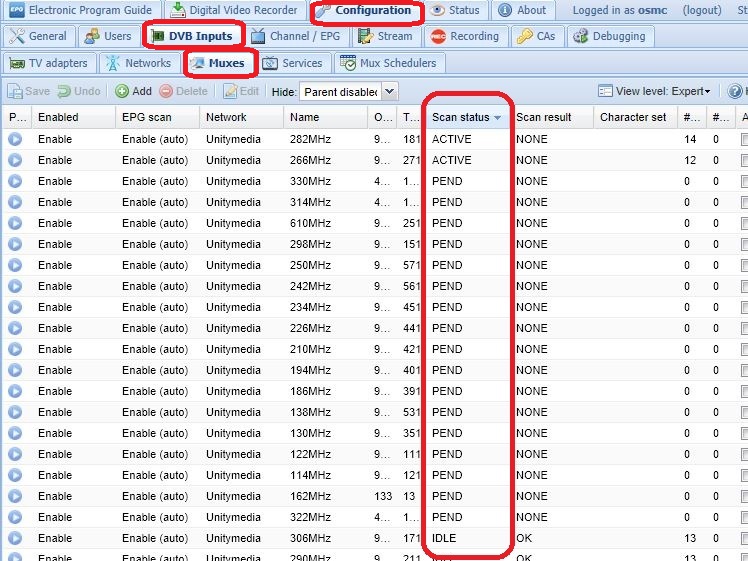
Go to Configuration → DVB Inputs → Muxes and wait until all muxes have got state IDLE. Be patient, it last some minutes until the scan for new and changed muxes will start. After the scan completed, remove all failed muxes since they were in the chosen pre-defined template but not contained in the real NIT (network information table) every mux should transmit as well.
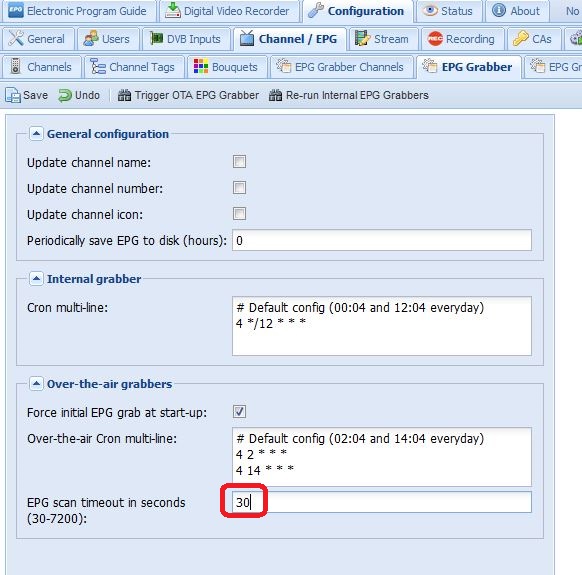
Go to Configuraton → Channel EPG → EPG Grabber and reduce the EPG Scan Timeout to 10 or 20 seconds, so the complete EPG grabbing process will not take ages. Tests showed in my environment with Unitymedia cable provider, that there is no difference in number of EPG entries with 10 and 20 seconds timeout setting.
In a last step assign all valid services (here all unencrypted) a programm channel you can use afterwards within OSMC GUI for Live TV and Radio. Go to Configuration → DVB Inputs → Services and choose Map All Services with the following settings:
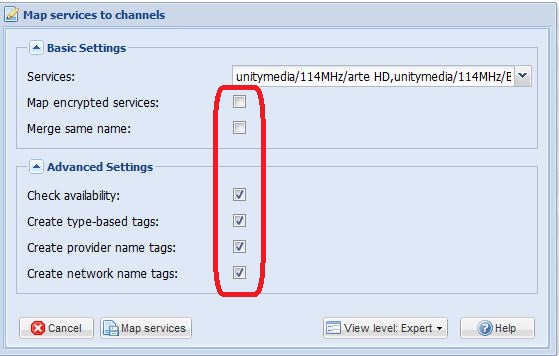
Do not use the Merge same name flag otherwise the channels could have missing TAGS!
Wait for the completion of this process:
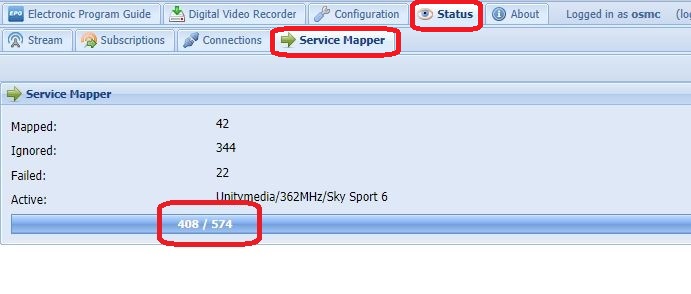
When this is done, all TV and Radio channels are setup and the EPG collection should have already started.
This article should demonstrate how to setup Tvheadend with the AVM Fritz!WLAN Repeater DVB-C on the current OSMC platform.
Other interesting topics regarding Tvheadend you should research in other htreads and forums.
6. Tips and Tricks
-
At Configuration → Recording → (a profile) you should at least configure the fields
pre-recordings padding,post-recoding paddingandRecording system pathto make your PVR work. -
If you want to make your recordings to a NAS you should think about the small network bandwidth your OSMC device might have. A Raspberry Pi or Vero 4K only got a Fast Ethernet interface with 100 mbit/s throughput capability, so it could be critical if you try to record two full HD programs in parallel since you now have four (4!) streams on the LAN: Two input streams from the AVM DVB-C and two output streams to the NAS. To avoid such trouble if not using an additional USB-Ethernet adapter, you should do the recording to a local device (large and fast USB stick or a external HDD/SSD connected to an USB port).
-
Channel logos within OSMC+Tvheadend: There are quite a lot of explanations you can find in the internet with instructions how to do that. Here a short description what I did: The AVM DVB-C provides you all the logos already on its web user interface at DVB-C → Senderliste, simply right-click on each and save the PNG to a directory the OSMC device has access to. Now I adapted the file names: For every Tvheadend channel name I used the following rules:
- only small letters
- leave out non-ASCII character like German umlauts
- leave out any punctuation marks like a points, dashes or commas
- leave out brackets and slashes
- leave out blanks
- an ampersand & is an “and”
Examples:
WDR Köln HD will be the logo file wdrklnhd.png
1-2-3.TV HD will be 123tvhd.png
QVC Beauty & Style HD will be qvcbeautyandstylehd.png
At the Tvheadend web UI go to Configuration → General → Base and configure the fields
Channel icon path → file:///(path to your logo files)/%C.png (really three slashes)
Channel icon name scheme → Service name picons
At Configuration → Channel / EPG → Channels select all channels and do a Reset Icon followed by Save.
Btw. the AVM DVB-C gets its logos from the nonbrowsable (!!!) URLs
http://tv.avm.de/tvapp/logos/
http://tv.avm.de/tvapp/logos/hd/
http://tv.avm.de/tvapp/logos/radio/
The user @Chillbo found another browsable (!!!) AVM-link which contains SD- and HD channel icons but unfortunately no radio channels:
https://download.avm.de/tv/logos/
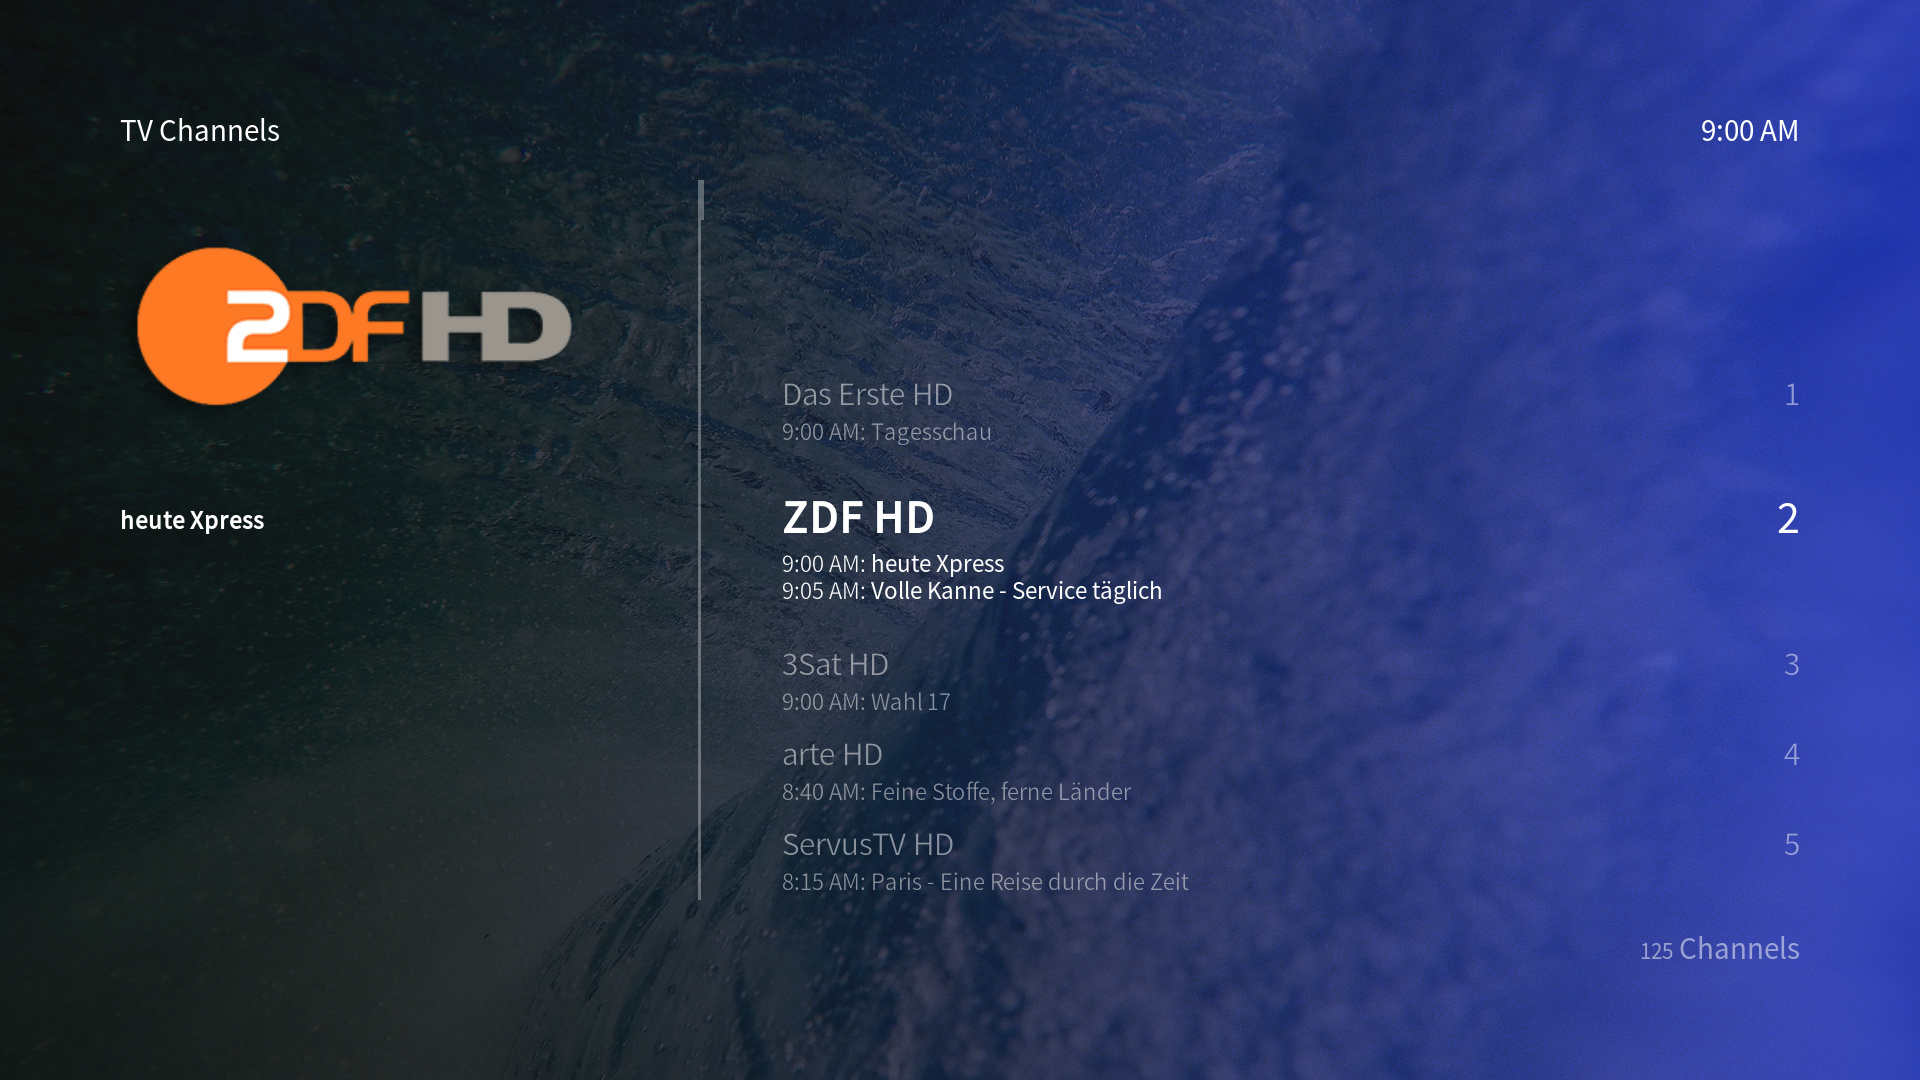
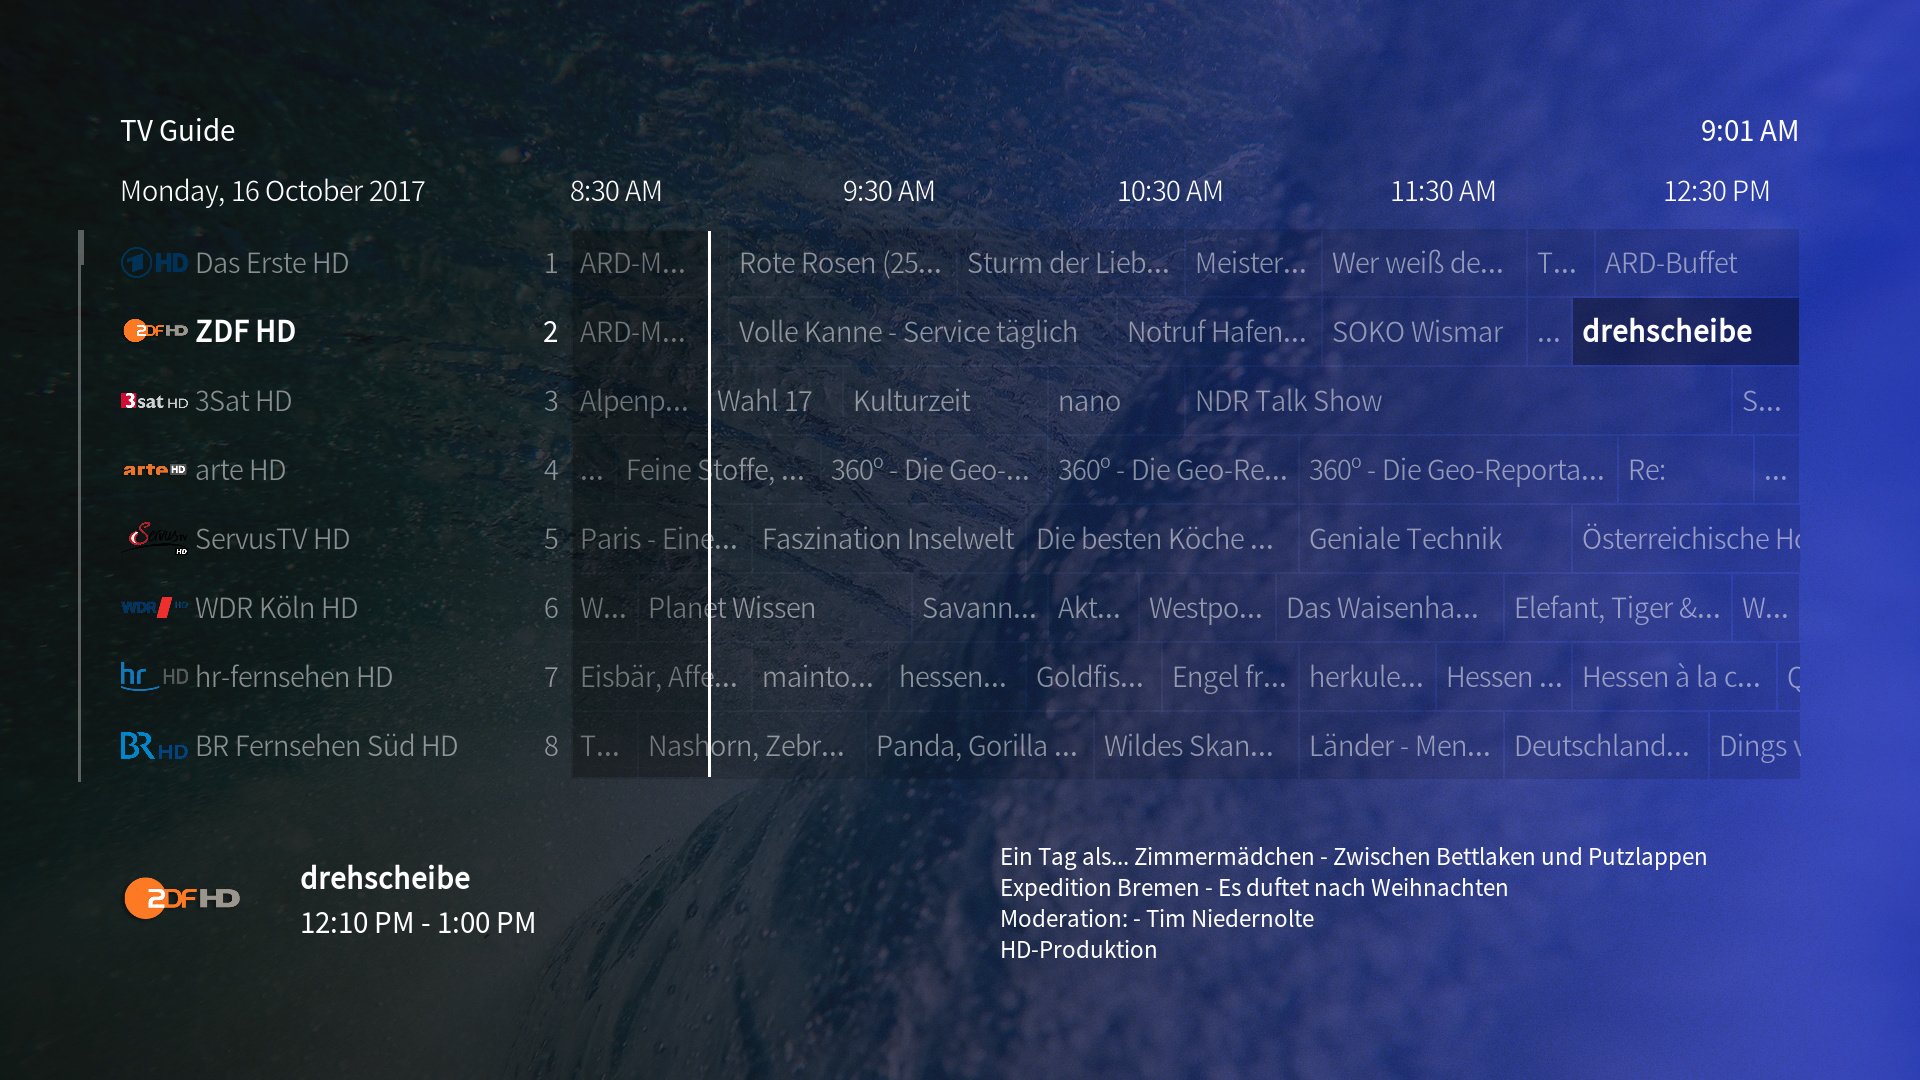
Here some example screenshots how nice the OSMC default skin looks like if using channel logos:

- If you do not want to be forced every time to login to the Tvheadend web UI by user name and password, you can create a new user with the name * (just the asterix) at Configuration → Users → Access Entries and give it all rights/flags in the fields
Change parameters:
Streaming:
Video recorder:
But be warned this is a security problem if someone could reach this web UI from outside of our intranet!


