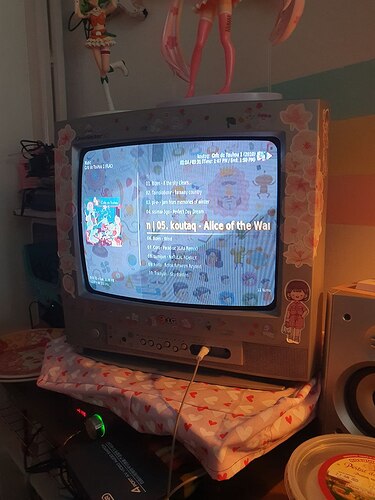
HowTo Raspberry Pi Help and Support
I’ve just discovered how to solve the very annoying issue regarding the black screen after the boot splash screen!
I spent 3 days trying to solve this, trying almost every single suggestion in the OSMC and LibreELEC forums and that’s how I was able to do it:
- Download the latest release of OSMC on your PC
The
2023.12-1release does not work with this method!
You only need to do this step if you only have a composite TV to work with. If you have an HDMI-capable screen, you can temporarily connect your Raspberry Pi to it for now! This is only so that you can see when the loading ends and avoid corruption if you remove the SD card before it finishes
- Flash it on an SD card and edit the following files:
config.txt
Add the following lines:
display_auto_detect=1
dtoverlay=vc4-kms-v3d,cma-384,composite=1
cmdline.txt
Add a space and add this line right after the code that’s already in there (DO NOT ADD AN ADDITIONAL LINE WITH ENTER! When I did this, it stopped working for me):
For NTSC
video=Composite-1:720x480@60ie
For PAL
video=Composite-1:720x576@50ie
- After that’s all done, insert the SD card into your Raspberry Pi and you’ll see the OSMC loading screen. Wait until it’s all done!
- Now that the loading is complete the Raspberry Pi will reboot and you’ll get a black screen right after the splash screen, but don’t worry! We’ll fix it now.
- Now you can choose how you are going to access the files:
If you are temporarily using an HDMI display
You can choose between removing the SD card from the Raspberry Pi and inserting it into your PC or setting up SSH and remotely changing the files you need. If you chose the latter, you can follow the tutorials below to do it:
Accessing the command line - General - OSMC
Transferring and editing files - General - OSMC
If you are using a composite TV or monitor
Remove the SD card from the Raspberry Pi and insert it into your PC
- You’ll again have to change some files:
config-user.txt
Add the following lines:
display_auto_detect=1
dtoverlay=vc4-kms-v3d,cma-384,composite=1
dtoverlay=audio=on
dtparam=audio=on
cmdline.txt
The exact same changes as before! Add a space and add this line right after the code that’s already in there (DO NOT ADD AN ADDITIONAL LINE WITH ENTER! When I did this, it stopped working for me):
For NTSC
video=Composite-1:720x480@60ie
For PAL
video=Composite-1:720x576@50ie
- Insert the SD card back into the Raspberry Pi and presto! You should be getting a composite output!
Here are the links that helped me get this result:
- Stuck on splash screen after editing /flash/config.txt for composite output CRT
- Raspberry composite output
- Raspberry Pi Documentation
- Is Composite Video still supported in OSMC on Pi?
- Trying to boot Pi 4 via composite - Stuck on splash - #14 by hearnia_2k
- RPi3a+ new install boots to sad face
- RPi2 composite failure
- [Testing] Raspberry Pi 3 USB stopped working after composite devel upgrade
- No audio device present but hdmi video snd_bcm2835
- No 3.5mm analogue audio output option, since latest update, Pi 3B
I hope I was able to help ![]() English is not my first language so please correct me if I said something wrong here
English is not my first language so please correct me if I said something wrong here
This tutorial has been updated so things don’t break after a new release! you can see the old tutorial on the edit history on top of the post
