This tutorial is to help those who are using Samba (also known as CIFS, SMB or Windows Networking). It assumes that you already are sharing media files on a Windows Server or Desktop.
Why use /etc/fstab instead of Kodi’s built in SMB client? The Kodi client in current versions (17.x and older) is slow. Using /etc/fstab is faster, and not really that hard to setup.
EDIT: 11/1/2019
While improvements were made in Kodi 18.x, using fstab will still be faster.
Preparation:
You will need to know the following information
- The IP address of the system where your media files are shared from.
- For this tutorial, we will be using the IP of 192.168.1.2
- Username and password used to access those shares.
- We will be using my_username and my_password
- NEW 04/29/2020: Create a credentials file
- The name of the share you will mount
- We will be using Movies
- What you would like the share to be named on OSMC?
- We will be using Server_Movies
- This can be the same name as the share, so Movies is OK also. Use any name here you’d like.
- Does the share name contains spaces?
- Replace spaces with \040. So My Movies would be My\040Movies.
Once you know that information, log into your OSMC system: Accessing the command line - General - OSMC
New 04/2020
Previously we had you putting your username/pw in the fstab. For better security, we recommend instead that you use a credentials file. Creating the file is simple:
$ sudo nano ~/.credentials
and add these two lines:
username=<my_username>
password=<my_password>
If you have more than one server and want to use credentials files, you can name them anyway you like. Personally if I had 2 servers I’d use the names: .credentials-server1 and .credentials-server2
Edit your /etc/fstab file:
$ sudo nano /etc/fstab
Go to the end of the file (use the down arrow key) and add this line:
//192.168.1.2/Movies /mnt/Server_Movies cifs x-systemd.automount,noauto,rw,iocharset=utf8,credentials=/home/osmc/.credentials,uid=osmc,gid=osmc,file_mode=0770,dir_mode=0770 0 0
Sometimes (depending on your server) you need to include a SMB version to the fstab entry:
//192.168.1.2/Movies /mnt/Server_Movies cifs x-systemd.automount,noauto,rw,iocharset=utf8,credentials=/home/osmc/.credentials,uid=osmc,gid=osmc,file_mode=0770,dir_mode=0770,vers=3.0 0 0
or if you prefer to not use a credentials file:
//192.168.1.2/Movies /mnt/Server_Movies cifs x-systemd.automount,noauto,rw,iocharset=utf8,username=my_username,password=my_password,uid=osmc,gid=osmc,file_mode=0770,dir_mode=0770 0 0
An example with spaces:
//192.168.1.2/TV\040Shows /mnt/TV\040Shows cifs x-systemd.automount,noauto,rw,iocharset=utf8,username=user\040with\040space,password=password\040with\040space,uid=osmc,gid=osmc,file_mode=0770,dir_mode=0770 0 0
If you have more than one share (like Music) to add, I’d recommend adding them after you get your first share working. Add them one at a time.
If your shares are setup as guest shares that do not require user/password you can use the guest option like this:
//192.168.1.2/Movies /mnt/Server_Movies cifs x-systemd.automount,noauto,rw,iocharset=utf8,guest,uid=osmc,gid=osmc,file_mode=0770,dir_mode=0770 0 0
New Information added 03/05/2018
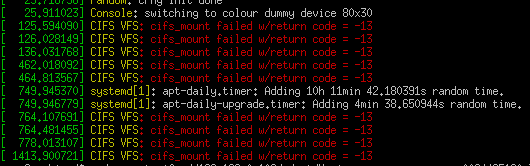
With the latest version of OSMC, you may get an error if using guest access. Some changes were made to make SMB more secure. If you see an error like:
No such device
when trying to mount, add vers=1.0 to your fstab:
//192.168.1.2/Movies /mnt/Server_Movies cifs x-systemd.automount,noauto,rw,iocharset=utf8,guest,uid=osmc,gid=osmc,file_mode=0770,dir_mode=0770,vers=1.0 0 0
New information added 7/23/2018
If your server is Windows 10, you probably will have to supply a SMB version, supported versions are 2.0, 2.1, 3.0 or 3.02, so in the above fstab line, replace the vers=1.0 with vers=3.0 (pick the version you want) If the version you chose does not work, try a different version.
Once done editing /etc/fstab, save the file and exit nano with CTRL-x YES
Now verify that there are no errors in your fstab file:
$ sudo mount -a
You should just get a new prompt back. If you get any errors looks again at your /etc/fstab for the errors.
Once you get a prompt with no errors, you will need to reload systemd:
$ sudo systemctl daemon-reload
$ sudo systemctl restart remote-fs.target
At this point, your shares should just work. To test, simply try to go to the share:
$ cd /mnt/Server_Movies
$ ls
Or if you used the TV Shows example (TV\040Shows):
$ cd /mnt/TV\ Shows
Notice the difference! In the fstab file, you use \040 for a space. On the command line, you just use a \ followed by a space.
and if all is well, you will see your files!
Now that you can see your files on the command line, it’s time to access them in Kodi. Add the source like normal, but when you select Browse do not select Add network location. Instead select Root filesystem and scroll down to /mnt. You should see the new shares and add it as a source.
If you do not see your files, try this:
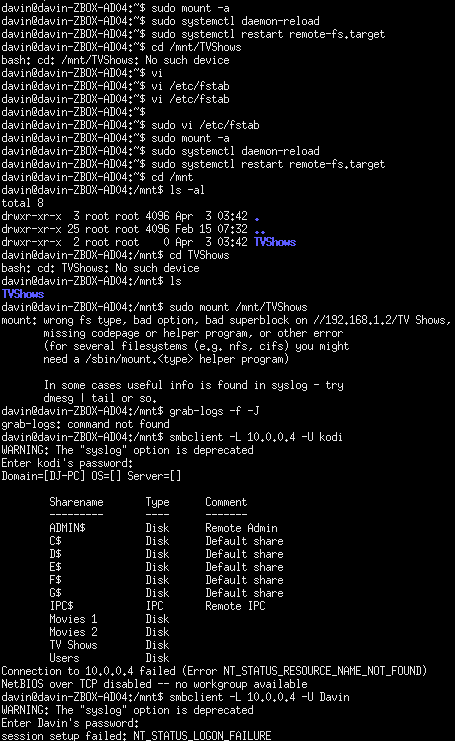
$ sudo mount /mnt/Server_Movies
If you see errors, post your logs to the forum:
grab-logs -f -J
Troubleshooting:
Easy way to make sure that you can actually talk to the Windows server is to install smbclient:
$ sudo apt-get install smbclient
$ smbclient -L 192.168.1.2 -U my_username
You should see the shares available on your server. It’s been reported that using the IP address in the smbclient command may not always work. If you get odd results, try the name of the server instead of the IP.